If more than one element is selected in the Editing Window, the properties of the selected element can be changed in the Properties Window on the right.
< Automatically Construct Layout >
Automatically layout components. You can layout each [Whole], [Left/Right 1/2], [Left/Right 1/3], [Top/Bottom 1/2], [Top/Bottom 1/3], and change the layout by clicking a button multiple times.
Adjust the opacity/border, etc., of the selected component or its position within the slide.
Select element > In the right Properties Window, [Shape and Position] > Change transparency
Change the opacity of the component. Generally, you can insert a transparent PNG file and change its opacity.
Add a border to a specific component. You can change the thickness and color of the border.
In blend mode, you can mix several overlapping components to create various visual effects.
Applies a flip effect to the inserted images or video clips.
Manually change the start and end intervals of the video clip. Generally, if the video is a background element that continues to show irrelevant content, there is no need to edit the playback interval.
However, if the video involves a speaker, you may need to adjust the intervals to match the subtitles, so editing the playback interval is essential.
We'll provide detailed instructions on how to change the video playback interval. Ah, changing the playback interval of the video and the uploaded voice file can be done in the same way!
Select the video inserted on the slide and click on the right side to adjust the playback interval.
Double-click or press s on the part you want to trim while previewing. A new slide is added with the trimmed area.
Or after specifying several intervals to use with mouse drag, finish to add new slides for each set interval.

You can edit the video playback interval more conveniently using shortcut keys.
Shortcut Key|Role
--|--
`s`/`double-click`|Splits the slide at the mouse-positioned interval.
`+`|Expands the trim timeline.
`-`|Contracts the trim timeline.
`space`|Plays from the selected portion.
`j`|Moves the start point of the selected region forward by 0.1 seconds.
`k`|Moves the start point of the selected region backward by 0.1 seconds.
`l`|Moves the end point of the selected region forward by 0.1 seconds.
`;`|Moves the end point of the selected region backward by 0.1 seconds.
The video fills the specified container (red border) to match its size. (Some parts of the video may be cropped depending on the original size of the video; you can adjust the position or enlarge the video by double-clicking.)

< Adjust the internal display method by zooming in >
The video is displayed at the maximum size within the bounds of the specified container (red border).
Ignore the existing settings and change the container (red border) size to the original size of the video.
Change the size of the sound included in the clip. Through [Preview](/de/guide/edit/view/top/preview), you can appropriately adjust the volume of BGM, sound effects, or AI voices. If you change it to 0%, you can mute the sound.
Change the playback speed of the video clip to faster/slower. You can change the speed from 20% up to 500% compared to the original speed (100%).
Select the part of the video clip to repeat when the slide length is longer than the video clip length. The default setting is 'Infinite repeat', and you can toggle the button to set the number of repeats. If it's set to 'Repeat once', the video clip will stop at the last scene and continue to play the slide if there is remaining slide playback time.
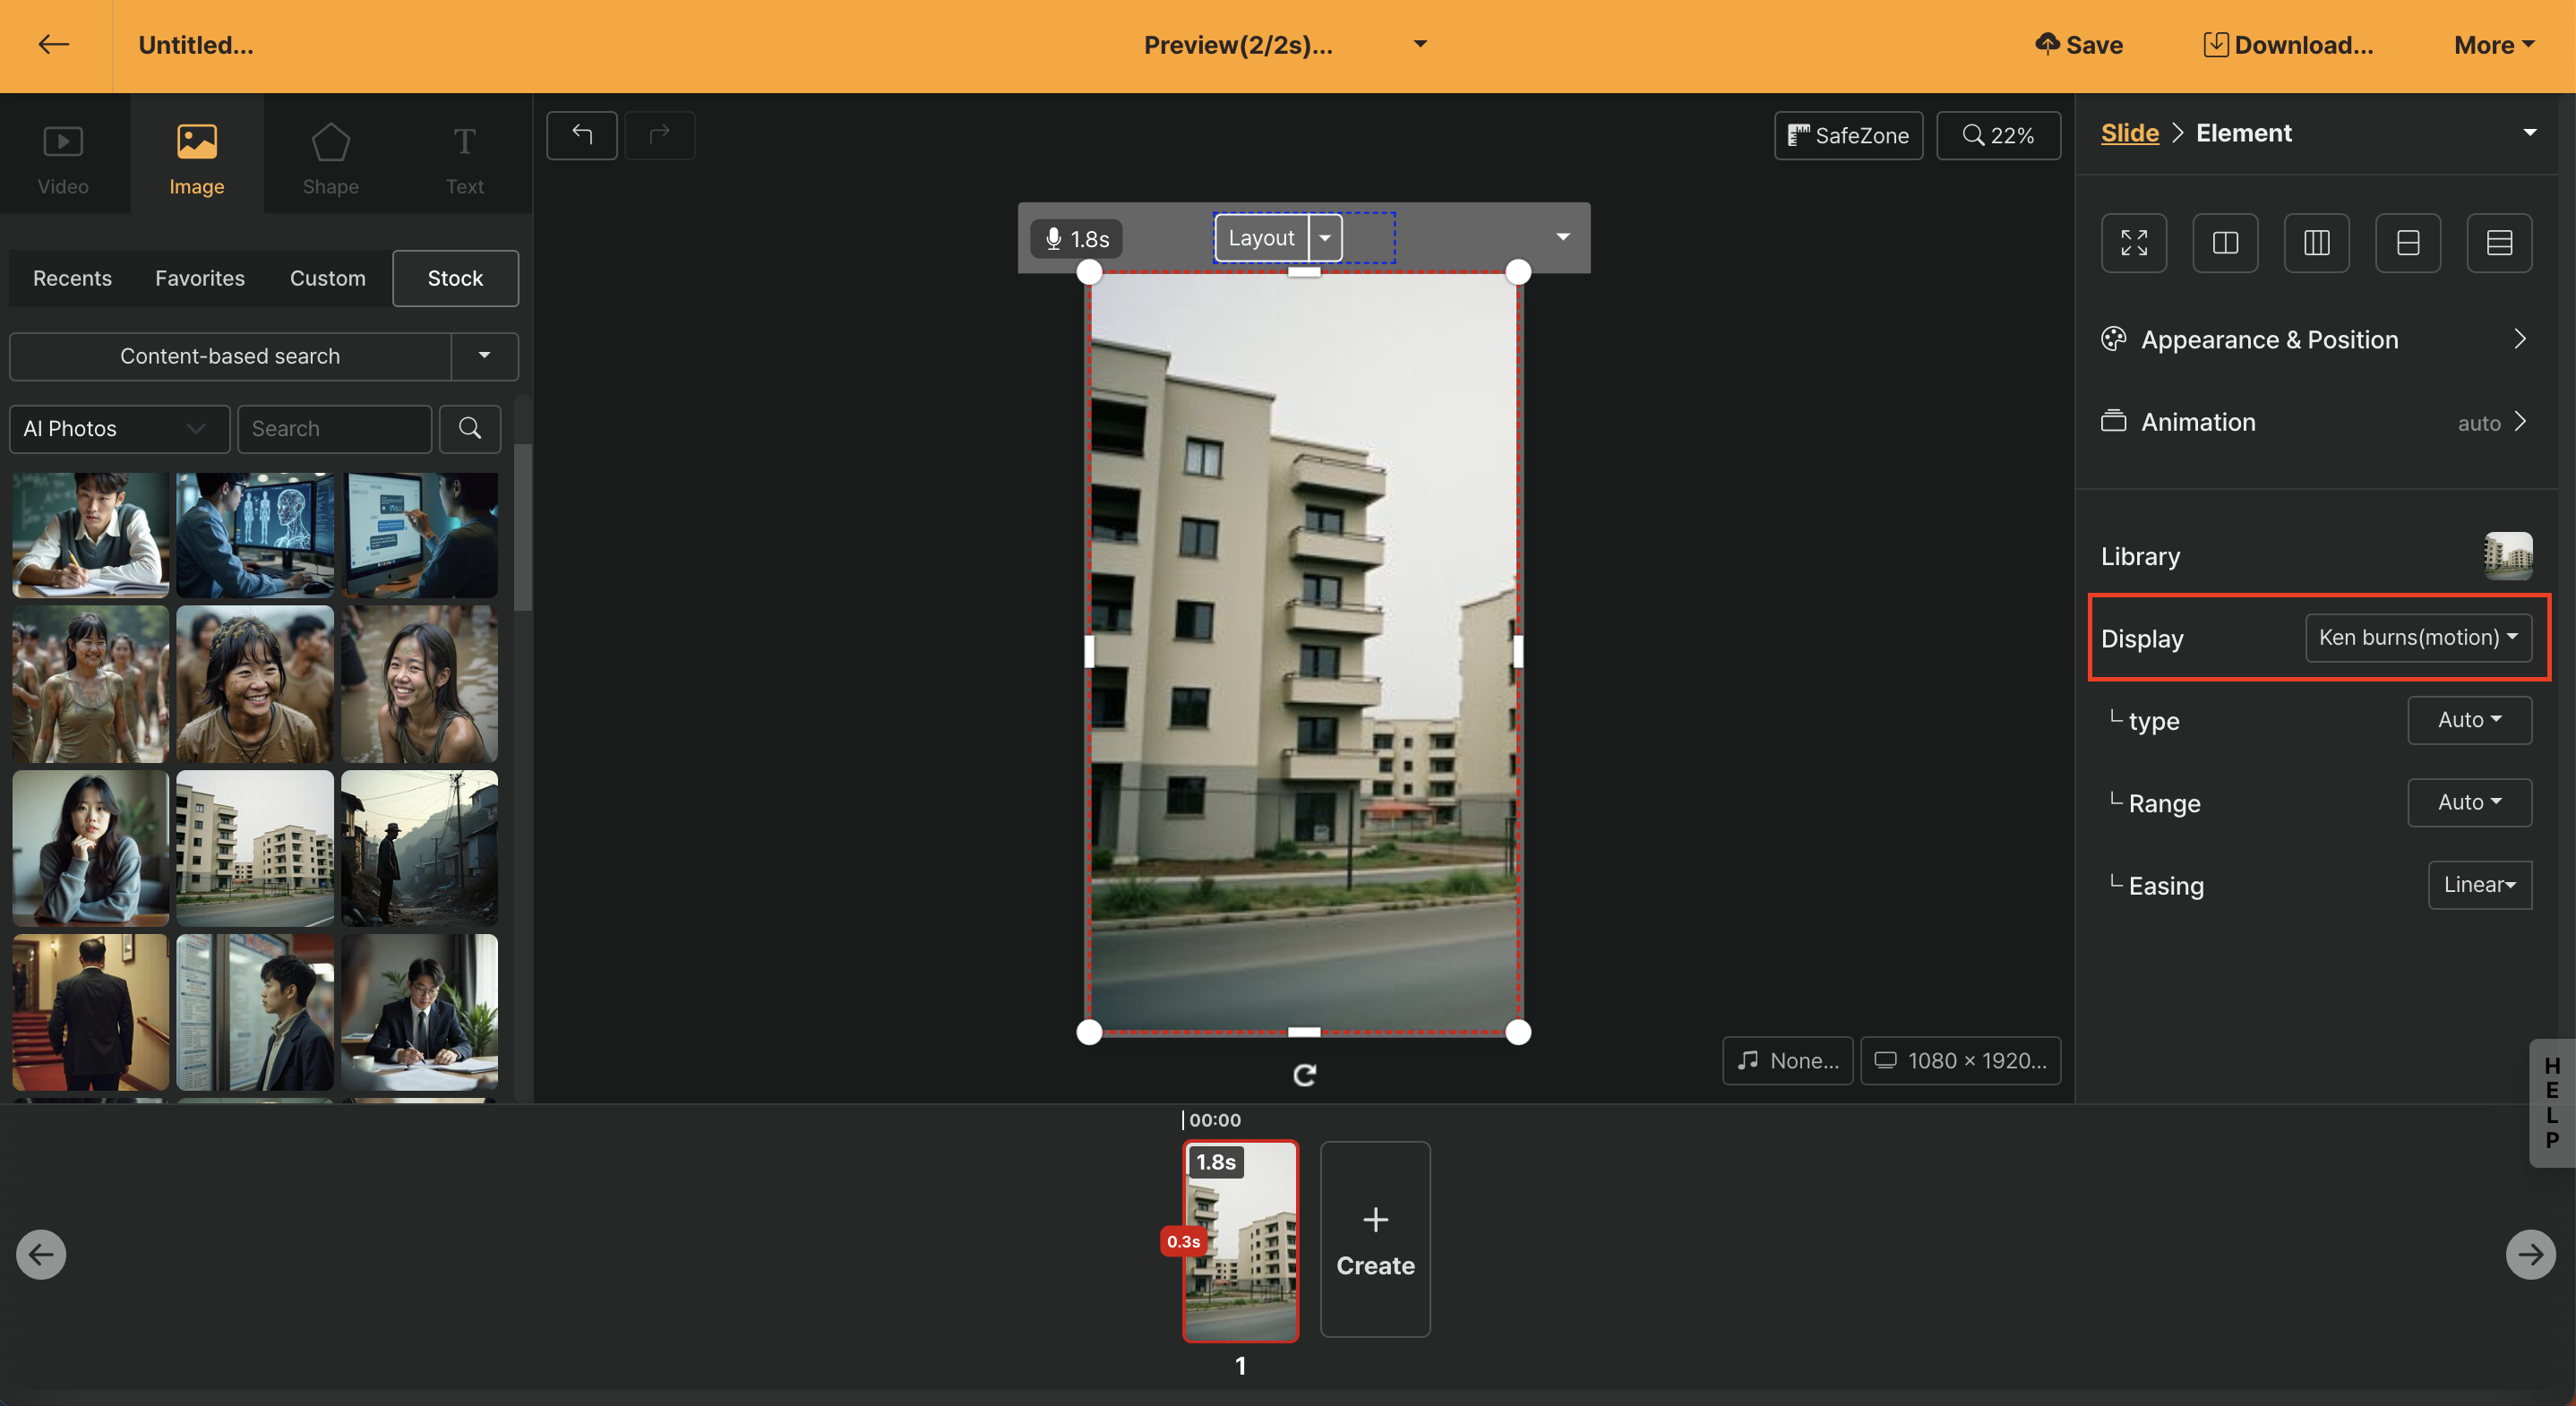
This feature allows you to automatically apply motion animation according to the characteristics of the image elements. The [Automatic] option is basic, and depending on the need, you can double-click the image to directly determine the effect of enlargement or movement, such as pan or zoom in/out.
Menu|Description
--|--
Automatic|Automatically applies appropriate Kenbun effects based on the image ratio or the extent to which the user has enlarged the image.
Expand|When you enlarge a certain area with the image expansion function, the specified area is expanded as the slide is regenerated.
Shrink|When you enlarge a certain area with the image expansion function, an animation that shrinks a certain part according to the moving range is created.
To the left|Applies a panning effect that slowly moves the image to the left.
To the right|Applies a panning effect that slowly moves the image to the right.
Upward|Applies a panning effect that slowly moves the image upward.
Downward|Applies a panning effect that slowly moves the image downward.
The [Automatic] option is the default and you can finely adjust the moving range.
This menu allows you to fine-tune animations when images are panned or enlarged/shrunk. You can specify movements separately from the overall project-applied [Ease (movement effect)]. In the case of Kenbun effects, the default setting `linear` works best.
The fixed image is gradually enlarged, filling the set size. (Some areas may be cropped depending on the original size of the image.)
The image is displayed to fill the specified container (red outline). (Some areas may be cropped depending on the original size of the image, and you can adjust the position or enlarge the image by double-clicking it.)
The original size of the image is adjusted to fit the specified container (red outline).
Ignore the existing settings and change the container (red outline) size to the original size of the image.
You can change the color of the inserted shape. You can also add a different color by pressing the "+" button and specify the gradient effect.
When you double-click on a text element in the [Editing Window](/de/guide/edit/view/stage) at the center, it switches to an editing mode where you can modify the content. When you select part of the text in this editing mode, a toolbar appears below, with each function as follows:

< When entering editing mode, a toolbar appears >
Button|Function
--|--
B|Applies bold effect to the selected text area.
*I*|Applies italics effect to the selected text area.
U|Adds an underline to the selected text area.
S|Add a cancellation line to the selected area of the text.
A|Changes the color of the selected text area. (Choose from default colors and recently used colors)
A|Changes the background color of the selected text area. (Choose from default colors and recently used colors)
*Tx*|Removes all applied effects.
< Change the color of some text characters >
You can set various animation effects for text elements. The duration that the applied animation takes to appear is as long as the [Transition Duration] on the slider. Therefore, if you want the animation to appear slowly, increase the [Transition Duration]. The functions that can be set in the text animation menu are as follows:
Specifies a repetitive motion for the text. The available repetition effects are as follows. Once an effect is set, a menu to set the "Stop Motion Effect" function appears.
Repetition Effect|Description
--|--
None|Removes all repetition effects
Wiggle|
Bounce|A bouncing effect
Shake|
Up and Down|
Left and Right|
Swing|
Clockwise|The element continues to rotate clockwise
Counterclockwise|The element continues to rotate counterclockwise
Sets various text animations. After setting, you can preview it directly through the [Preview](/de/guide/edit/view/top/preview) slide.
Animation|Description
--|--
Automatic|The default setting option applies a morphing effect
Sliding|An effect of sliding from the side
Expansion|An effect of expanding in one direction
Cube Rotation|An effect of rotating with a cube-like face
Flip|A flipping effect
Paging|
Page Turn|
Circle Appear|An effect of a circle gradually getting larger or smaller while appearing
Clock Appear|An effect of a circle filling up like a clock while appearing
Unfold|An effect of appearing bit by bit from one direction
Fade in Slowly|An effect of gradually appearing from a blurred state
Pop|An effect as if the element pops onto the screen or jumps out
Pop Spin|An effect as if the element spins and pops onto the screen or jumps out
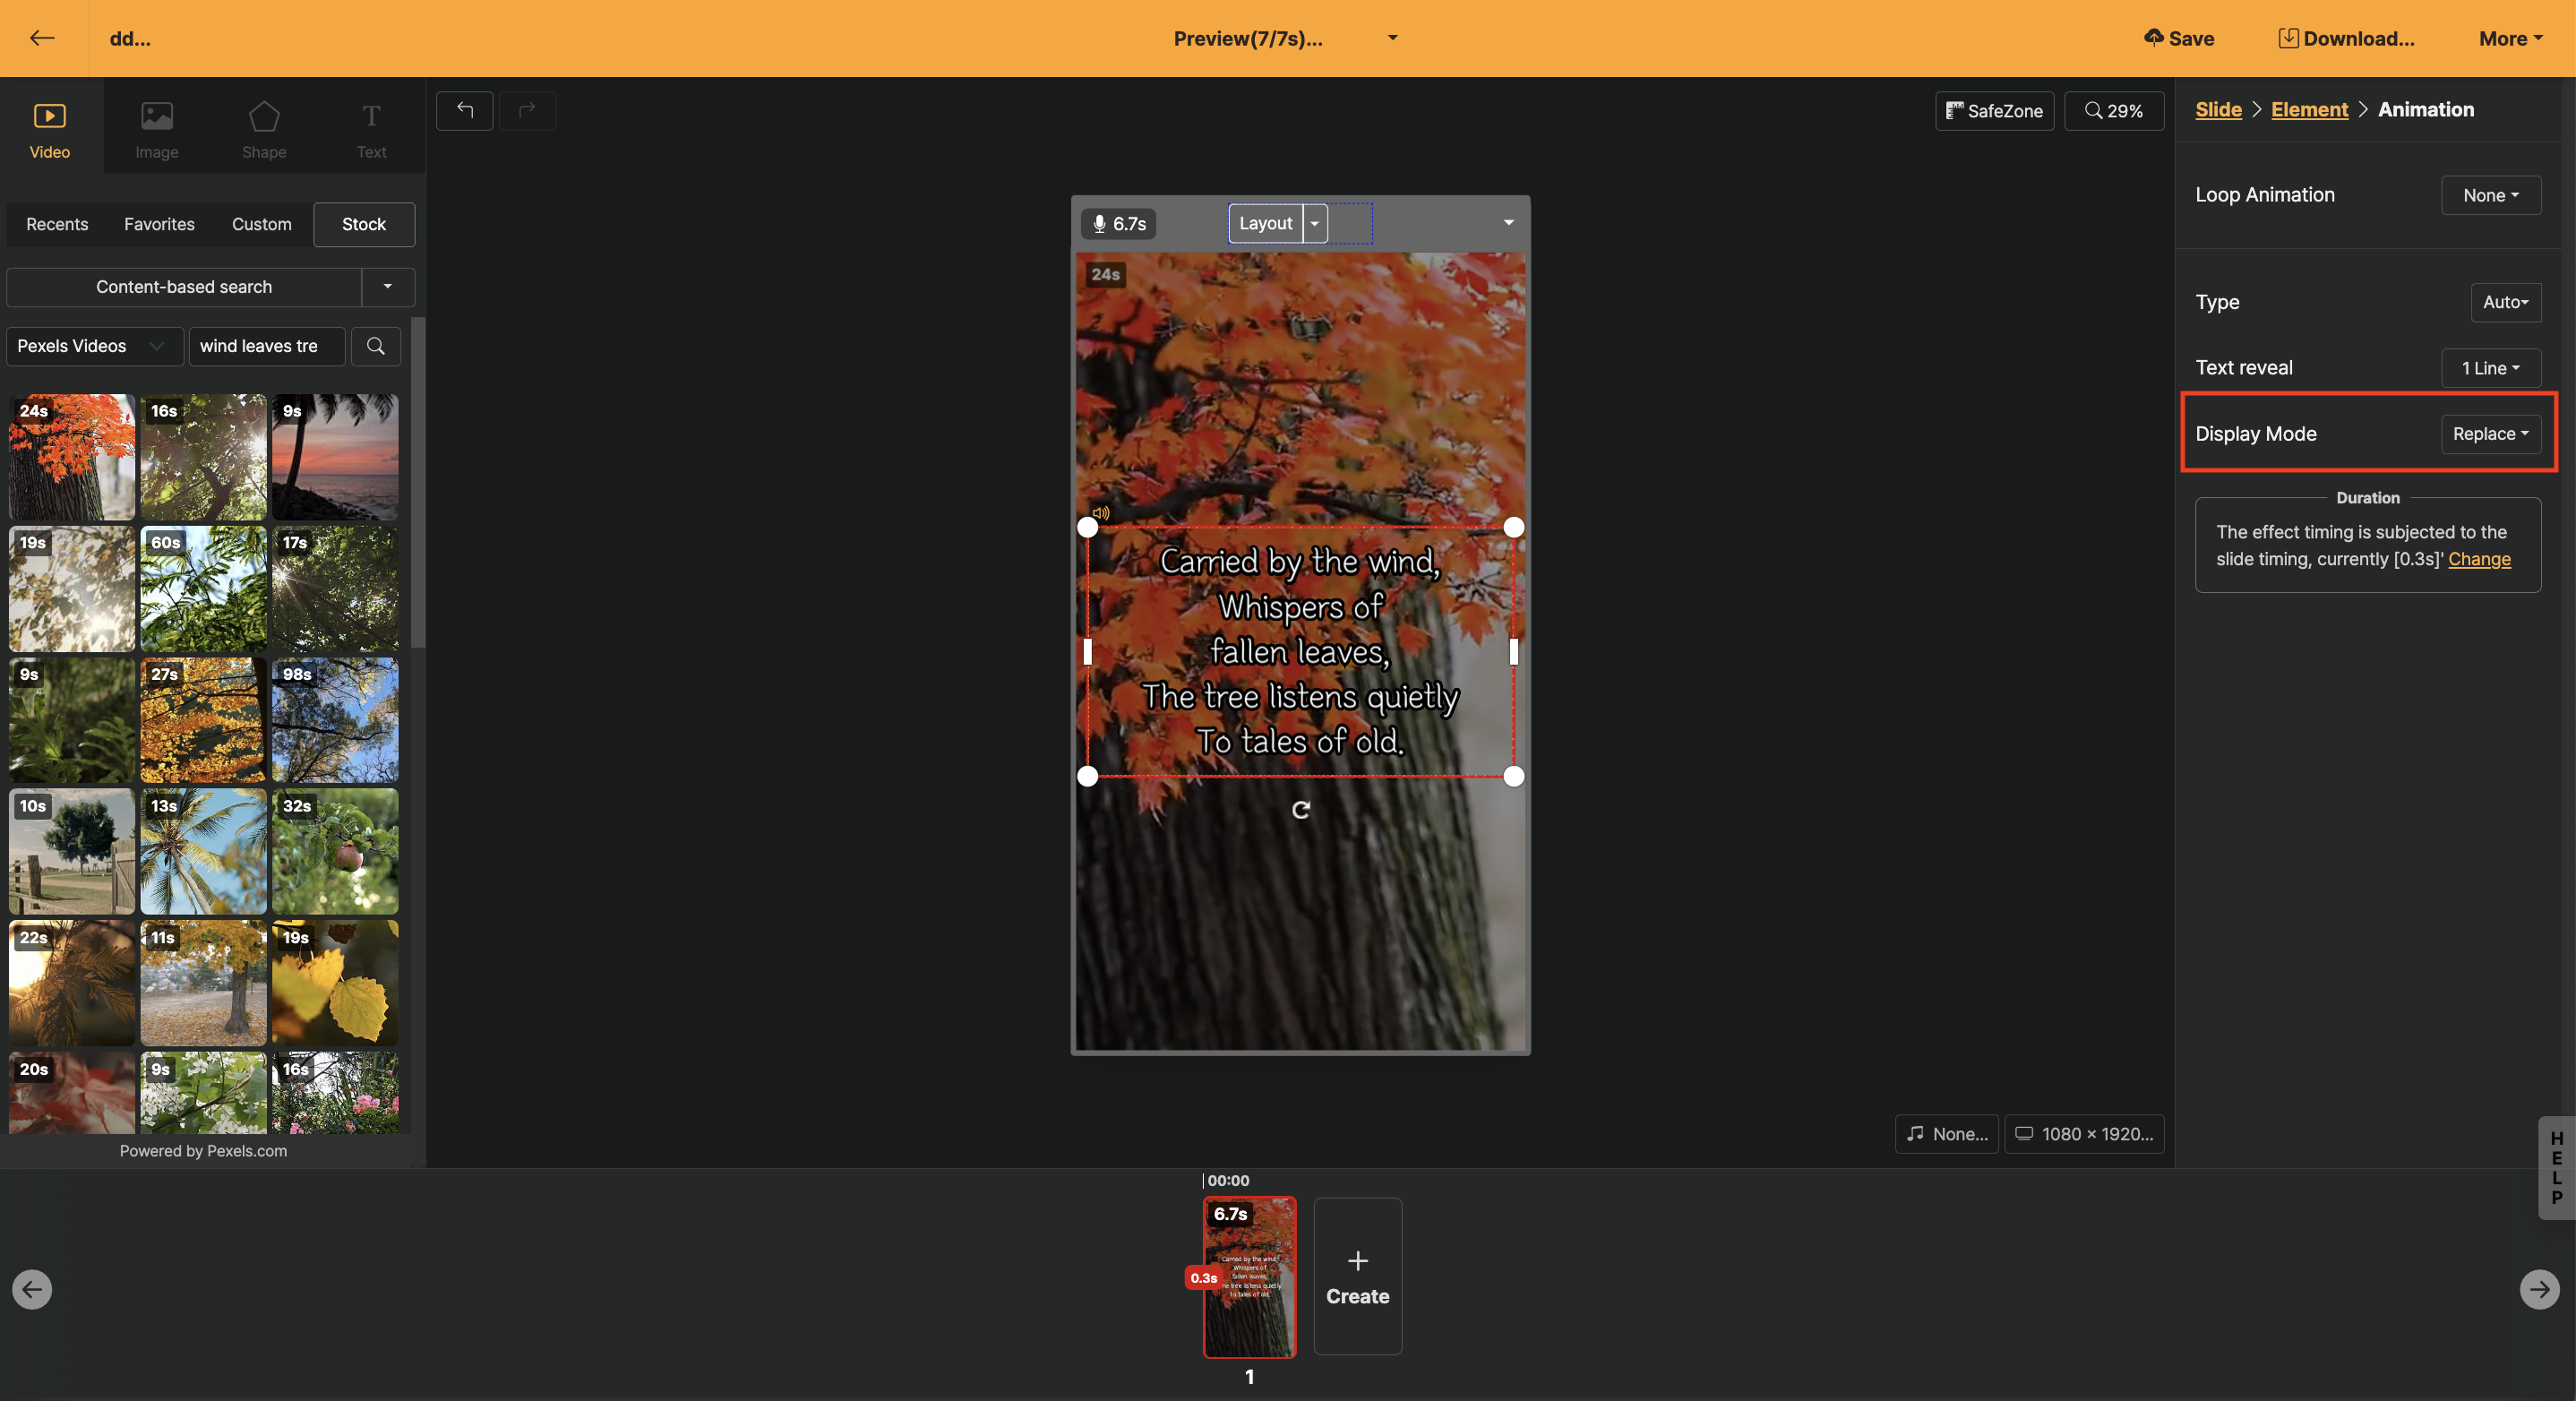
After selecting the text element, select 'Animation > Text appearance effect' to set the way texts in a slide are displayed.
In the editing screen, there are various types of texts in a slide, and it has the function to display them well.
Text Registration Effect|Description
--|--
Entire|One text block appears at once
Line by Line|Text appears line by line according to the line break within the text block
Two Lines at a Time|Text appears two lines at a time according to the number of lines in the text block
Paragraph unit|Visible separation of paragraphs (enter) within the text block
If you set options like "One line at a time" here, a "Additional Format" menu will appear. Please refer to the image below to see each option's format.

< Swap >
A new text appears with animation effects, continuing in one line (or two lines depending on the settings) at the same position.

< Attach >
More lines appear based on [Vertical Alignment], either one line at a time (or two lines at a time). [Vertical Alignment] is most naturally used when fixed "above".
If [AI Voice](/de/guide/edit/slide-property/narration/ai-voice) is applied to the slide narration, all the text on the screen will be read sequentially.
However, if there is a text you do not want to read, you can select the text element and then click "Read by AI Voice". Besides this method, if you want to read the text on the screen completely without ignoring it, please refer to [Automatic Text Specification].
Readability enhancement uses the 'text wrapping' feature to modify settings so that text on the screen is easier to read. You can apply effects such as "None", "Boxed", "Line by line", "Outline", and "Shadow", and please refer to the image below for each effect.
.png?_=1hvr7qu)
Additionally, the color of the box and outline can be changed in the "Readability color" menu.
! The "automatic slide separation" feature can be set in [Text Animation](/de/guide/edit/element-property/text/text-animation)'s [Text Appearance Effect].
Slide division can be set as "One line at a time", "Two lines at a time", [Paragraph unit], and when [Automatic Slide Division] is applied, it will be displayed as shown below.
< Preview of Automatic Slide Division application >
You can select the desired font family to change the font. The font library is organized into tabs such as "Recent", "Favorites", "User", and "Stock".
To change the font family of multiple slides at once, please refer to the content of the [Edit multiple slides at once](/de/guide/tips/multi-update) action.
Change the color of the entire text element. All colors of the text box will change, and you can combine up to three colors to create a gradient effect.

< Text Color Change >
To change the color of some text, you can drag the desired text and then use the inline editor feature that appears at the top. In the inline editor, you can select from the default colors or recently used colors. If you want a specific color, setting it as a background color once will display it in the recent colors.

< Change part of the text color >
Change the alignment of the text within the box to "Left", "Center", or "Right".
Change the font size from 10 px to 256 px. For vertical type scroll video content, we recommend using 80 px to 90 px.
Change the size of the left and bottom margins of the text box.
Change the line spacing when multiple lines of text are entered into a text box.
Change the spacing of the font size. It can be adjusted from -40% to 200%, with 0% being the default value.
You can change the alignment within the text box. Alignment can be set to "Left", "Center", or "Right".
Changes the vertical alignment inside the text box. The default option is "Auto", and you can set it to "Top", "Middle", or "Bottom".

Activating height fixation allows you to change the vertical size of the text box. This is useful when specifying a consistent box size across multiple slides.
Change the alignment of the text within the box to "Left", "Center", or "Right".
Activating height lock adds handlers to the top/bottom of the box, allowing you to change the height of the text box.
Generally, when using text boxes in auto mode, even if the text is one or two lines, you can maintain the same box size.