Guide
Go with the flow
It may be a simple video editing tool, but you need to know some basic information to use it, right? Then from now on, let's find out what each button on the screen does! That way, you won't have to read this guide any further, right?
So we have prepared tutorials that allow you to follow along easily and learn the functions. Even if you are familiar with traditional video editing tools such as Premiere, please follow the tutorial at least once. You will be able to fully appreciate the advantages that only Videostew offers.
You can also learn various usage methods from the online class provided by Videostew through VOD videos.
Online class: https://onlineclass.videostew.com
Follow the Wizard Mode
When you first learn computer programming, the very first thing you do is not computer theory or history, nor hardware. It starts with printing the letters "Hello World" on the screen.
< Coding starts with Hello World >
Through this, it's a simple feeling of 'I did something at least.' Let's start this way too. If you're not sure where to start with Starting Tutorial, please prepare by detaching this guide or viewing it alongside while editing in Videostew.
Add Project
First, assume you are on the home screen. Click the 'New Project' button at the top.
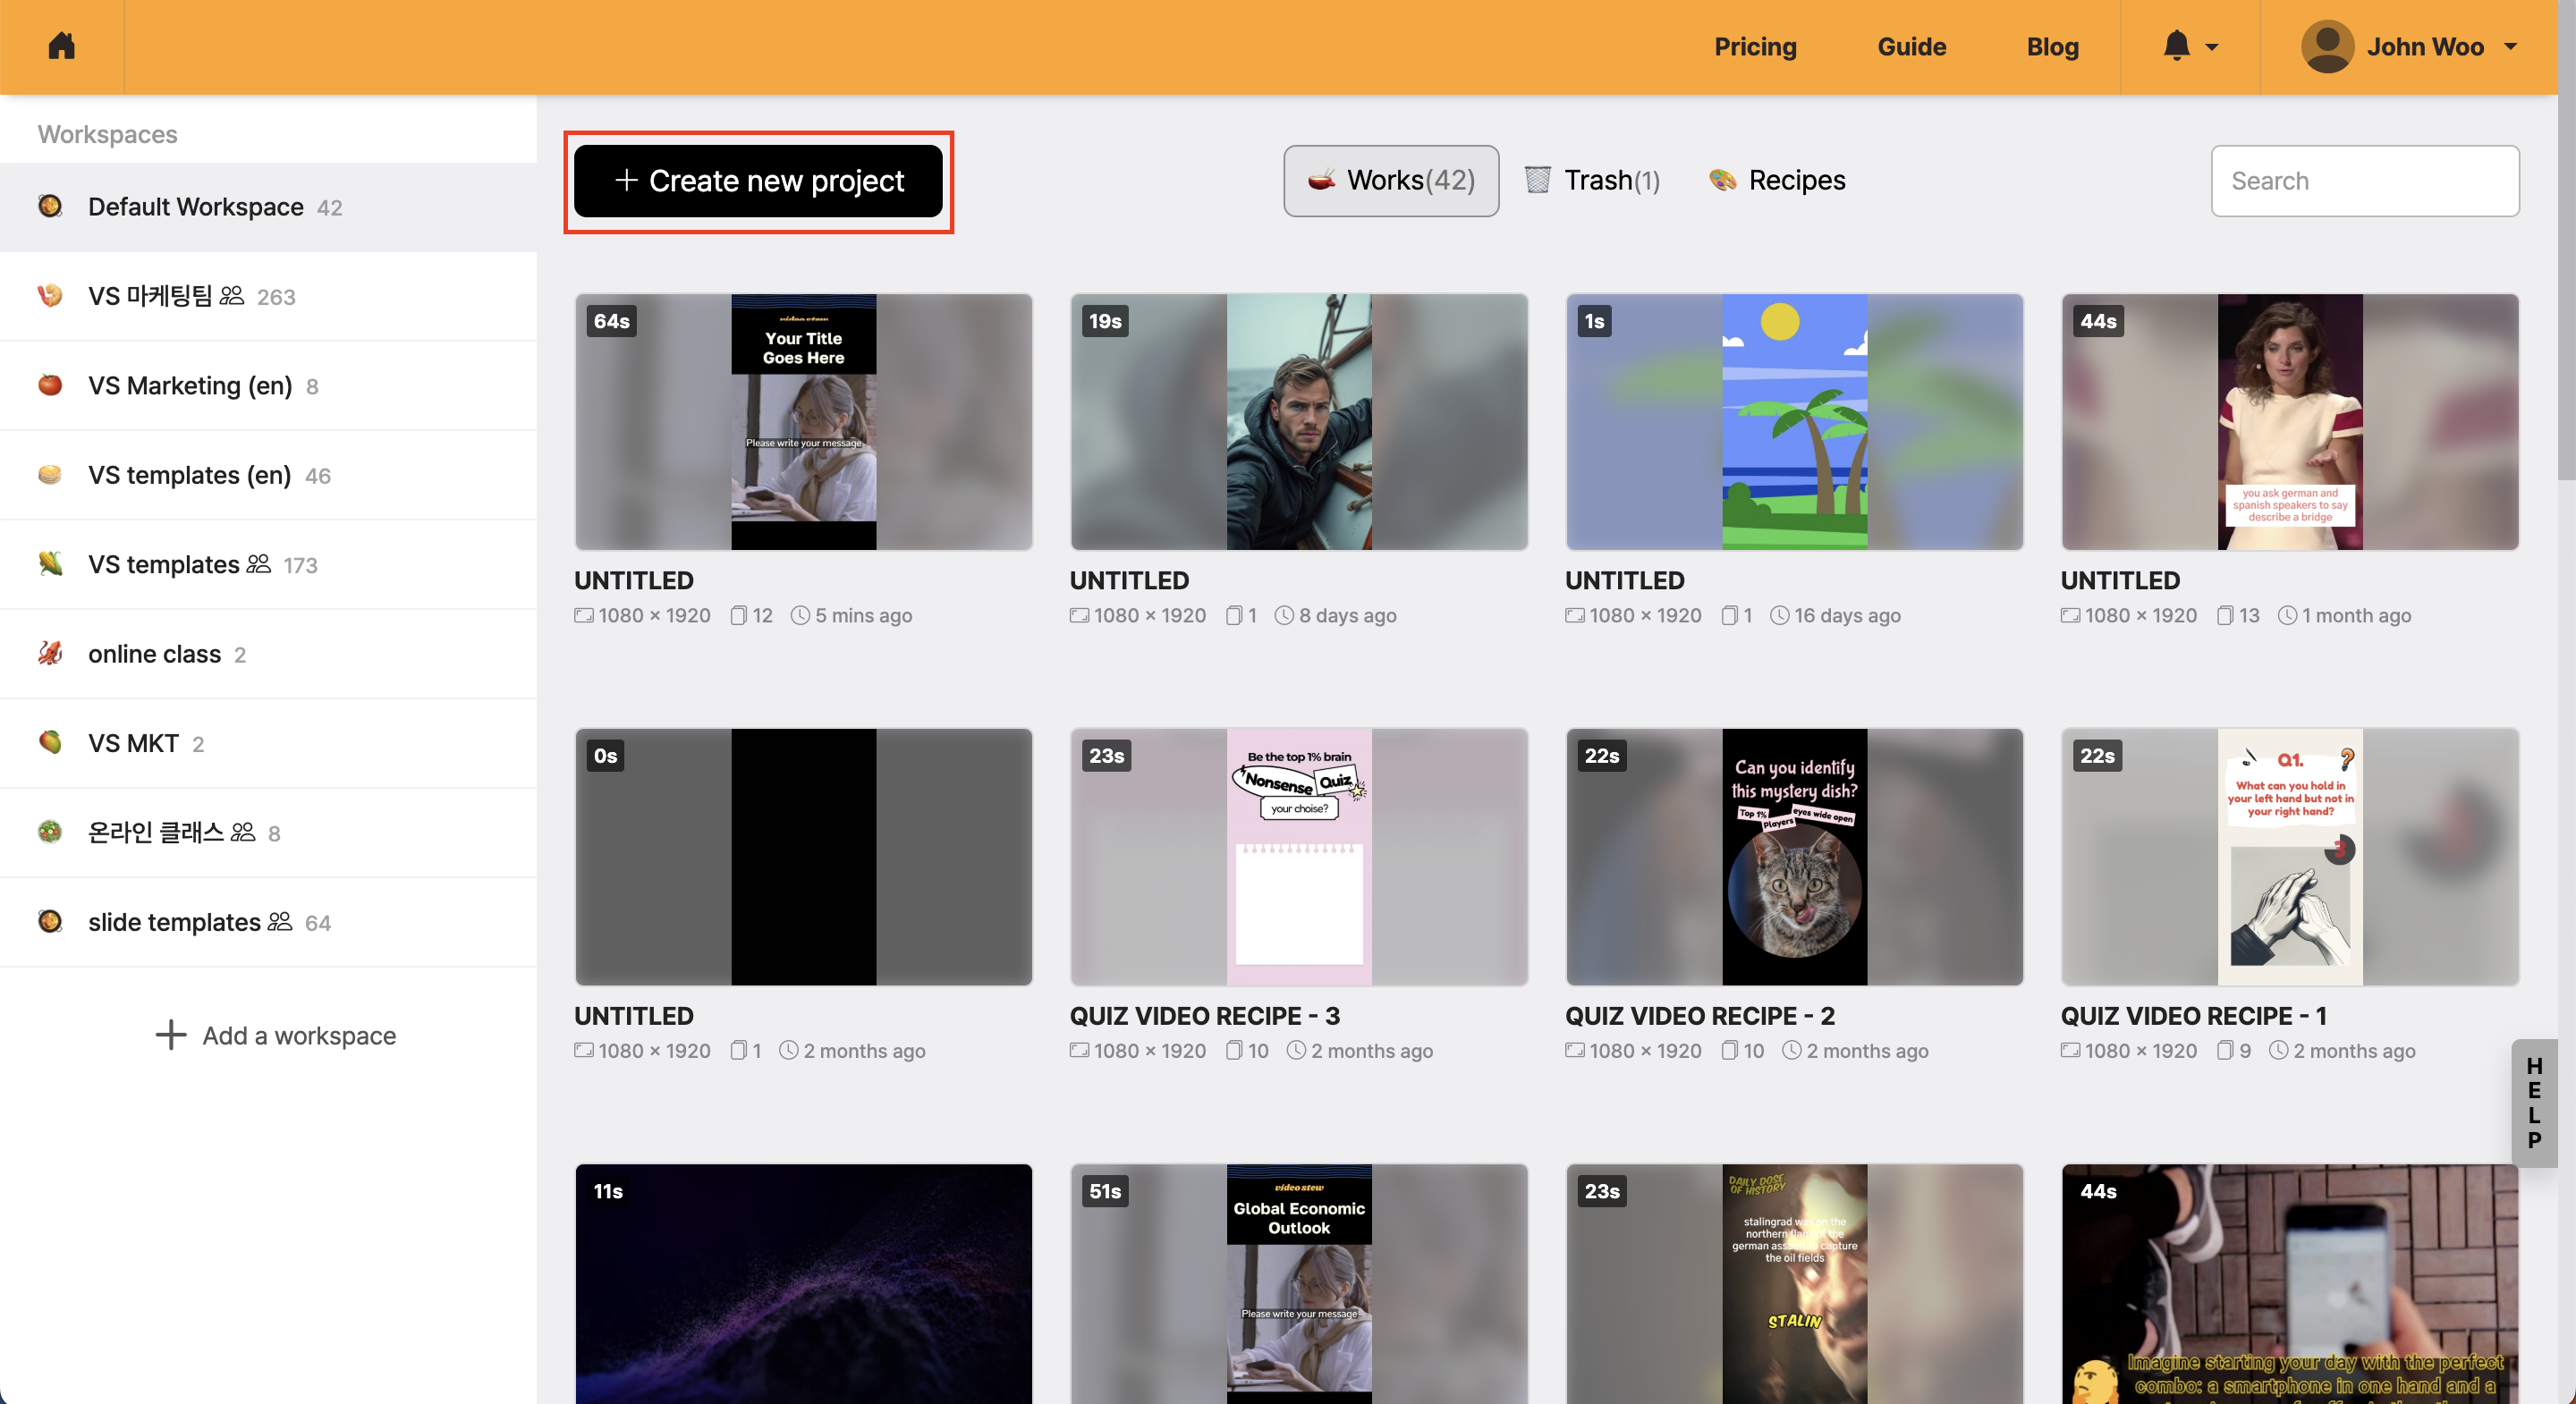
< Create New Project >
Start Wizard Mode
Then the wizard mode will appear automatically. When you add a new project, it will be displayed first. Set the title as "First Project", and then click the "Next" button.

In the next screen, you will adjust the aspect ratio of the video you are going to make. For now, select Short video and proceed to the next step.
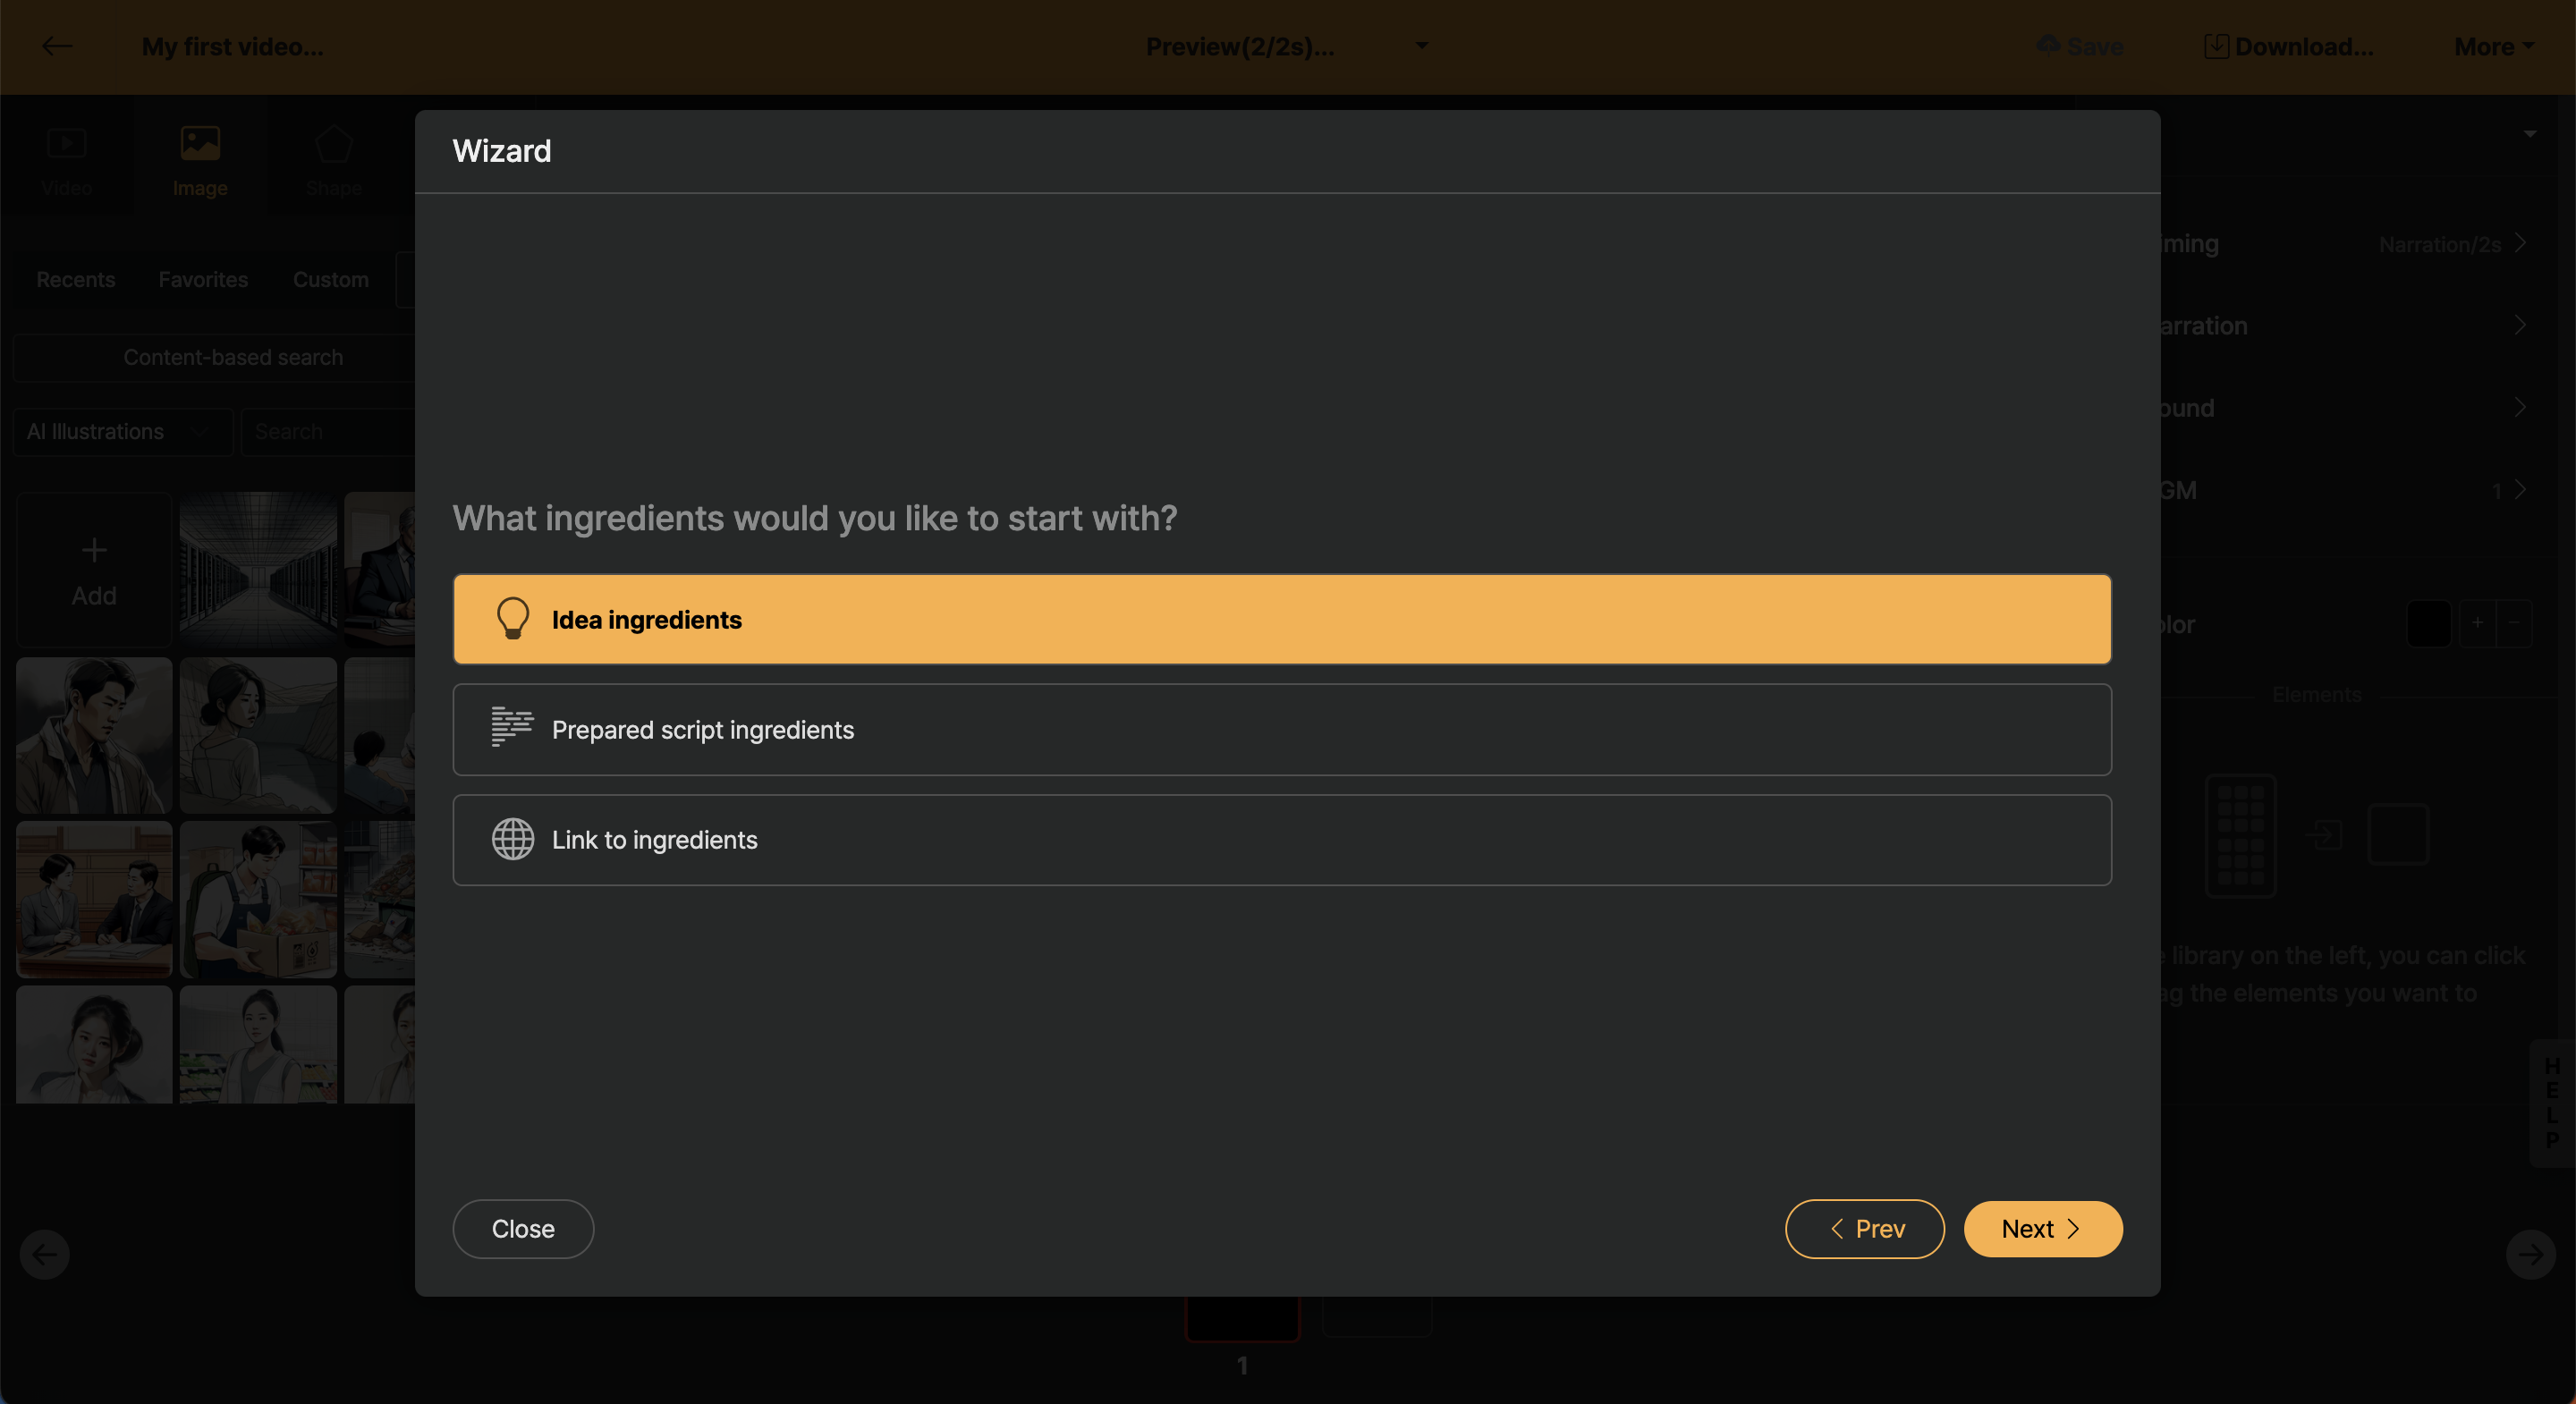
In the next screen, you will find various methods to start editing your video. Now, in the tutorial, select Idea Ingredients to create a script to be used in the video in one go.
Creating a Script
Now, let's create the script that will be used in the video. Set the style to Informational content and create information to refer to, as shown below.
What is well-being?
Definition
Daily tip for it
The script will be generated in each language according to the language entered here.
< Script is automatically generated in text editor >
If there is a part you want to edit additionally, you can edit it. For example, you can use the # key to set subtitles in the middle.
< Directly editing the script >
Select Template
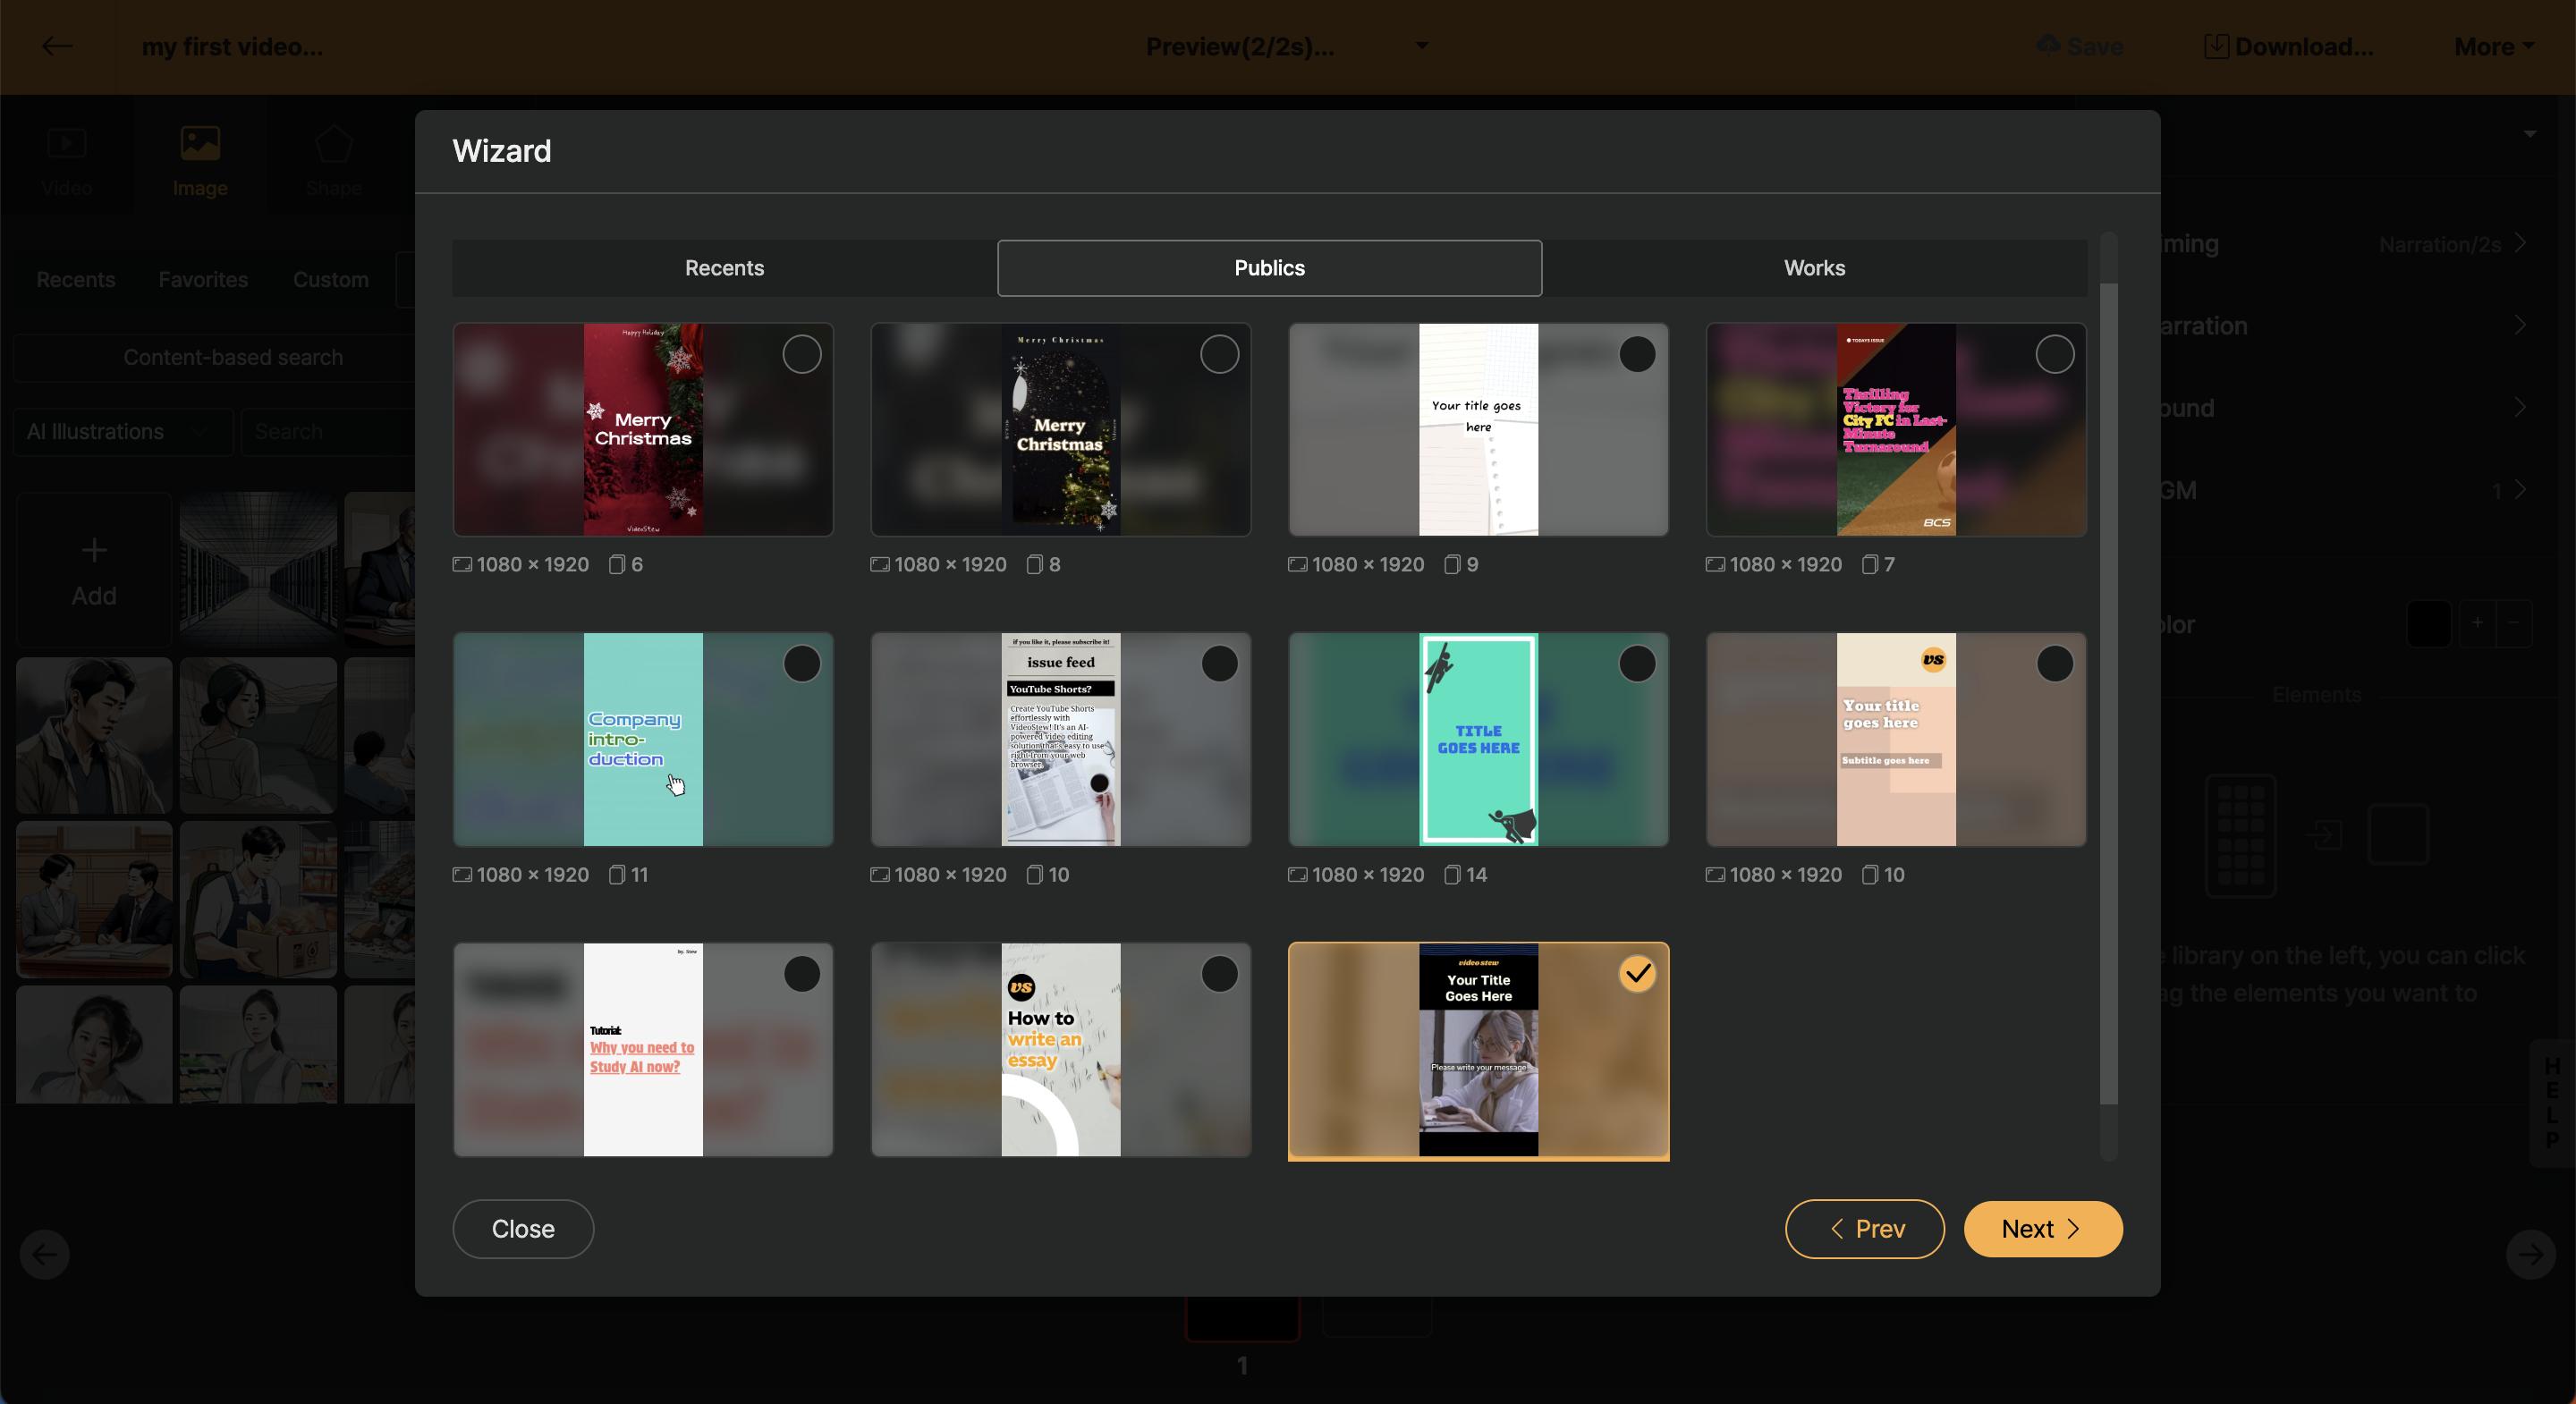
Now my script will be applied to the template, i.e., collage. If the mouse is hovered over, you can check the feeling through the preview.
Mouse Settings
On the final screen, you can briefly review the unique features of the applied template. Here you can configure details such as background music, AI voice, stock library auto-matching, or AI image generation.
Since all of these can also be edited, please make sure to press Done here.
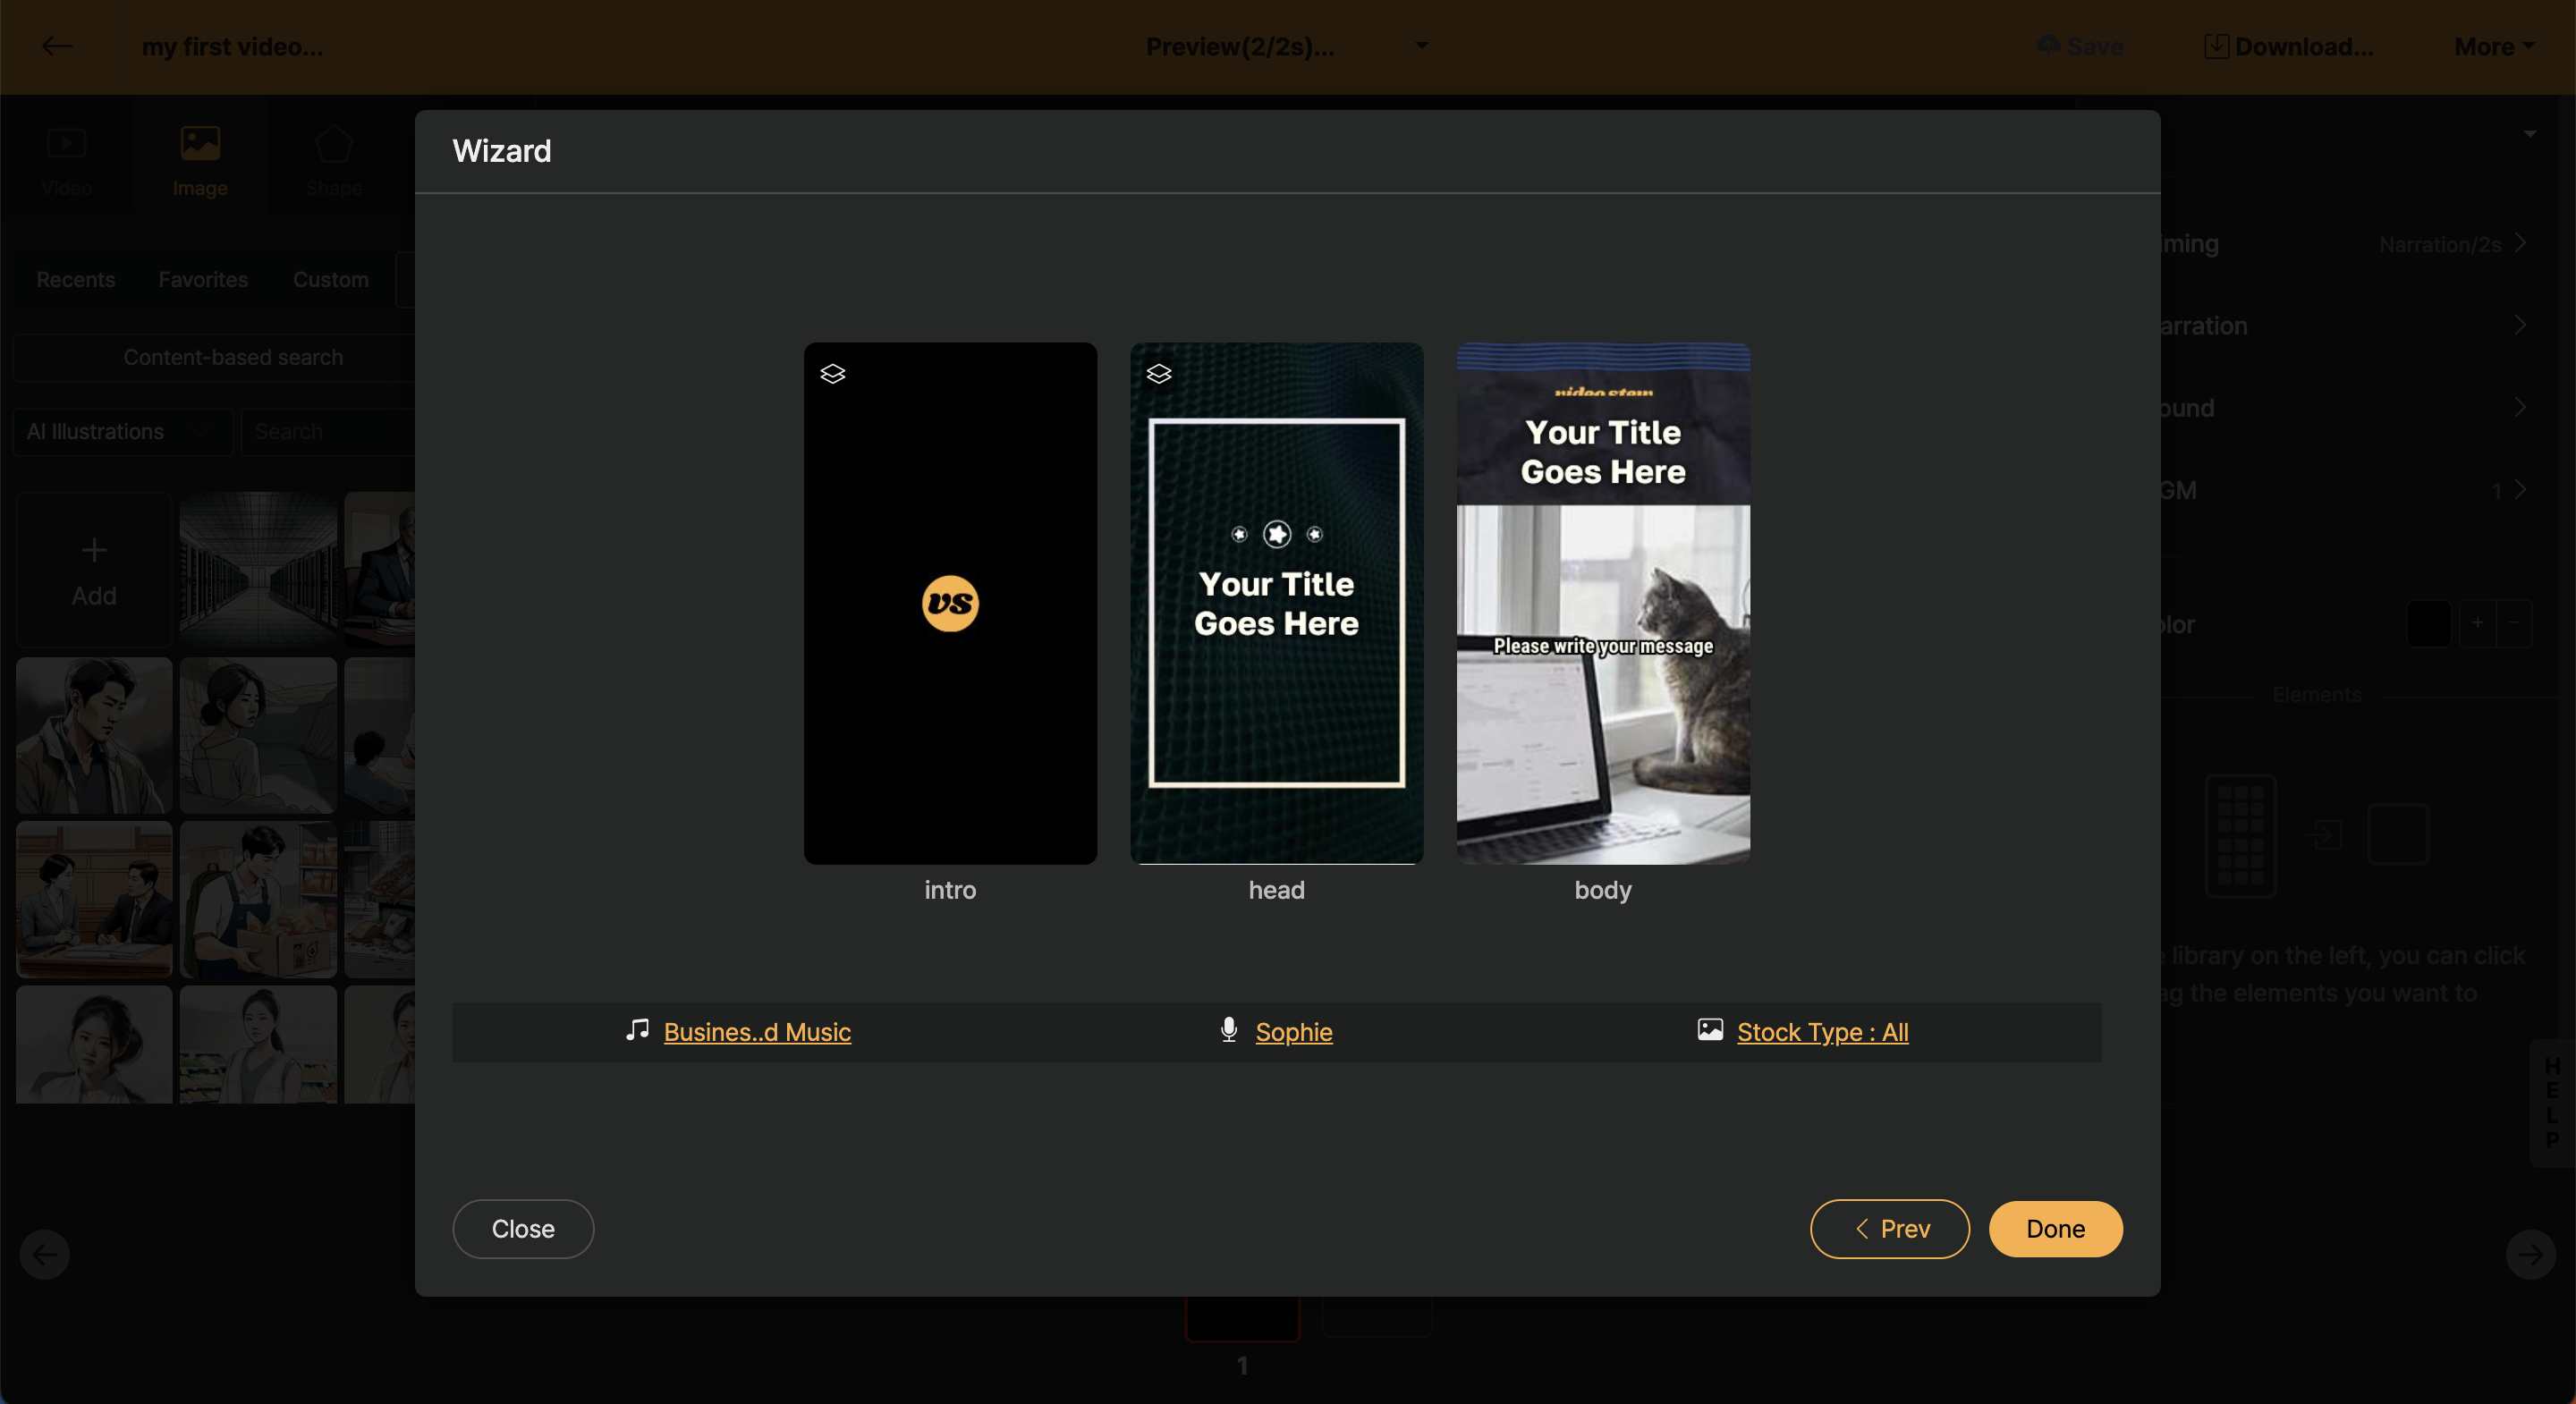
< 위자드 모드 마무리 설정 >
Create Project Draft
Now, based on the input content and selected template, a video draft will be generated.
< Video draft is generated automatically >
Preview the Entire Video
Now you've come to the stage where you can edit without any worries. Shall we try previewing the entire project without touching anything? You can preview the entire project through the dropdown (▼) icon next to the top center Preview button.
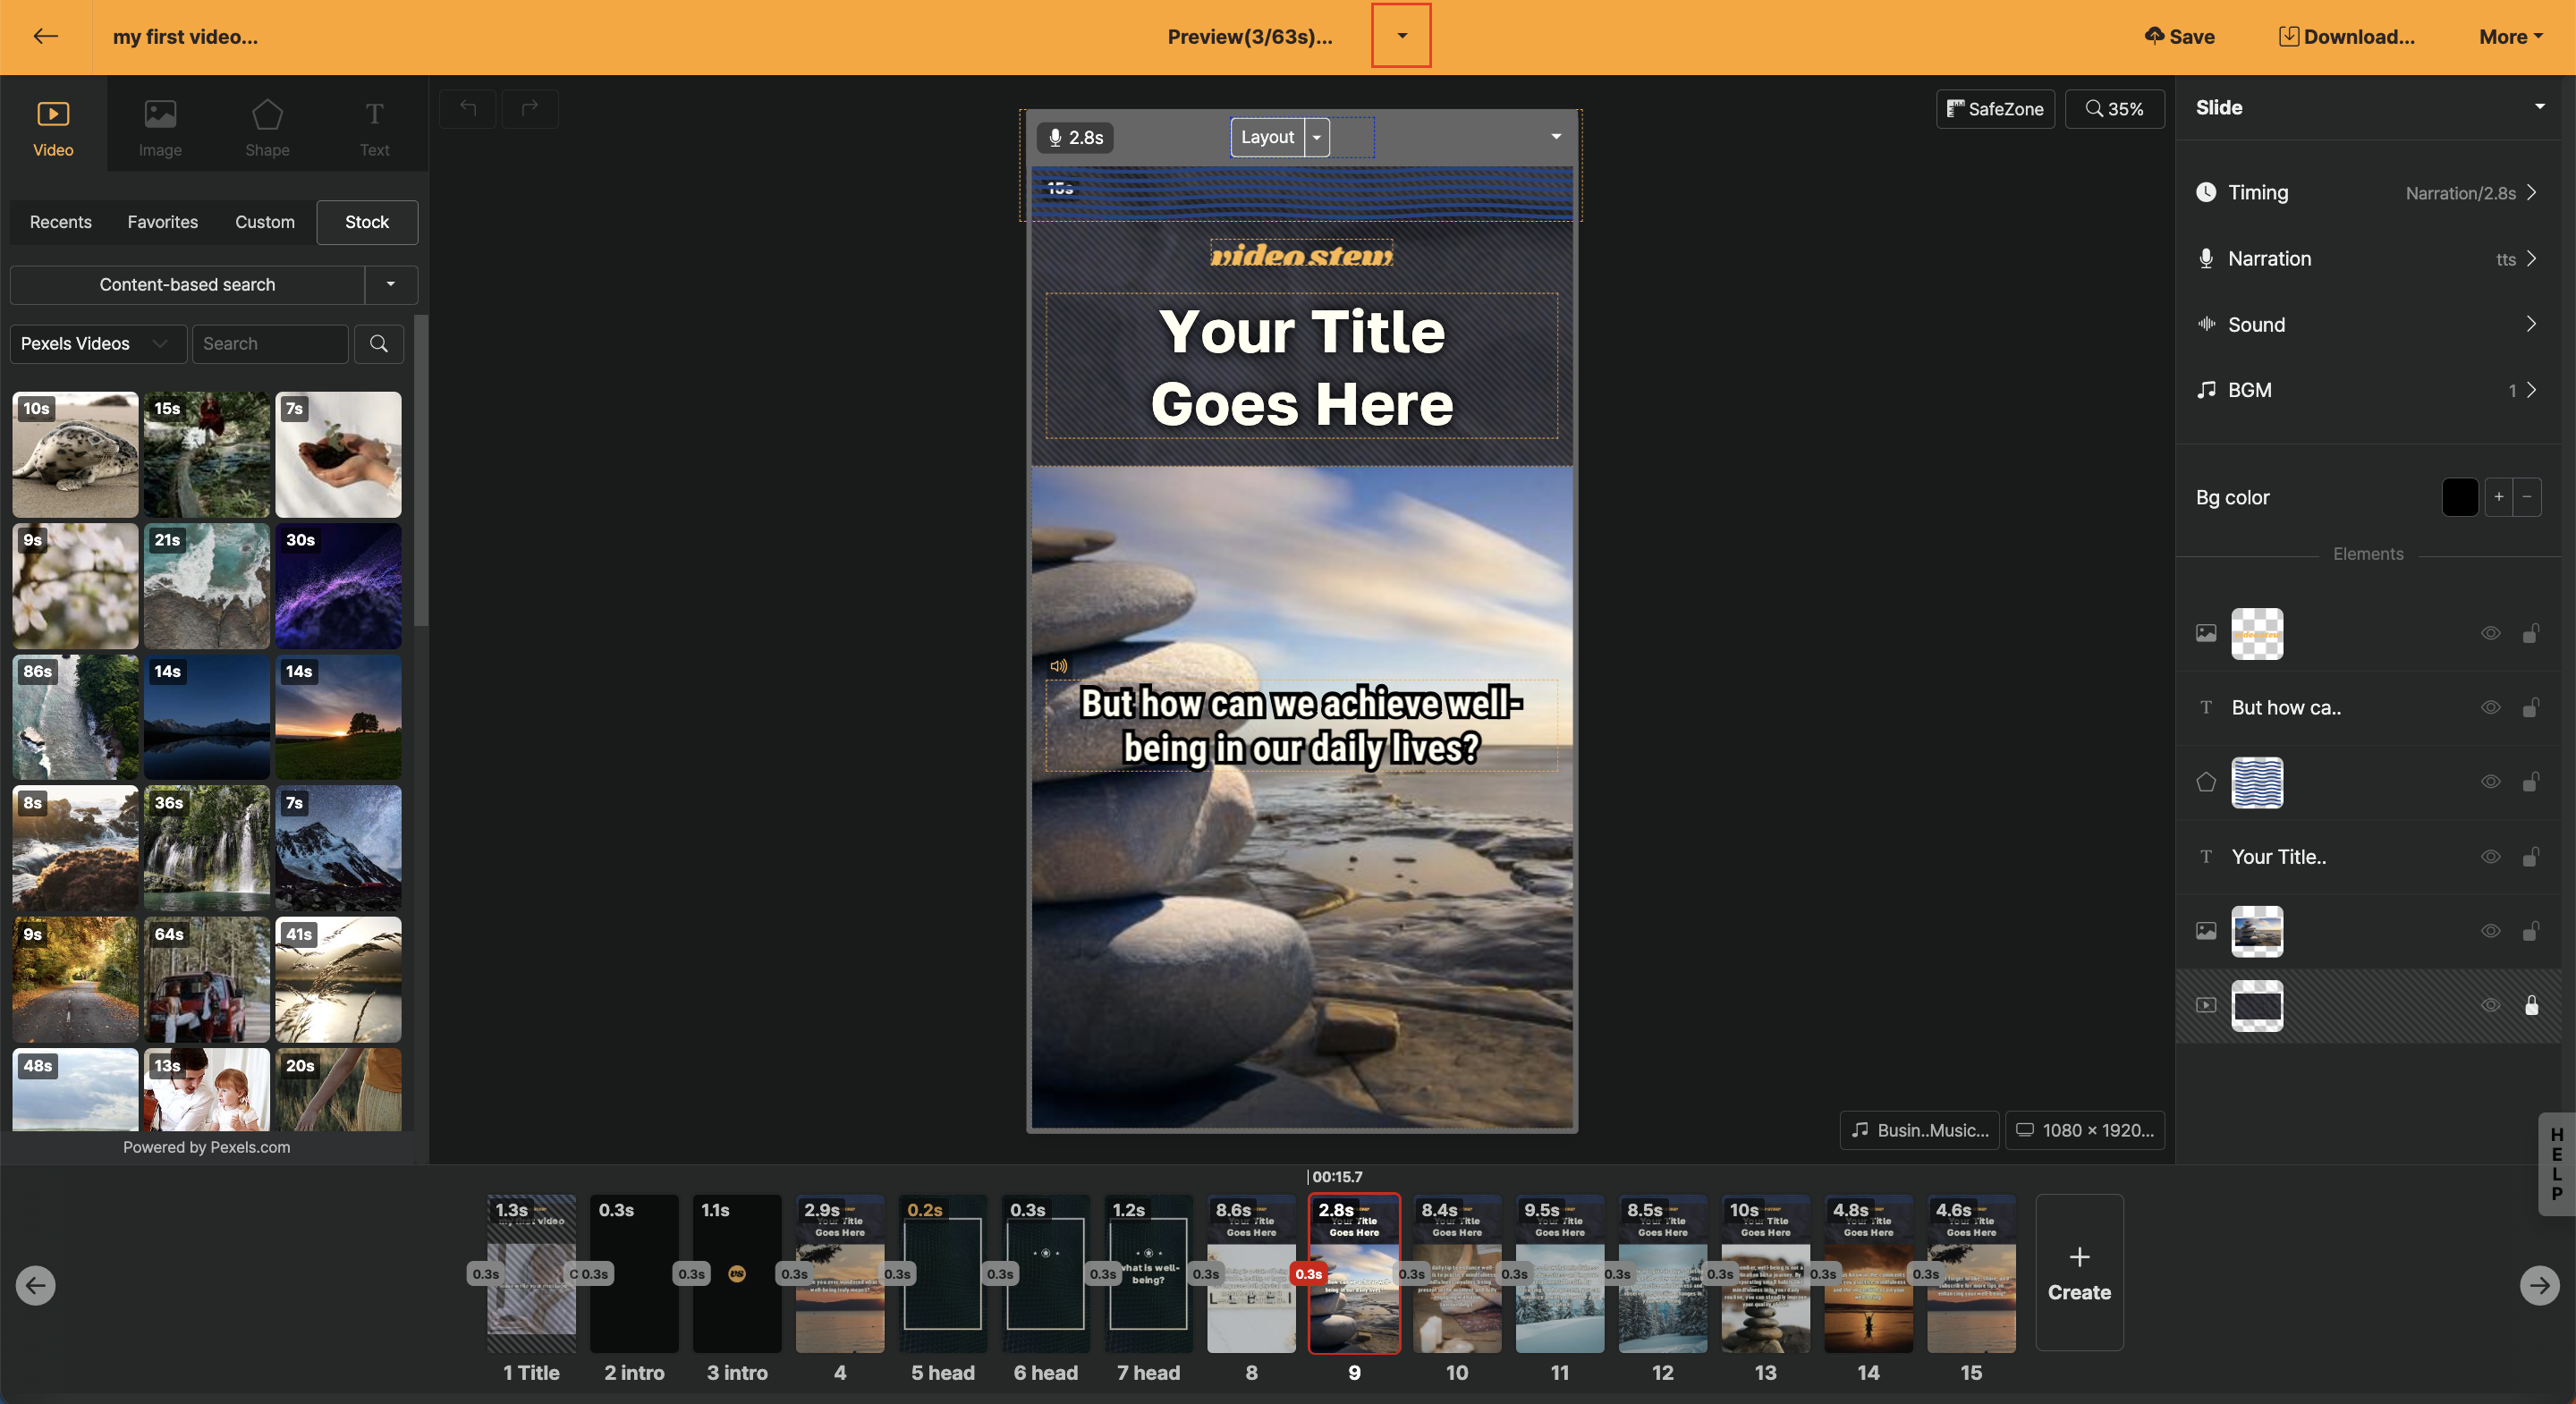
< Real-time Preview >
If there is a part you want to modify by adding at this step, refer to the [Edit all slides at once] section, assume it is complete, and move on to the next step.
Rendering and Download
So far, your project only exists on the Videostew server. Now it's time to render it and download it to "My Computer".
Do you see the "Download" button on the right side of the screen? Click it. A download window will open below. Click "Rendering" on the far left there. It is the process of converting the worked item into a video.
< 동영상 렌더링 및 다운로드하기 >
If you wait for a few minutes, you will see the Download button activated next to it. If you click on it, the completed video (mp4) will be downloaded to "My Computer". Open the explorer (or finder) and go to the download folder to replay it!
Manual Editing
Finally, shall we try creating everything directly without [template] or [wizard mode]? Through this process, you can get more familiar with the functions and work flow of Videostew! Let's take it step by step!
< Create Video >
Add Project
Let's assume you're on the home screen. Press the 'Add Project' button on the left sidebar.
< Click the Add Project button >
The title is This time, we won't use Wizard Mode, but let's try clicking "Quick Start" on the lower left side.
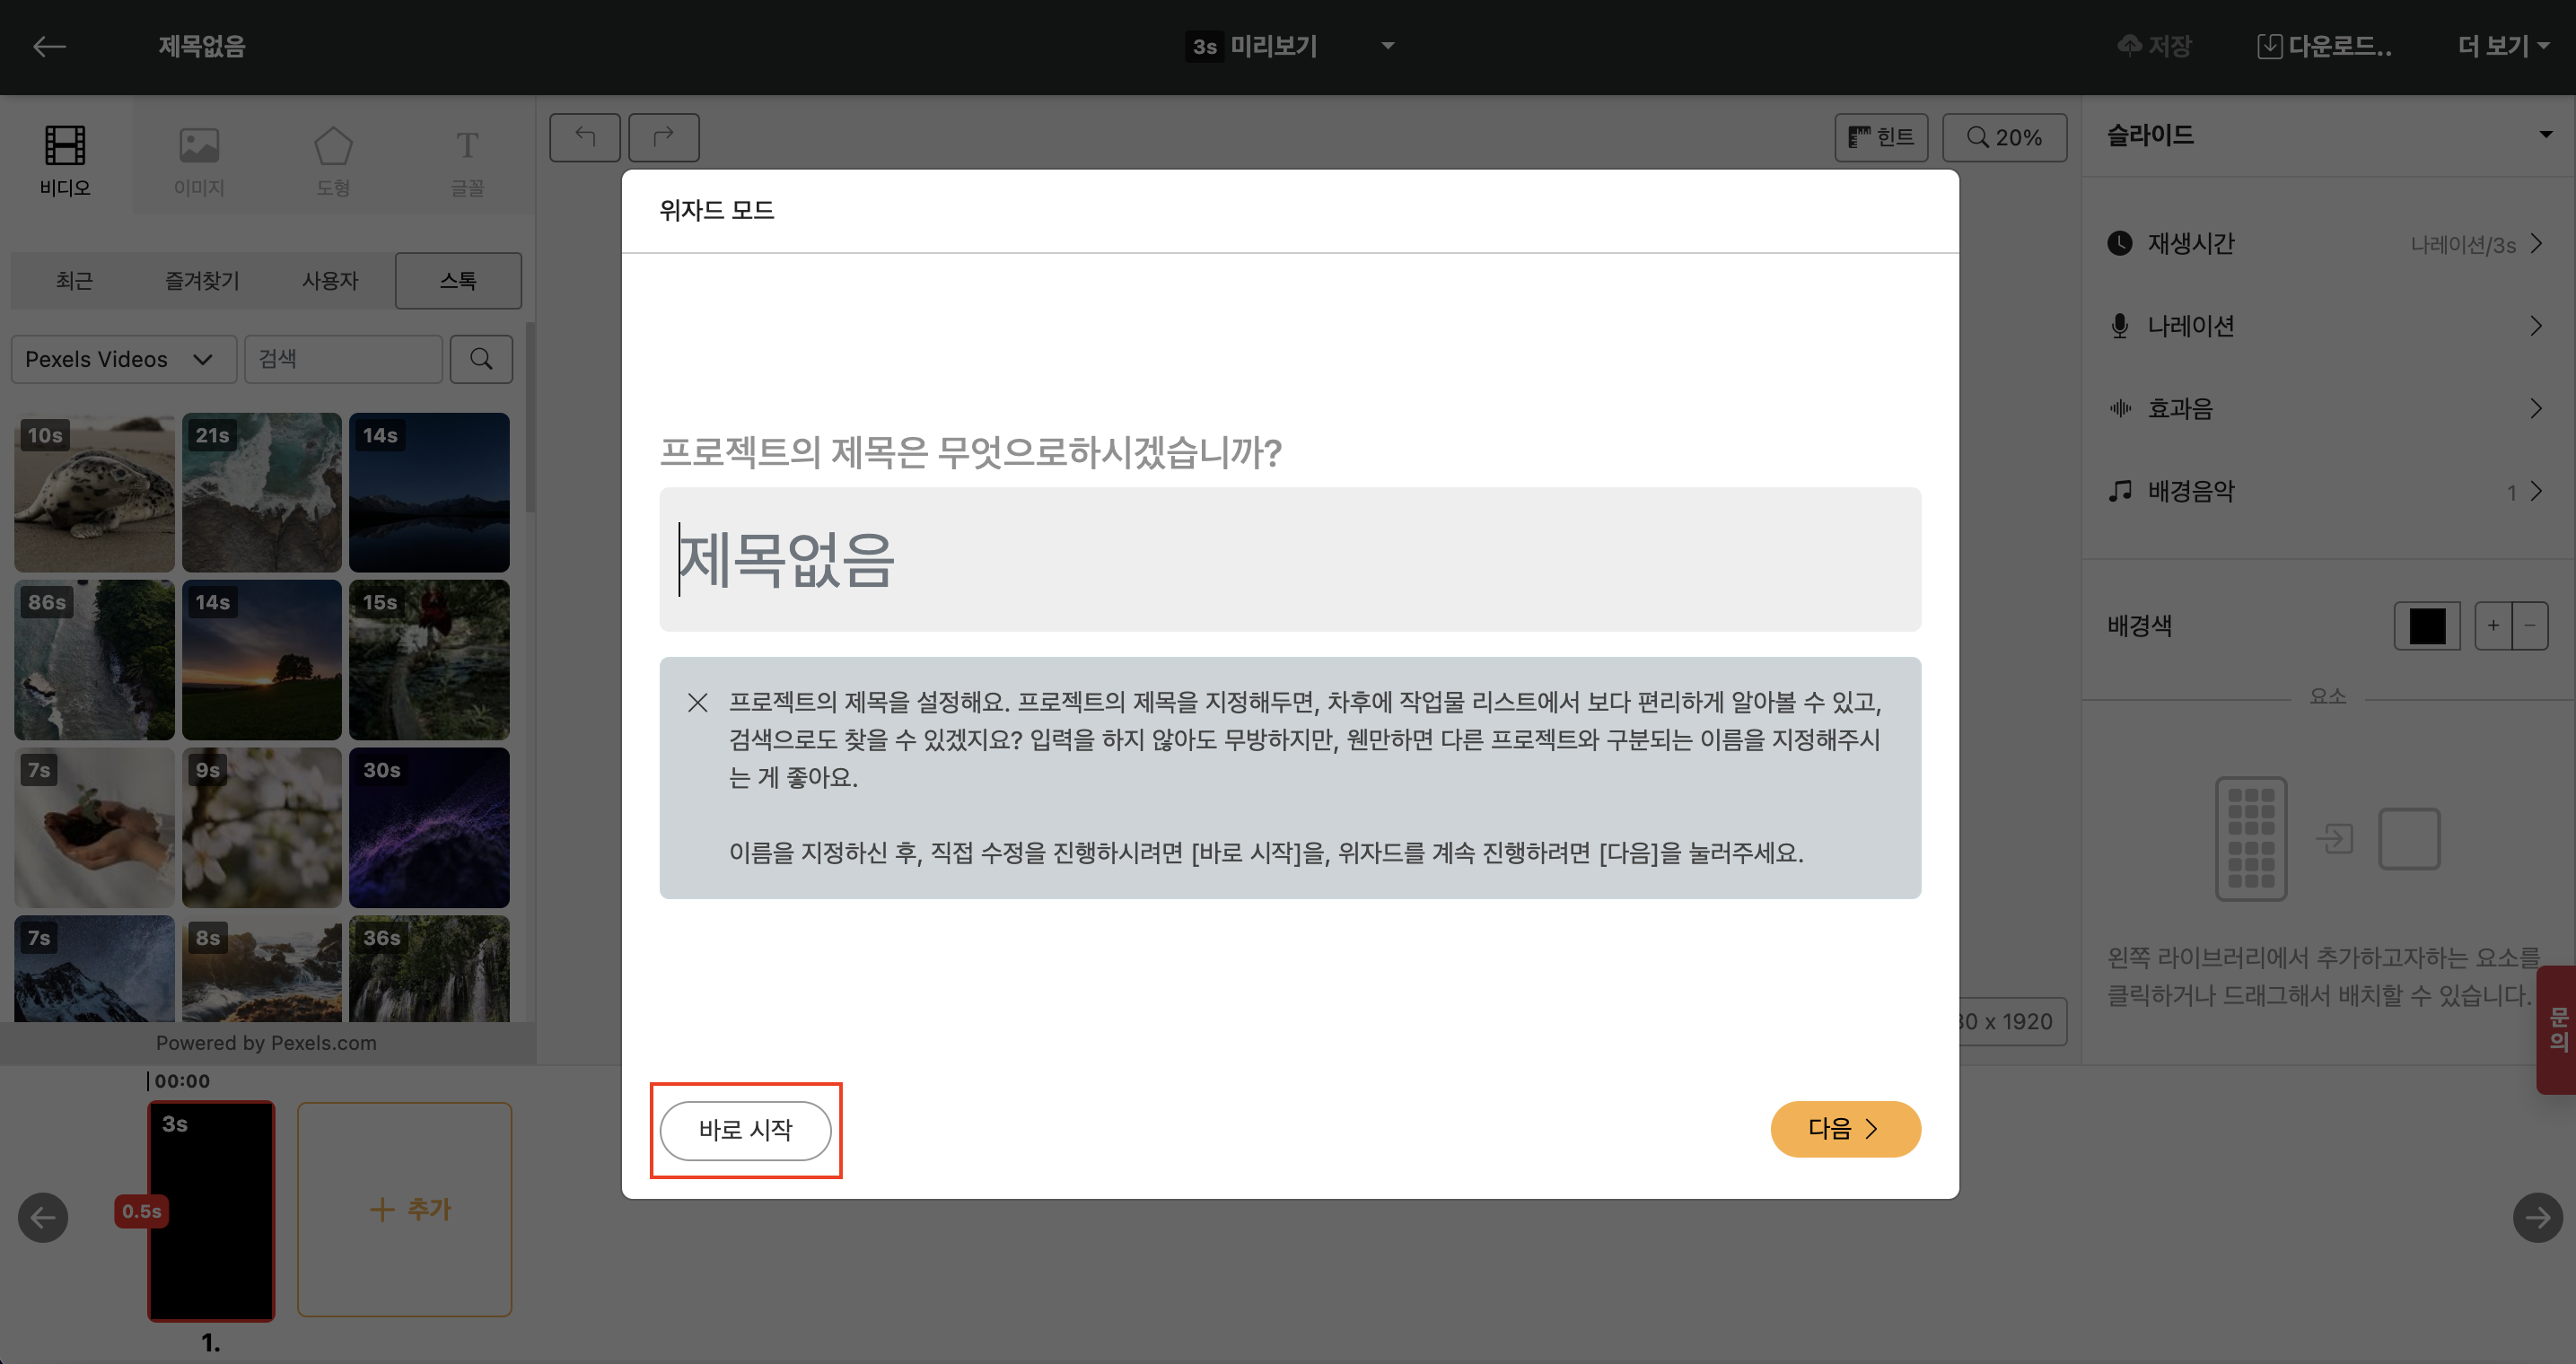
< Click Start Immediately on the bottom left >
Changing to a Horizontal Project with a 16:9 Aspect Ratio
Depending on what the last action was, the aspect ratio of the screen in the Editing Window after 'Quick Start' might differ. In such cases, click on Size at the bottom right to change it to the desired screen ratio.
In this action, we will select a 1920x1080 (16:9) aspect ratio. Then you can verify that the Editing Window changes to a horizontal format.
< Changing the Project's Screen Aspect Ratio >
Inserting Images and Text
Select "Video > Stock" from the Library Window on the left, enter "ocean" in the search bar at the top, and search. Click on the image that you like, and it will be inserted into the Editing Window in the center at the default size.
< Inserting Image after Searching >
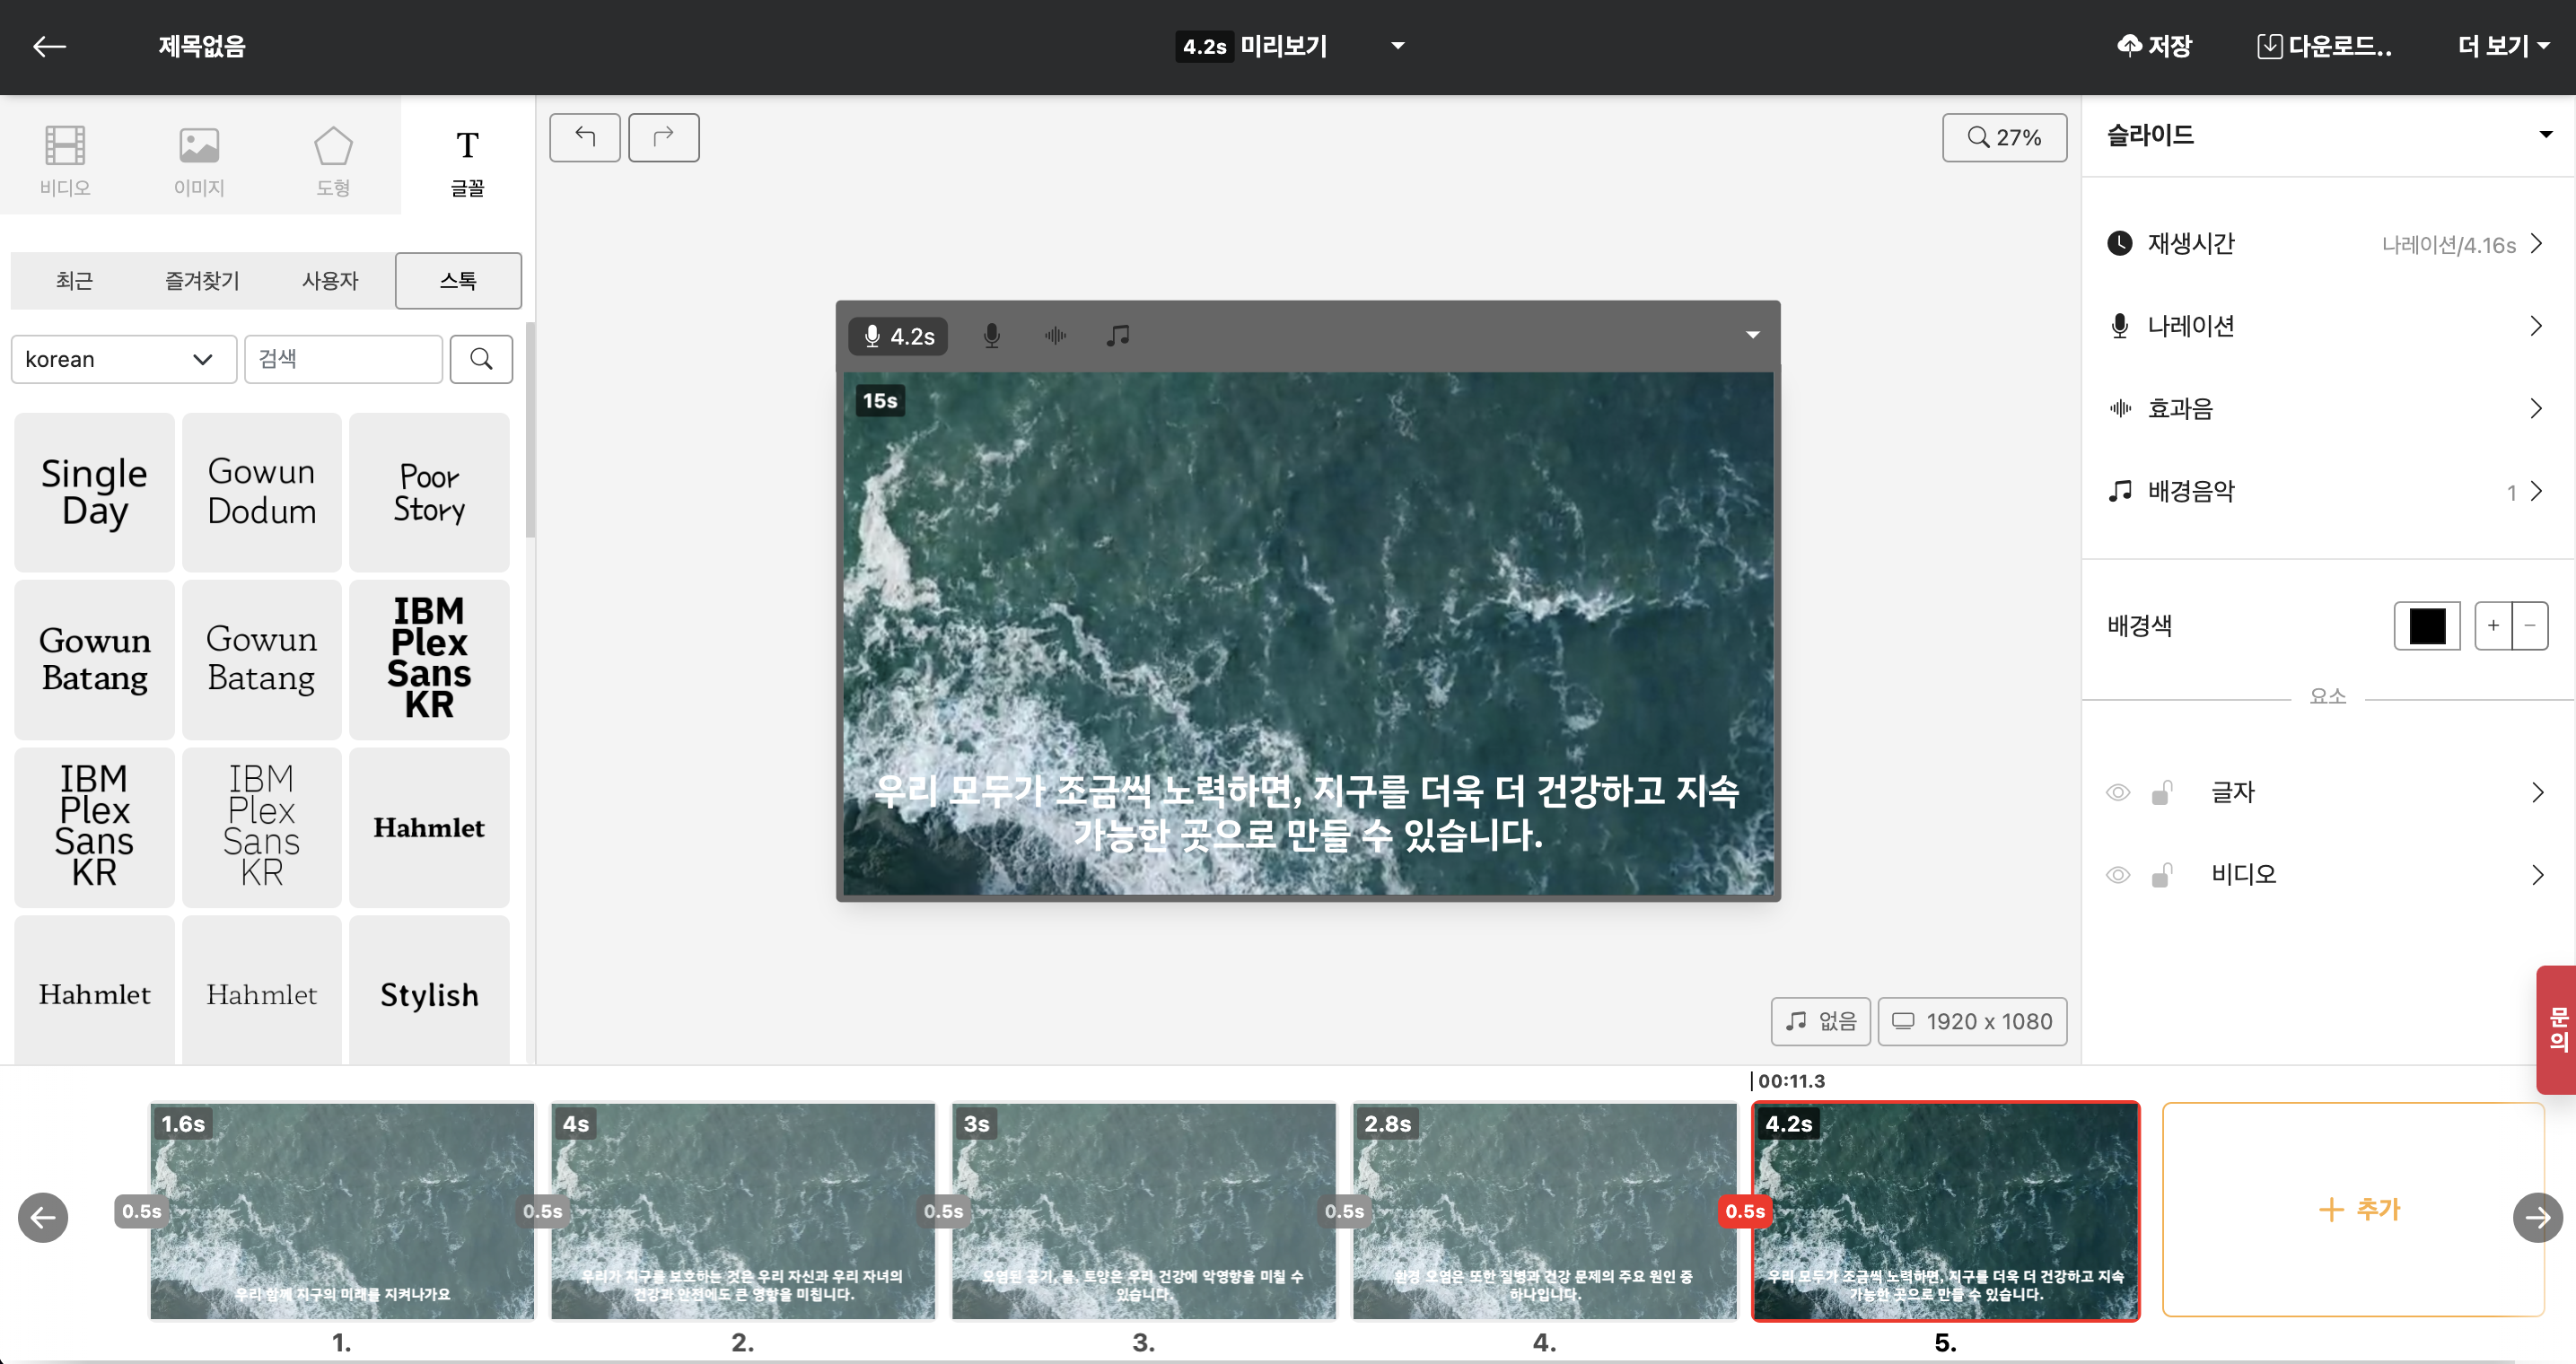
Next, we'll insert text. Select "Text > Stock" from the Library Window on the left side, and click on the font you like. Then, in the Editing Window in the center, a "Text" element with the corresponding font style will have been inserted.
< Text Insertion >
In the Editing Window, double-click on Text Element to switch to editing mode. Enter the content as "Let's protect the future of the Earth together". Once you've entered it, click outside the Editing Window to exit text editing mode.
< Exiting Text Edit Mode >
Grab the text and position it where you want, adjusting its size. Stick it at the bottom like a subtitle, and change the size by sliding to fit the slide size.
< Adjusting Text Position and Size >
Filling in Content
To duplicate a slide, press the "+ Add" button in the Slide Window. The last slide will be duplicated automatically. Typically, when working with videos, content changes continuously in a similar format, so this is why the operation works this way.
Once a new slide is duplicated and added, it is automatically selected. So, you can immediately double-click the text and change it to the desired content. This time, enter the text as "Protecting the Earth is also greatly influential for our own health and safety, as well as for our children's future."
< Created Slide >
By adding new slides and continuously changing the content like this, you've directly created 5 slides.
< Duplicate the slide to create 5 slides >
Readability Enhancement
Even after looking more closely, it seems like the text isn't very visible. You can change the font color, but there is no guarantee that the image in the background will always be the same color, so this time try adding a readability enhancement feature.
Select the text in the slide, and in the [Properties Window] on the right, choose "No background opacity". Among several options, select "Align to bottom". Then, as shown below, you can see that the basic editing search box is attached behind the text.
< Readability Enhancement Applied Screen >
Multi Slide and properties
Now, if you select each added slide and change the accessibility preservation four times, will that suffice? No! If you want to create a video, you would have to create dozens of slides, and if you have to repeat the process multiple times whenever there's a change, it won't be efficient, right? That's why Videostew offers a feature that allows you to change multiple slides at once.
Select all the slides you want to change from the Slide Window at the bottom. To select all, click on the first slide you want to select, and then click on the last slide while holding down Shift. Then all the slides in between will be selected at once.
< Multiple slides selected at once >
Do you see that the color of the handle in the Editing Window in the center has changed? This indicates that you can simultaneously apply changes to multiple selected slides.
In this state, as above, in the [Properties Window] on the right, try changing the value of [Background opacity] to "Outline only". Then you will see that an outline is added to the text of all selected slides.
After such a multi selection, changes are applied not only to the text but also to the properties of everything including videos, images, and shapes. Isn't it convenient?
Changing to Videos that Fit the Situation
Now we have unified the background video into one, but inserting a contextual visual is important. So let's try changing to different videos that match the content of each slide.
First, select the second slide. Then choose [Video > Stock] from the Library Window on the left side. Select the video you want and drag it to the existing video in the Editing Window in the center. When you release the mouse, it will be replaced with the newly selected image.
Change each video in the same way. There is no need to multi-select this time because we are going to insert different content into each slide.
Add Background Music
The completion level is fine, but does it feel empty without volume? In the central [Edit tab] you will see a speaker icon and a button marked “None”. That button lets you change the background music.
< Background music change button >
Click this button and select the background music you want. If your mouse is hovering over any sound, a preview will play automatically. Once you have chosen the music you want, press Confirm.
Now you can see that the display has changed from "None" to the selected music! Shall we take a listen? Just press Space on the keyboard or click on Preview at the top of the screen! You'll know the current selected slide is playing along with the music. If you want to view the entire sequence, click the ▼ button on the right side of Preview and select Preview.
Add Narration
We're almost done. The music is in, and the screen is fully constructed. But doesn't it seem like something is missing? That's right, the narration! We'll add narration to make our video better communicate to the audience!
Narrations can be added to each slide, but since we're going to add them to all slides, you can process them all at once by selecting all slides. Remember the method of selecting a range using Shift I told you before? You can do it that way, but let's try selecting all at once this time.
In the [slide window] at the bottom, select any slide, then press the Ctrl + A keys. You will then see that all slides are selected. Next, click [Layer] in the [Properties Window] on the right.
There are various ways to set up the narration, but for now, let's just have the AI voice read it. Click on "None" for the category and select AI Voice. You'll be able to see a few more options expanding. You can also change the voice and even listen to previews.
Now that you've inserted the narration, shall we preview it one last time before rendering? Click the ▼ next to Preview on the sidebar and try Preview! Does it now look like a proper video?
Rendering and Download
Manual production is all done too! Congratulations!! ?? Did you try downloading to your computer for the first time? This time, practice sharing the completed video without downloading. Just like downloading, press the Download button on the sidebar, and click on [Rendering] in the video. The share URL will be activated once rendering is completed.
After a little while, when the rendering is finished, do not download it this time; please close the download window. Then click on [See more ▼] in the right-side menu, and select Share. You will be able to see the shareable link displayed below.
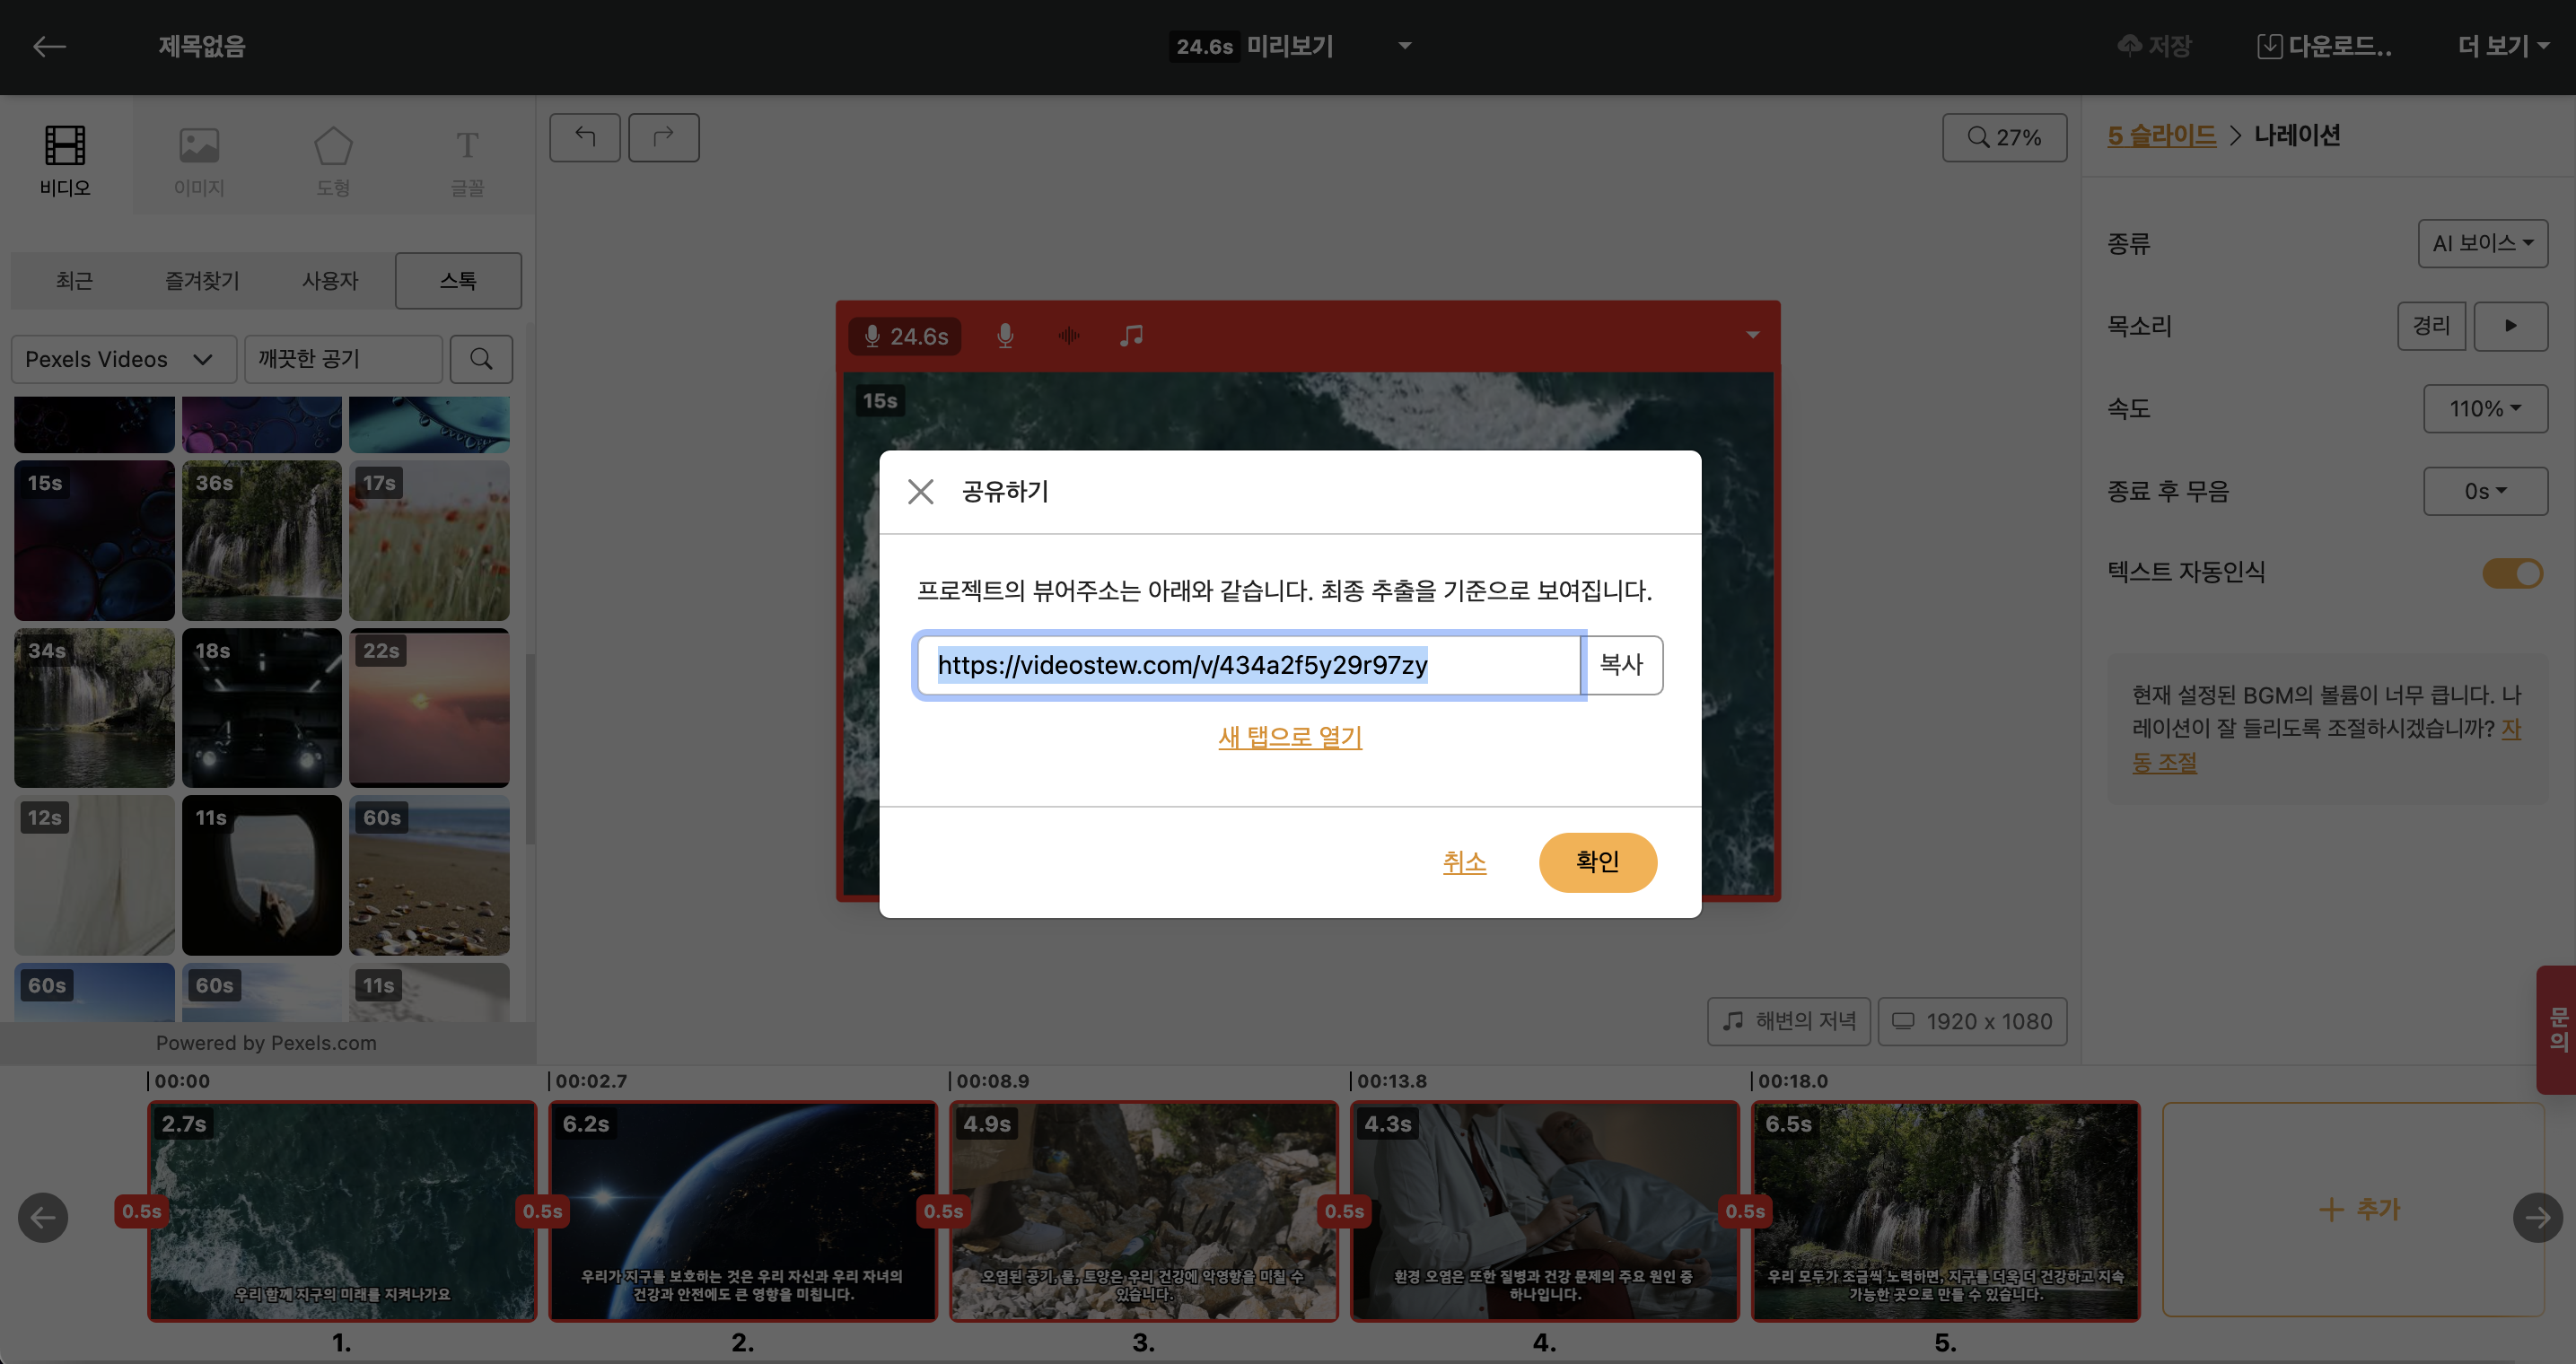
< Sharing Window >
Now copy that address and share it directly in your friends' chat room! If you're curious to see how it appears, open a new tab in the Chrome browser and paste the address to see! You can show everyone the video you've created without downloading it, isn't that convenient?
Follow along with animation video production
If you have come this far, I assume you have become familiar with the basic usage of Videostew. This time, let's learn about how to create an animated video, which can be considered the flower of Videostew.
Videostew provides an [Auto Animation] feature similar to PowerPoint's motion effects. It automatically creates animations if it finds identical elements across slides that have changed in size or position.
< Easy Animated Content Creation >
When using the actual Auto Animation, many of you will use it along with AI voice. In this tutorial, we will show you how to easily utilize Auto Animation with narration.
Why not watch the video below first, and then follow the steps outlined in the guide?
Placing elements on the slide
First, prepare the necessary elements. In this guide, we used images provided by freepik. After preparing mountain and hiker images as PNG files, upload them to the user library with drag and drop. In the case of a background element, search for "sky" in the image library to find and insert an appropriate image.
< Insert transparent PNG images and freely position them >
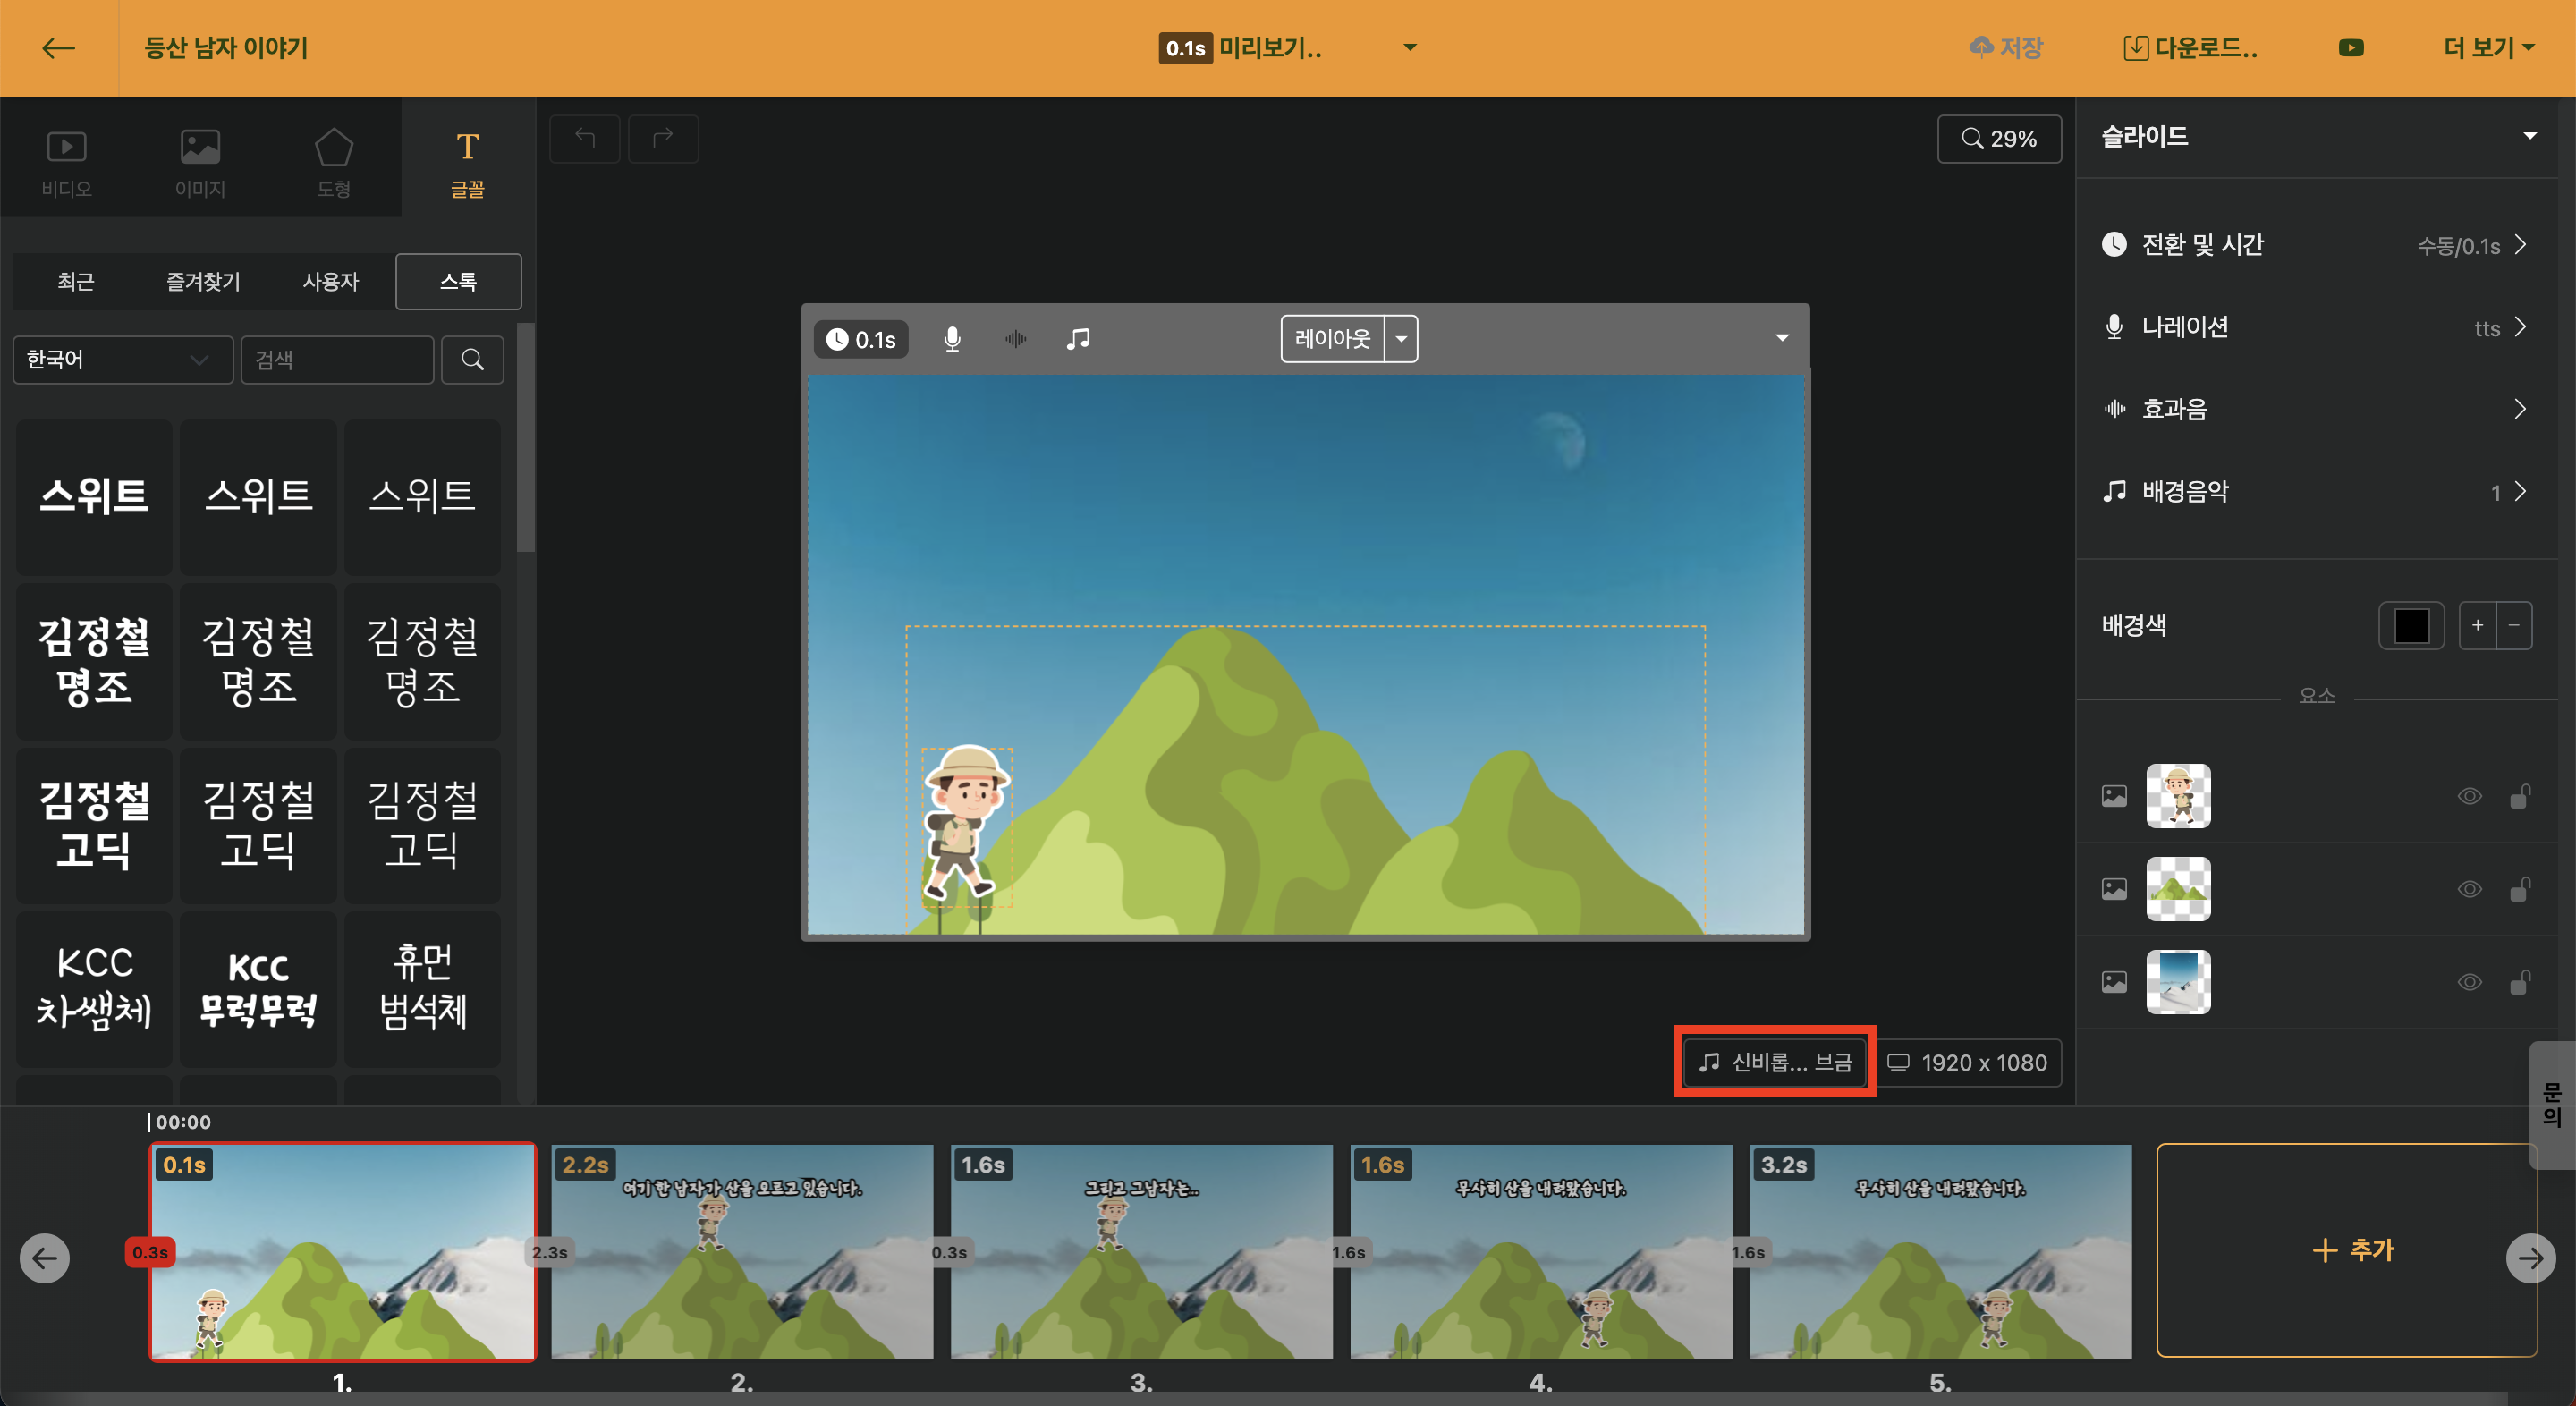
This way, the first slide has been embedded with a total of three elements: a sky image, a mountain vector image, and a mountaineer vector image. And now the most important task remains.
The most important thing on the first slide is to manually change the slide duration to 0.1 seconds. I will explain the reason in the next step. Shall we move on to the next slide?
Creating a Climbing Part
Click the "+ Add" button in the lower slide navigation to add a slide. Then, let's position the mountaineer at the top of the mountain.
Next, choose an appropriate font and add it to the slide after selecting it, saying "Here's a man climbing the mountain." Also, adjust the slide time to match the narration length and select "Narration > AI Voice" to assign the appropriate voice.
< Create animations by changing the position of elements between slides >
If you preview it here, you will see that the mountaineer quickly reaches the top of the mountain. Precisely, it arrives at the summit in just 0.3 seconds. The reason is the [Transition Duration]. [Transition Duration] is the duration it takes for the animation to activate. Simply put, if you change the [Transition Duration] to 2.2 seconds, the animation will move slowly towards the mountain summit over the course of the narration.
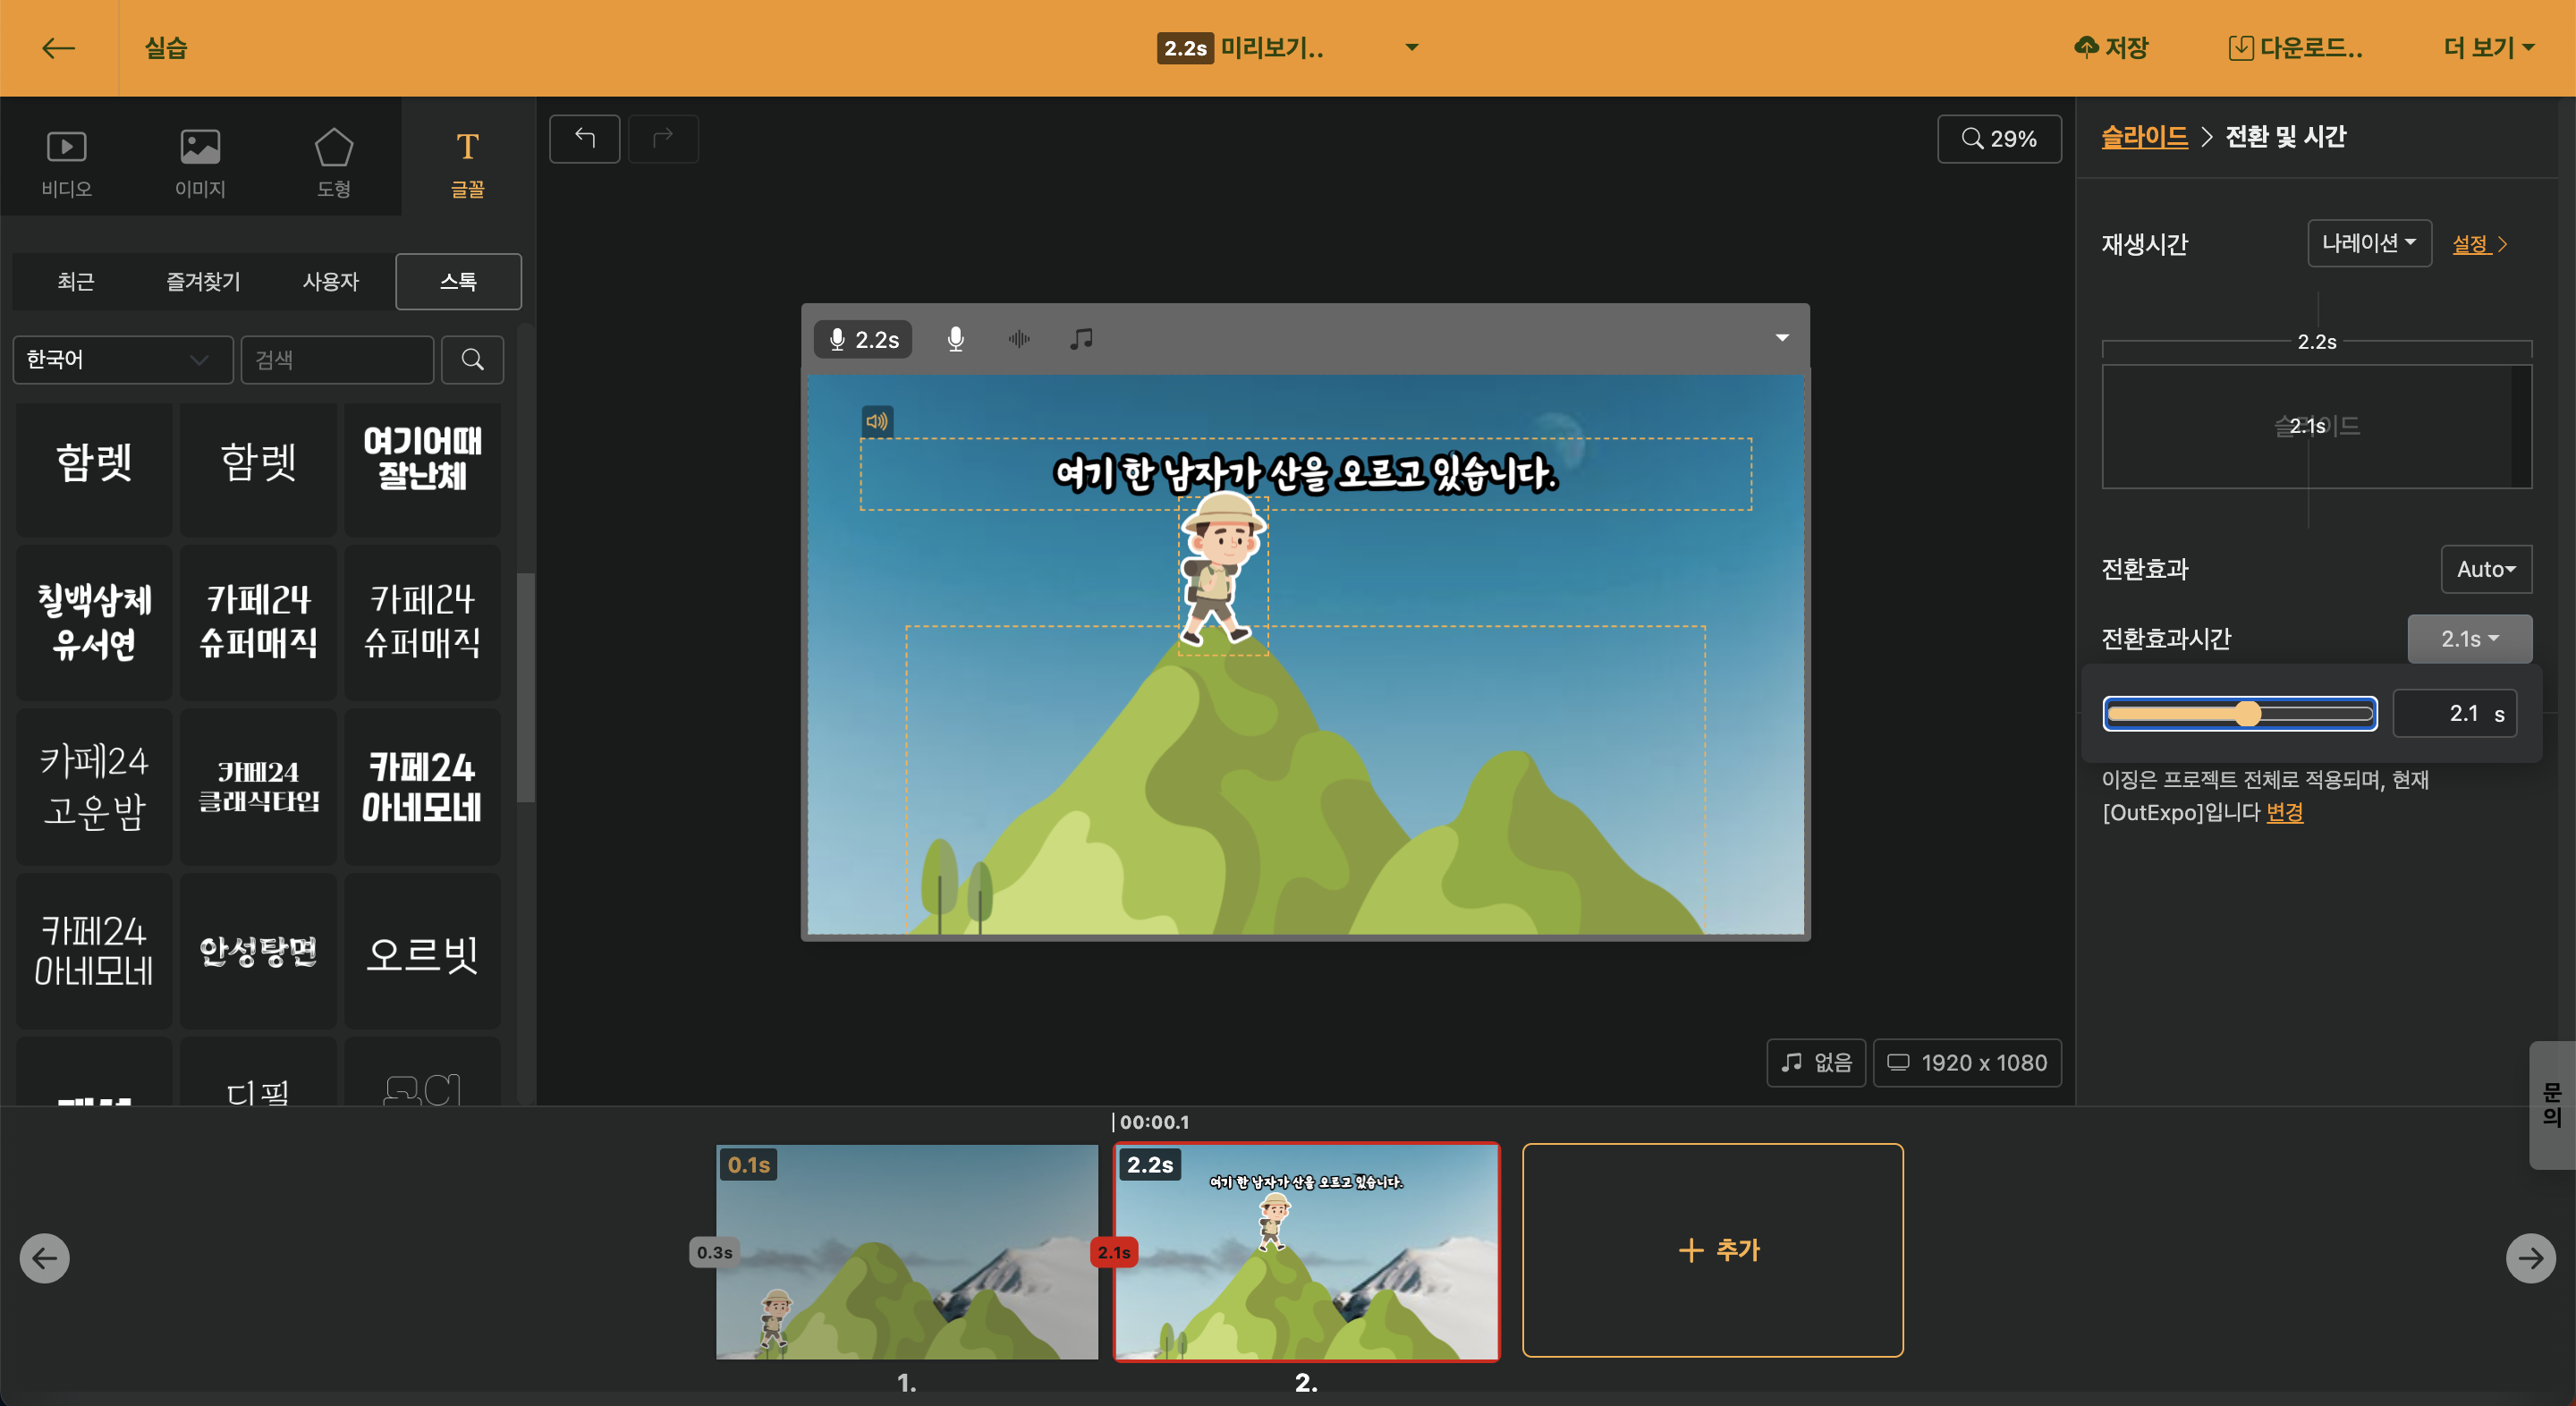
< Adjust the Transition Duration to match the length of the narration >
If you feel like the speed is stuck as you climb the mountain, you are correct. Videostew provides the [Ease (motion effect)] feature that can change the speed of the animation. To create an animation that climbs slowly to the top, please select the “Linear” option among the Ease options.
Creating a Slide of Mountain Summit
Now, in the next slide, we will create a part where the narration says, “And then the man...”. Just copy another slide, and replace the text, and you are good to go. Please note that if the Transition Duration of the slide is copied and exceeds 2 seconds, it is advisable to adjust it to around 0.3 seconds.
Oh dear, to prevent moving too quickly to the next slide after finishing the narration, we will insert about 0.5 seconds of 'silence after end' in the narration options. By doing so, the slide will linger for the set amount of time after the narration ends before moving on to the next slide.
Creating a Descending Part
Now let's create a slide where the mountain climber descends normally. Also, copy the previous slide and move the position of the climber. Then change the text to 'Safely descended the mountain.'
And for more fun, let's add a laughing sound effect. It's good to have a laugh sound after all the narration is over, so copy another slide and this time leave out the narration and just insert the sound effect. Find the appropriate sound effect in the sound effect library and adjust the duration of the slide accordingly.
< Insert sound effect after narration >
Once you have completed all the work, please preview it to confirm that it has been implemented as desired, and then rendering and downloading will complete the process.