Guide
- Editing Uploaded Videos (Trim)
- Edit multiple slides at once
- Start Wizard Mode
- Utilizing Voice Recording Feature
- Inviting Other Users to Workspace
- How to Use Auto Animation
- Creating Thumbnails
- Creating My Template
- Manually syncing subtitles
- Adding a custom color with transparency to the cursor
- Uploading video files to Naver Blog
- Uploading videos/images shot on smartphones
- Titles do not appear on the screen, only narration is inserted
- Create a dialogue-type content with multiple narrations on a single scene
- Invite Students with Student ID in the School-exclusive Solution
- Manage your own templates with Project Enjoy Finder
- Creating a long video by chaining projects
- Translate into multiple languages
Advanced Utilization Tips
Videostew contains many advanced utilization tips hidden within. Here we will introduce various tips to better leverage Videostew.
Editing Uploaded Videos (Trim)
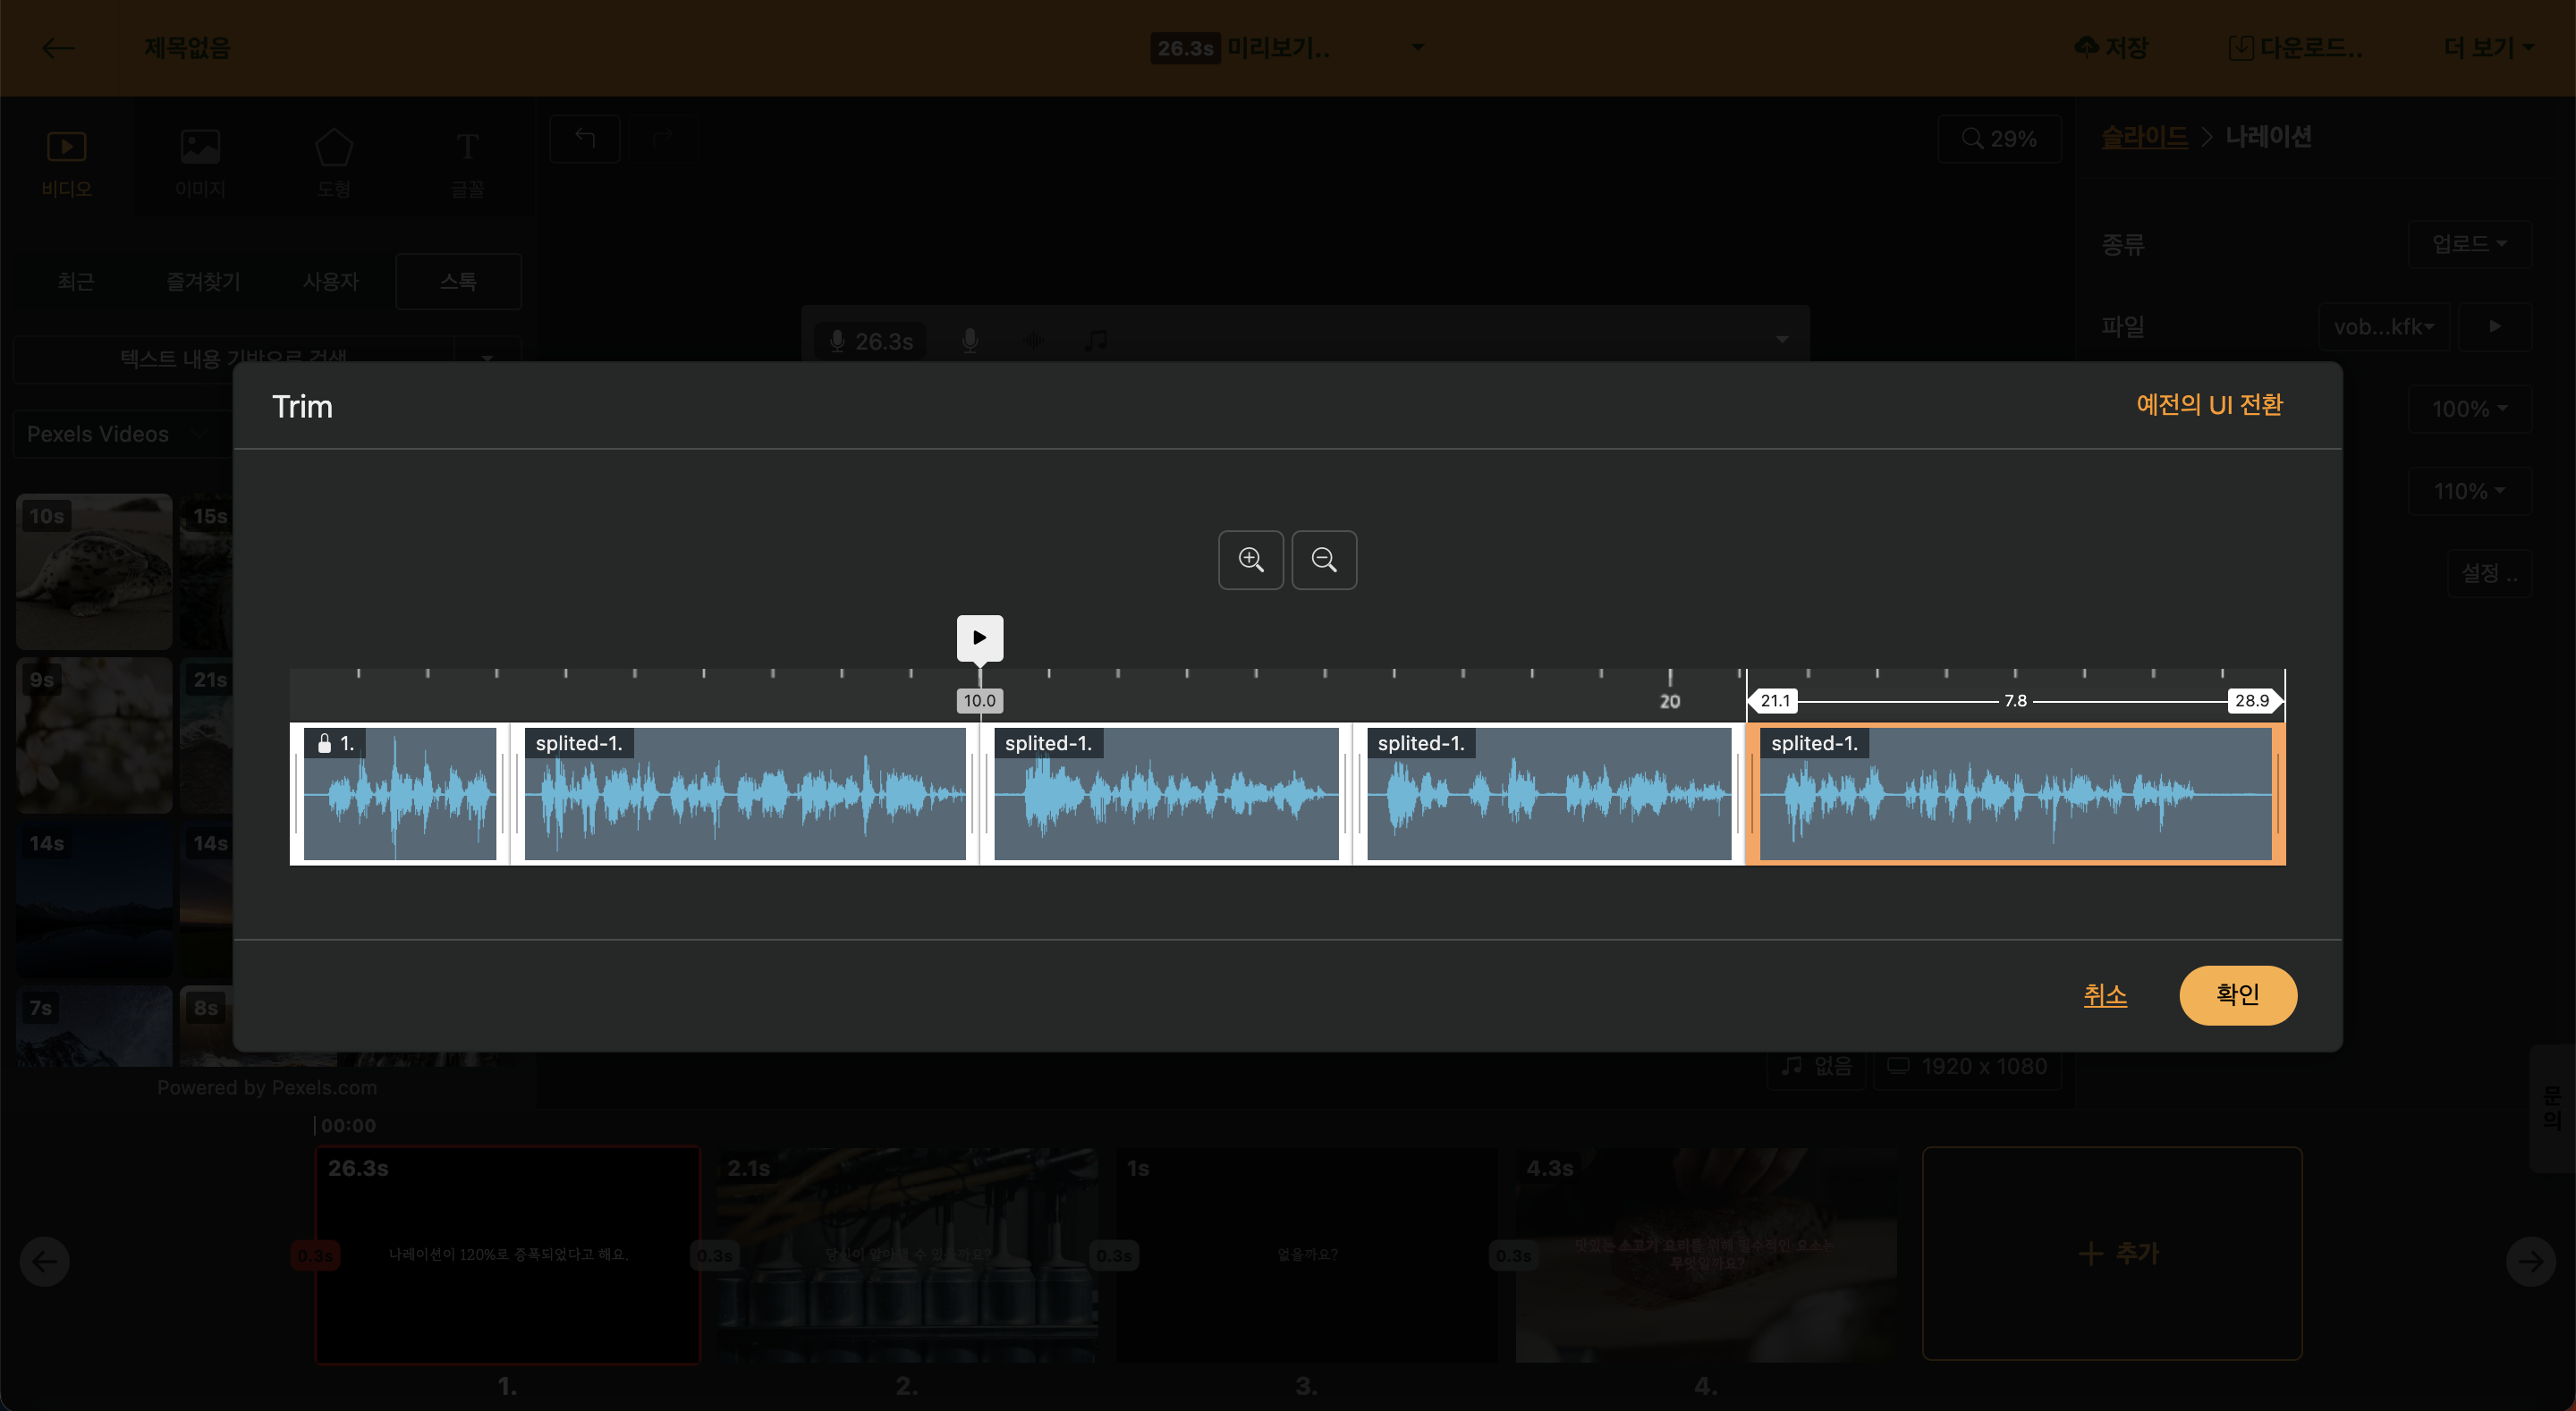
In Videostew, you can upload your own shot videos and perform cut editing operations. For detailed information, please refer to Playing Around with Playback Intervals.
Edit multiple slides at once
Editing Consistent Elements Across Multiple Slides
Creating video content often involves adding many slides, even if they are in slide format. That means a tremendous amount of editing work is necessary. Videostew has introduced a bulk editing concept to block such laborious tasks and provide a comfortable editing environment.It is common for the element you want to edit to be attached to multiple slides. For example, when you insert text at the bottom of a slide as a subtitle, and you want to change the text color of that text. In this case, select the slide you want to edit together. You can find detailed instructions on how to select multiple slides at once in Multi Slide and properties. Then, select the element you want to edit and try changing the text color in the [Properties Window].
< Change the text color of multiple slides at once >
Then you can see that the font color of the text has been changed in all selected slides. The location or size, typeface (font), etc., are all applicable. And besides the text, all things such as videos/images/shapes are also possible.
Select the same slide format at once
By using the [Set Slide Note] feature of Videostew, you can apply a specific format to each slide. When editing, there are often times when you just want to select a particular layout and edit everything at once.
For example, if you want to edit a head slide to insert an interstitial title at once, you can select the relevant slide and then press the Ctrl key to select the number on the bottom navigator.
< Select the same format slides at once >
Start Wizard Mode
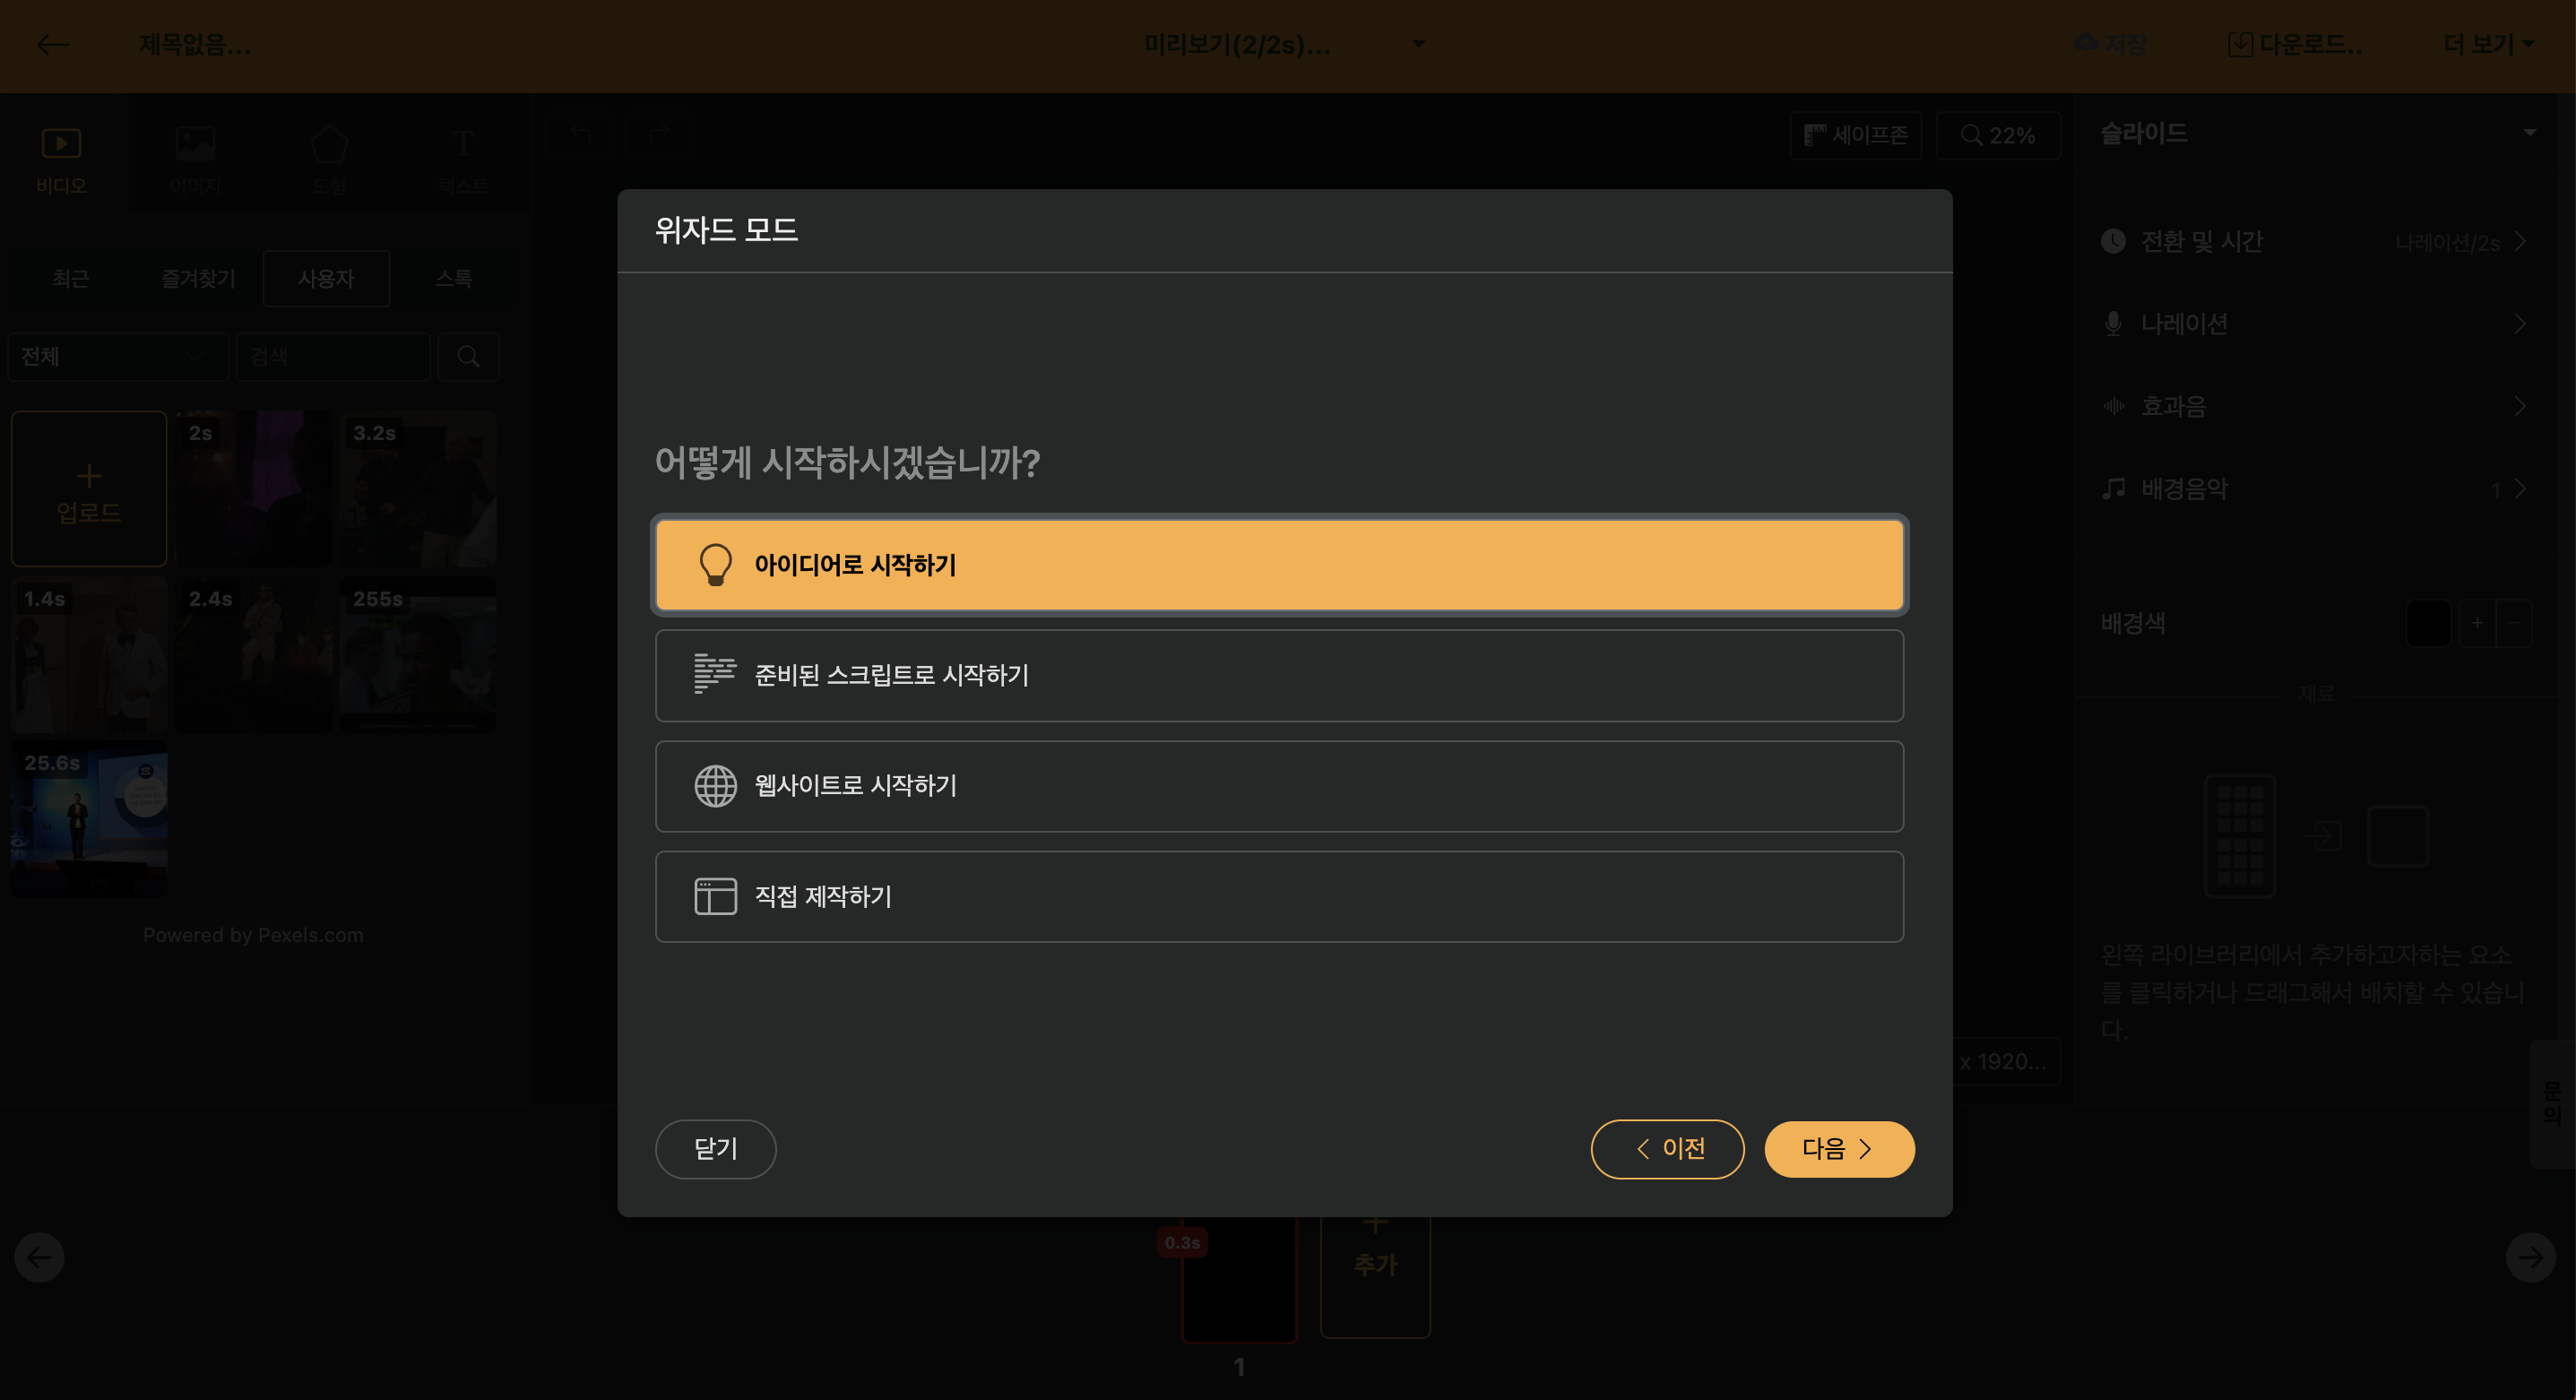
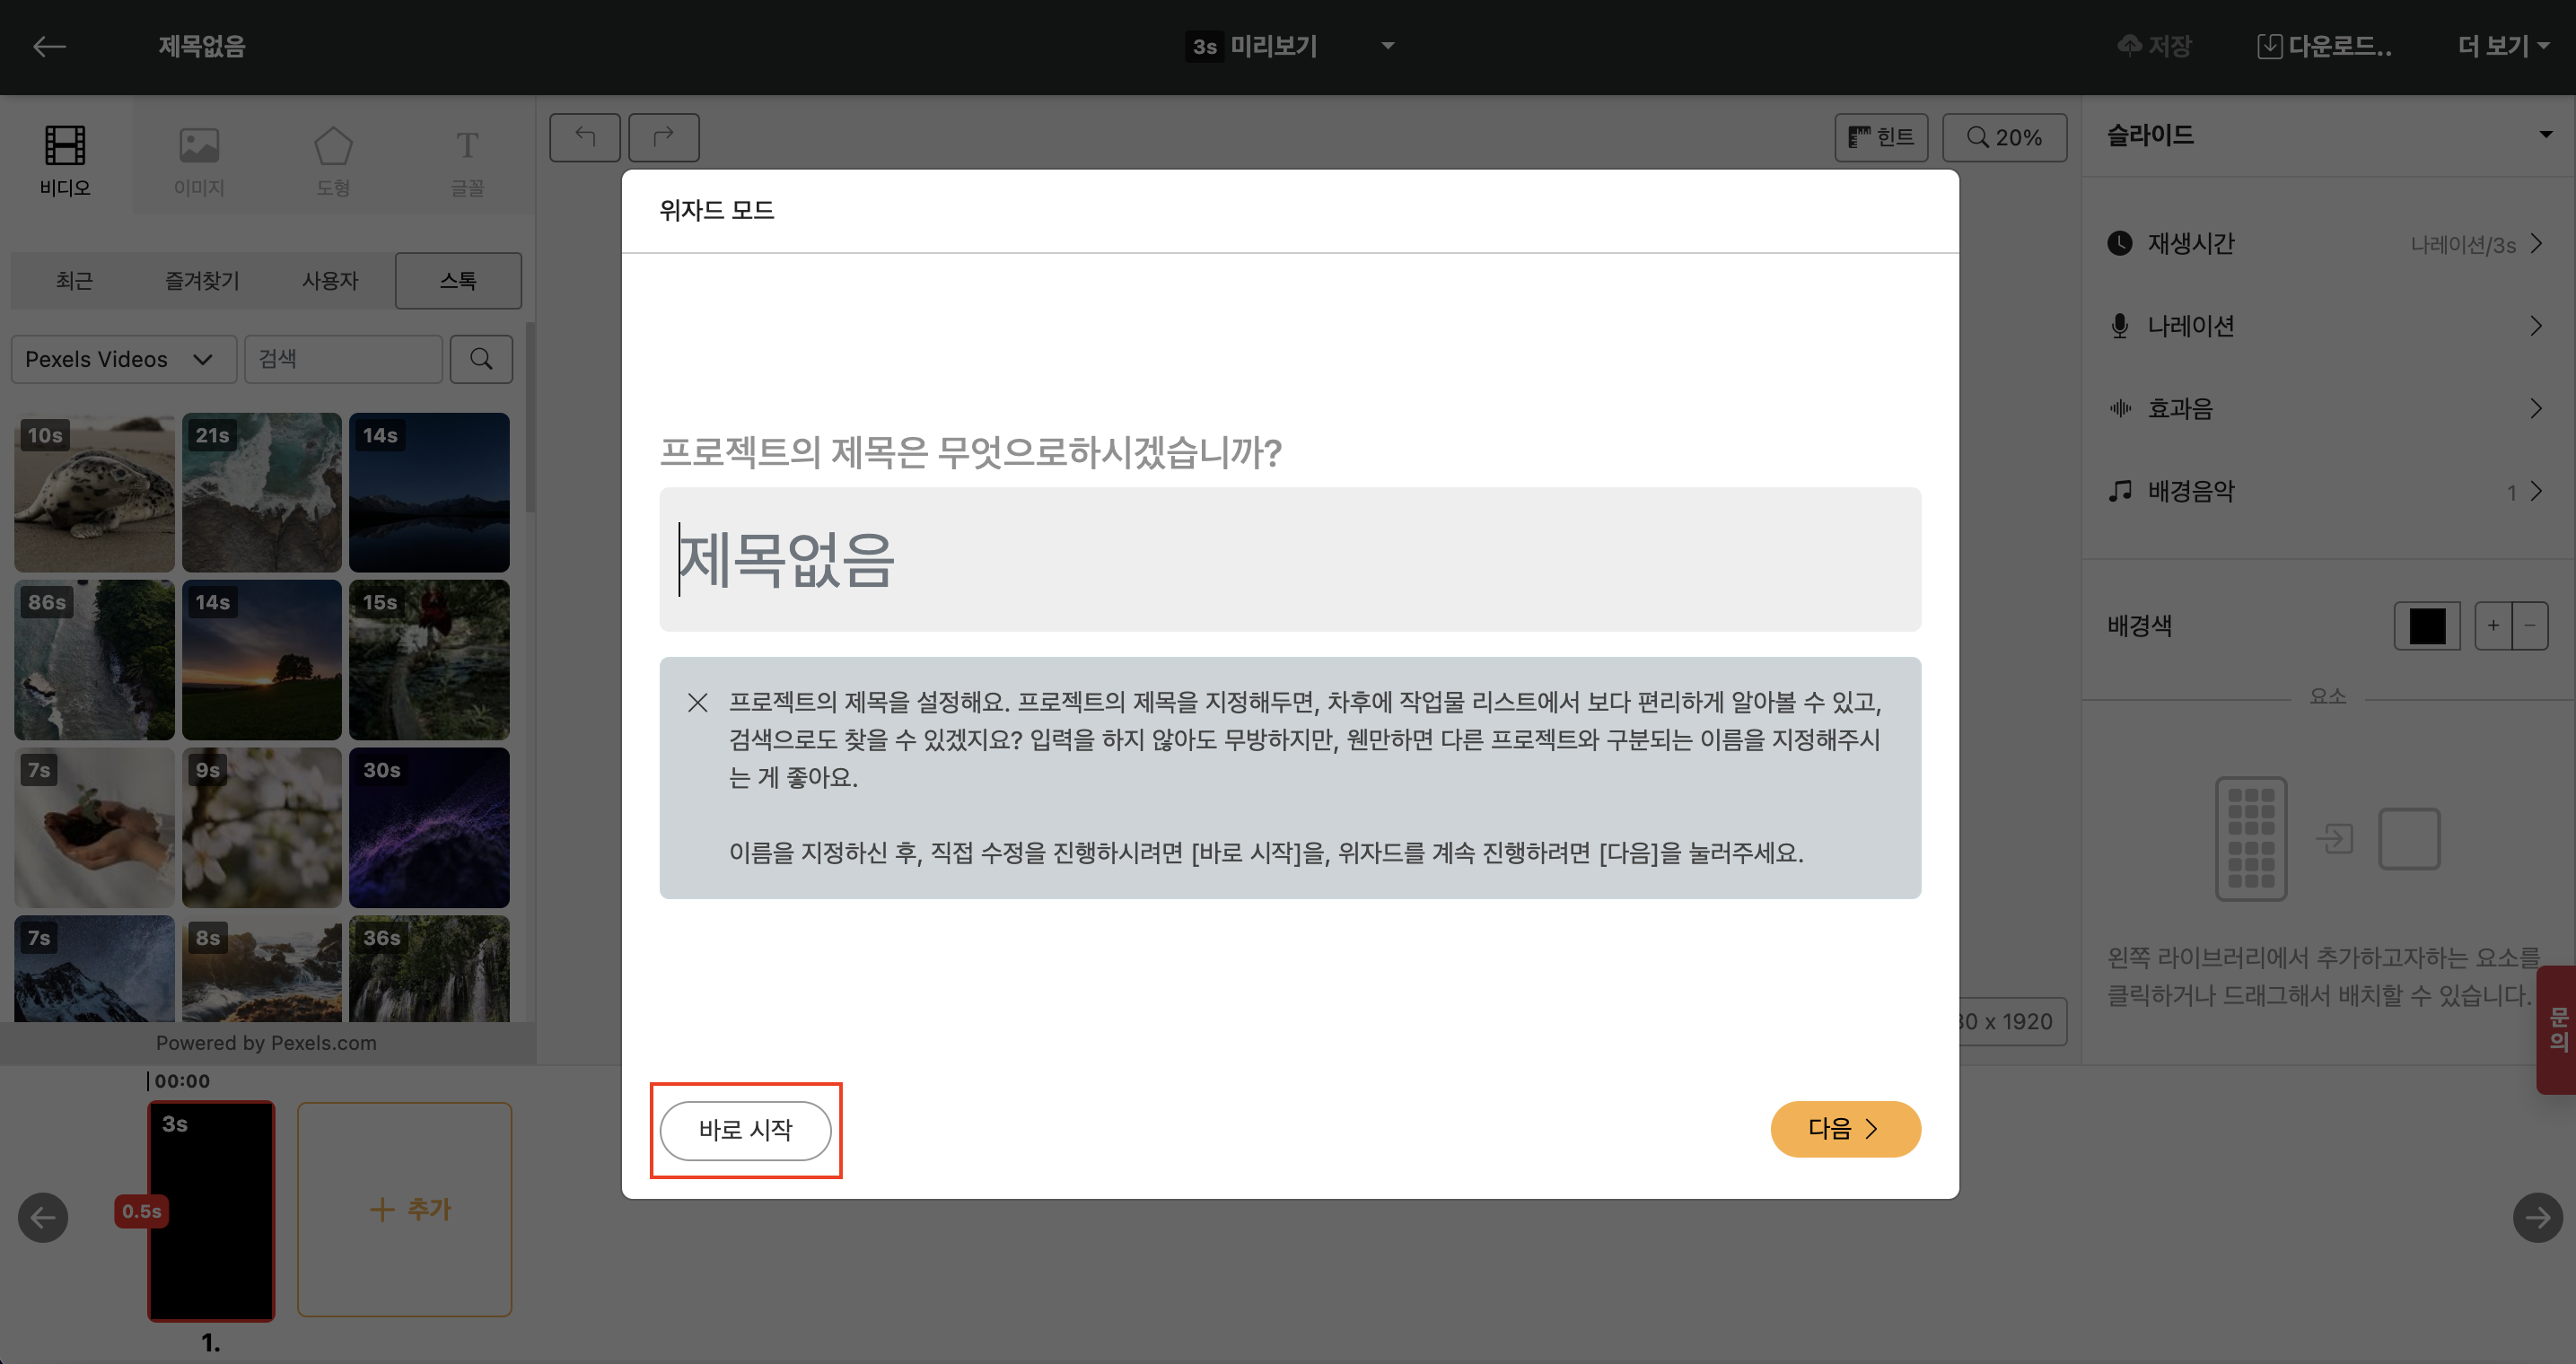
When you start a new project, Wizard mode automatically opens. This Wizard mode is a method that allows you to easily create videos from default input or a blog URL. If you want to do it yourself, you can cancel the Wizard mode by clicking [Start Immediately].
The method to start a project in wizard mode is to follow the [Follow the Wizard] section to practice.
Various ways to request a video
Videostew allows you to use various materials to create and edit videos for everyone.
Start with an idea
With this option, you can create a script for a short film or a long film with simple text input. You can specify 'target segment' and 'style' with the supported styles being as follows.
| Style | Detailed Description |
|---|---|
| Casual Tone | Creates scripts that communicate closely with viewers through comfortable and natural speech. |
| News Style | Creates scripts that convey information clearly and concisely with a trustworthy anchor tone. |
| Podcast Format | Creates scripts that immerse listeners through a conversational, engaging flow. |
| Informational Content | Creates a script that conveys fun knowledge and information easily and accurately. |
| Insight Column | Creates a high-quality script with specialized knowledge and communication skills in a specific field. |
| Essay | Creates deeply meaningful scripts that sincerely express personal thoughts and emotions. |
| Musical | Creates scripts full of personality with concise and impactful musical-style text. |
< Style Specification and Keyword Creation Preview >
Select each style and move to the next step to prepare a team for the best results. Refer to the relevant content and create the content with keywords or short sentences, then move to the next step to complete the script.
Of course, you can recreate the completed script or edit only the desired parts.
Start with a prepared script
If you have prepared a draft video through Word or Memo, you can use Copy & Paste to utilize it.
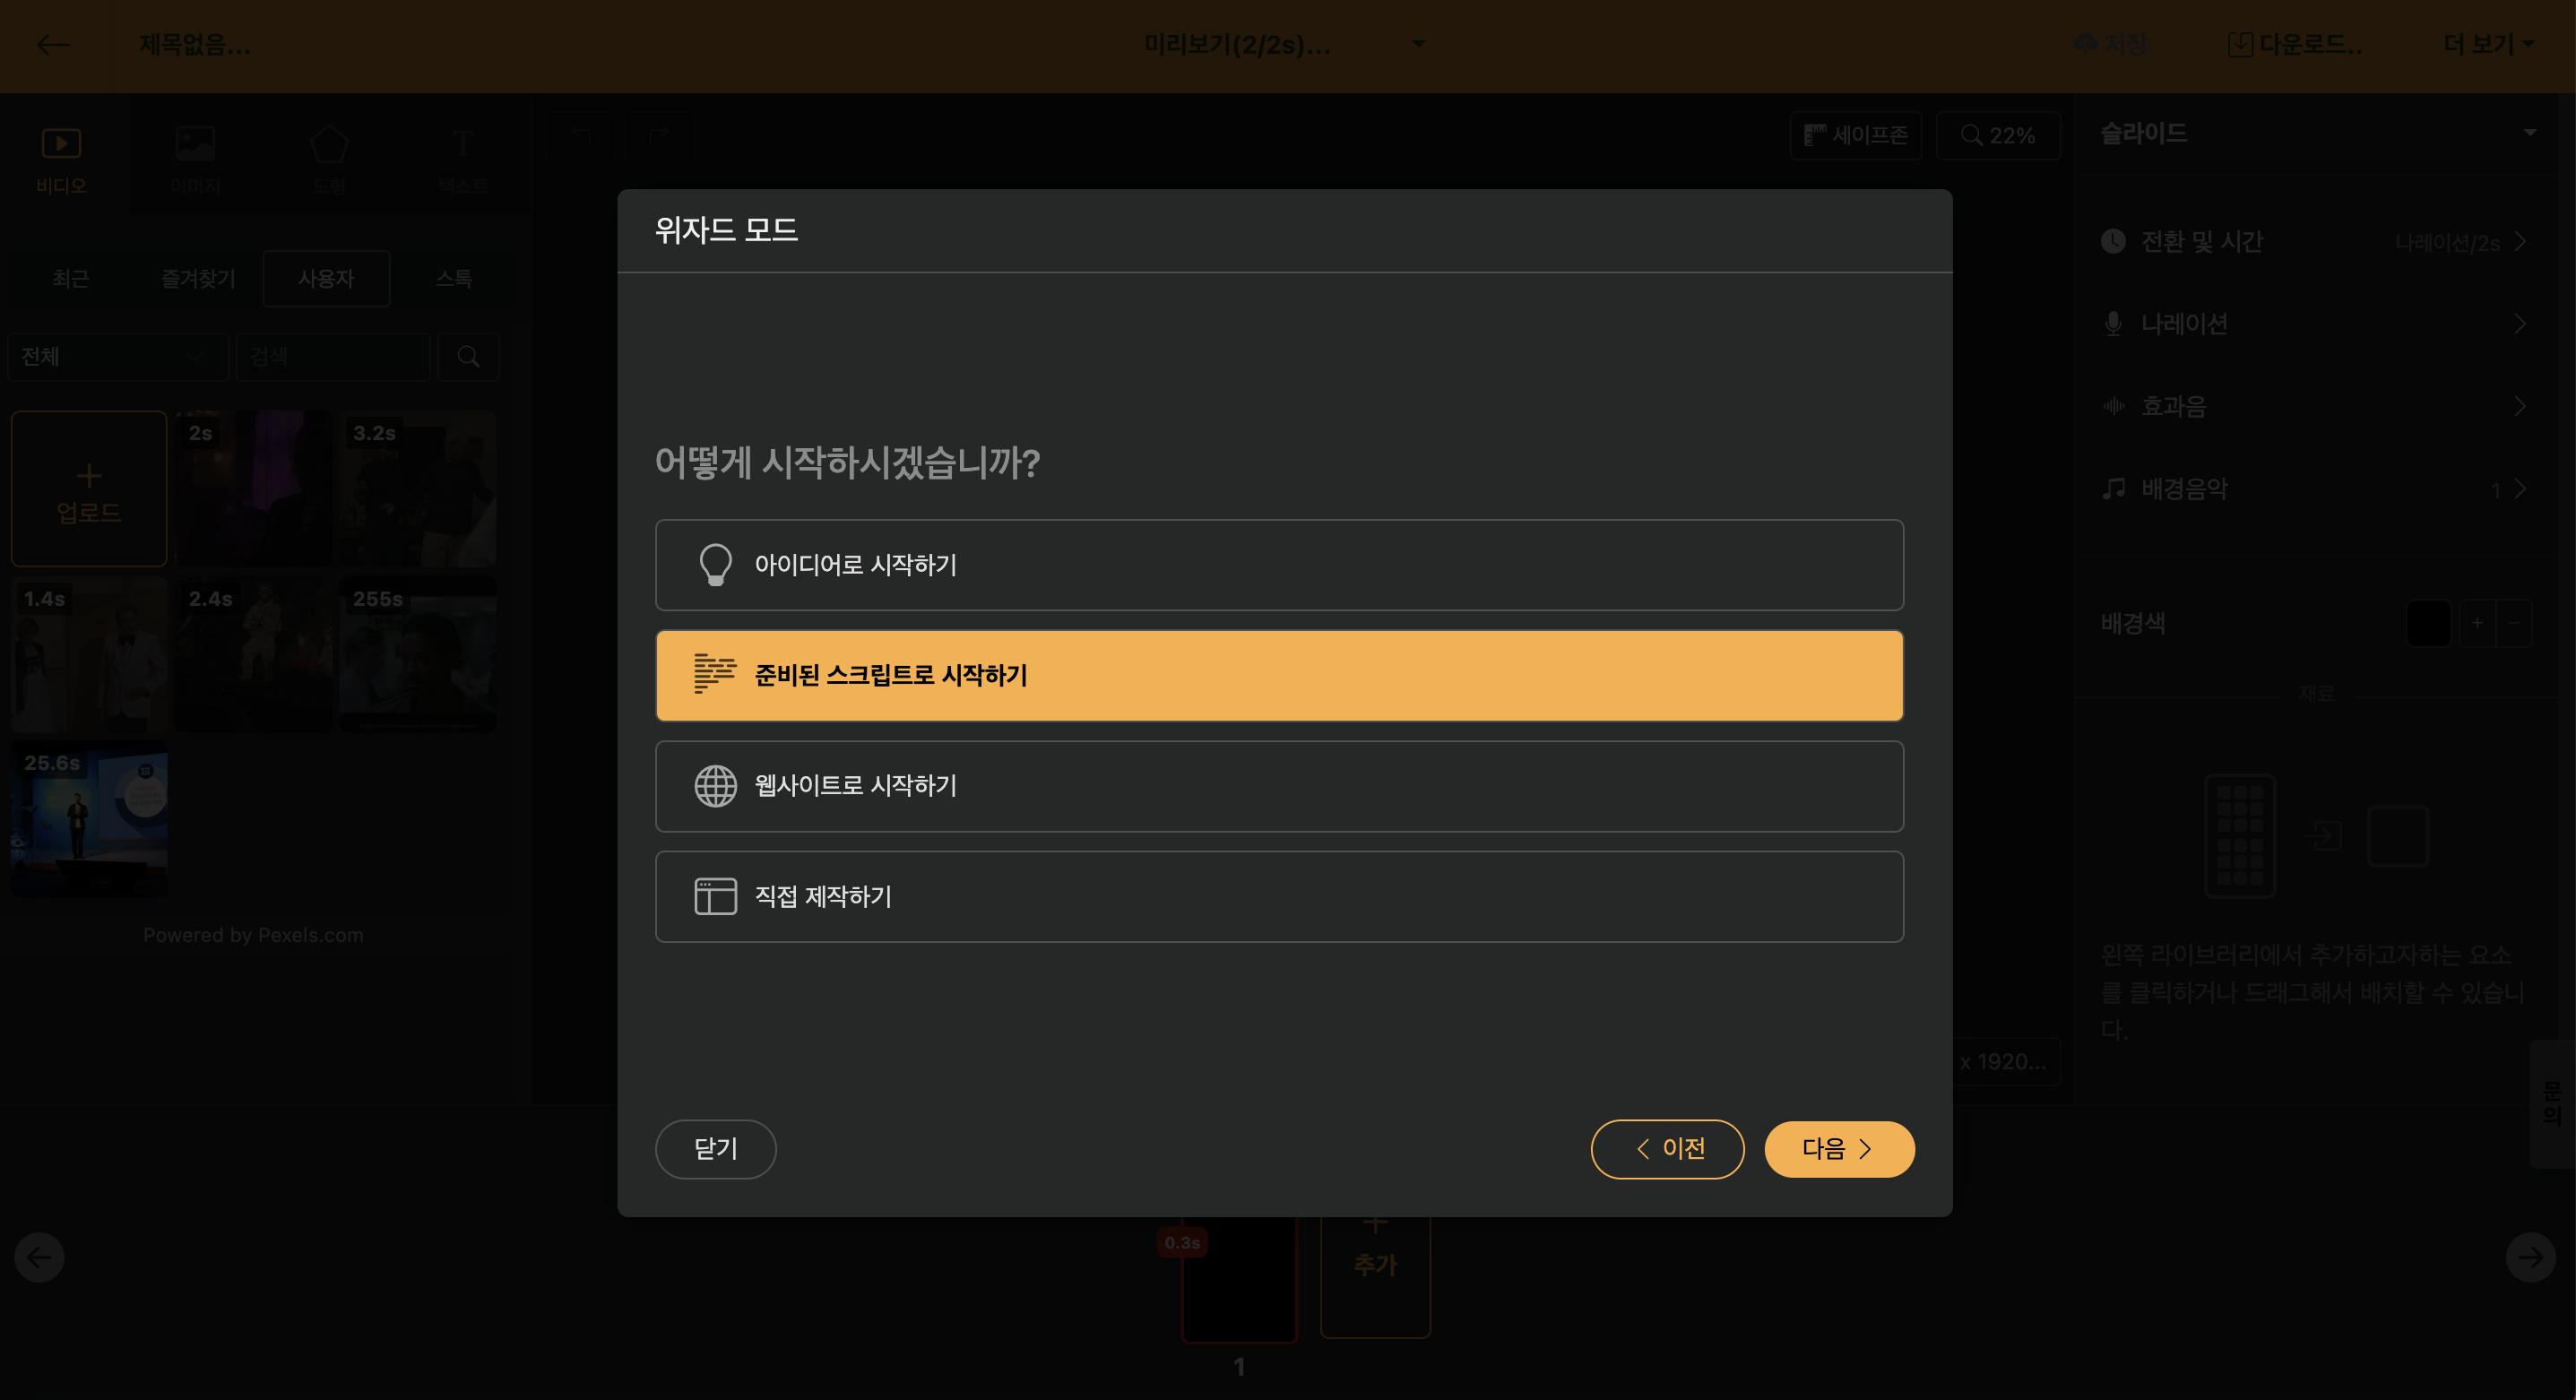
If you want to change the length, you can use the [Trim] function at the top right. This function changes the length while maintaining the style of the script entered by the user as much as possible.
Start with the website
You can start editing videos with the URL of a blog content or news article URL.
When you enter the URL, it fetches the text and images included on the website, and if needed, you can change the length through the [Trim] function.
Create directly
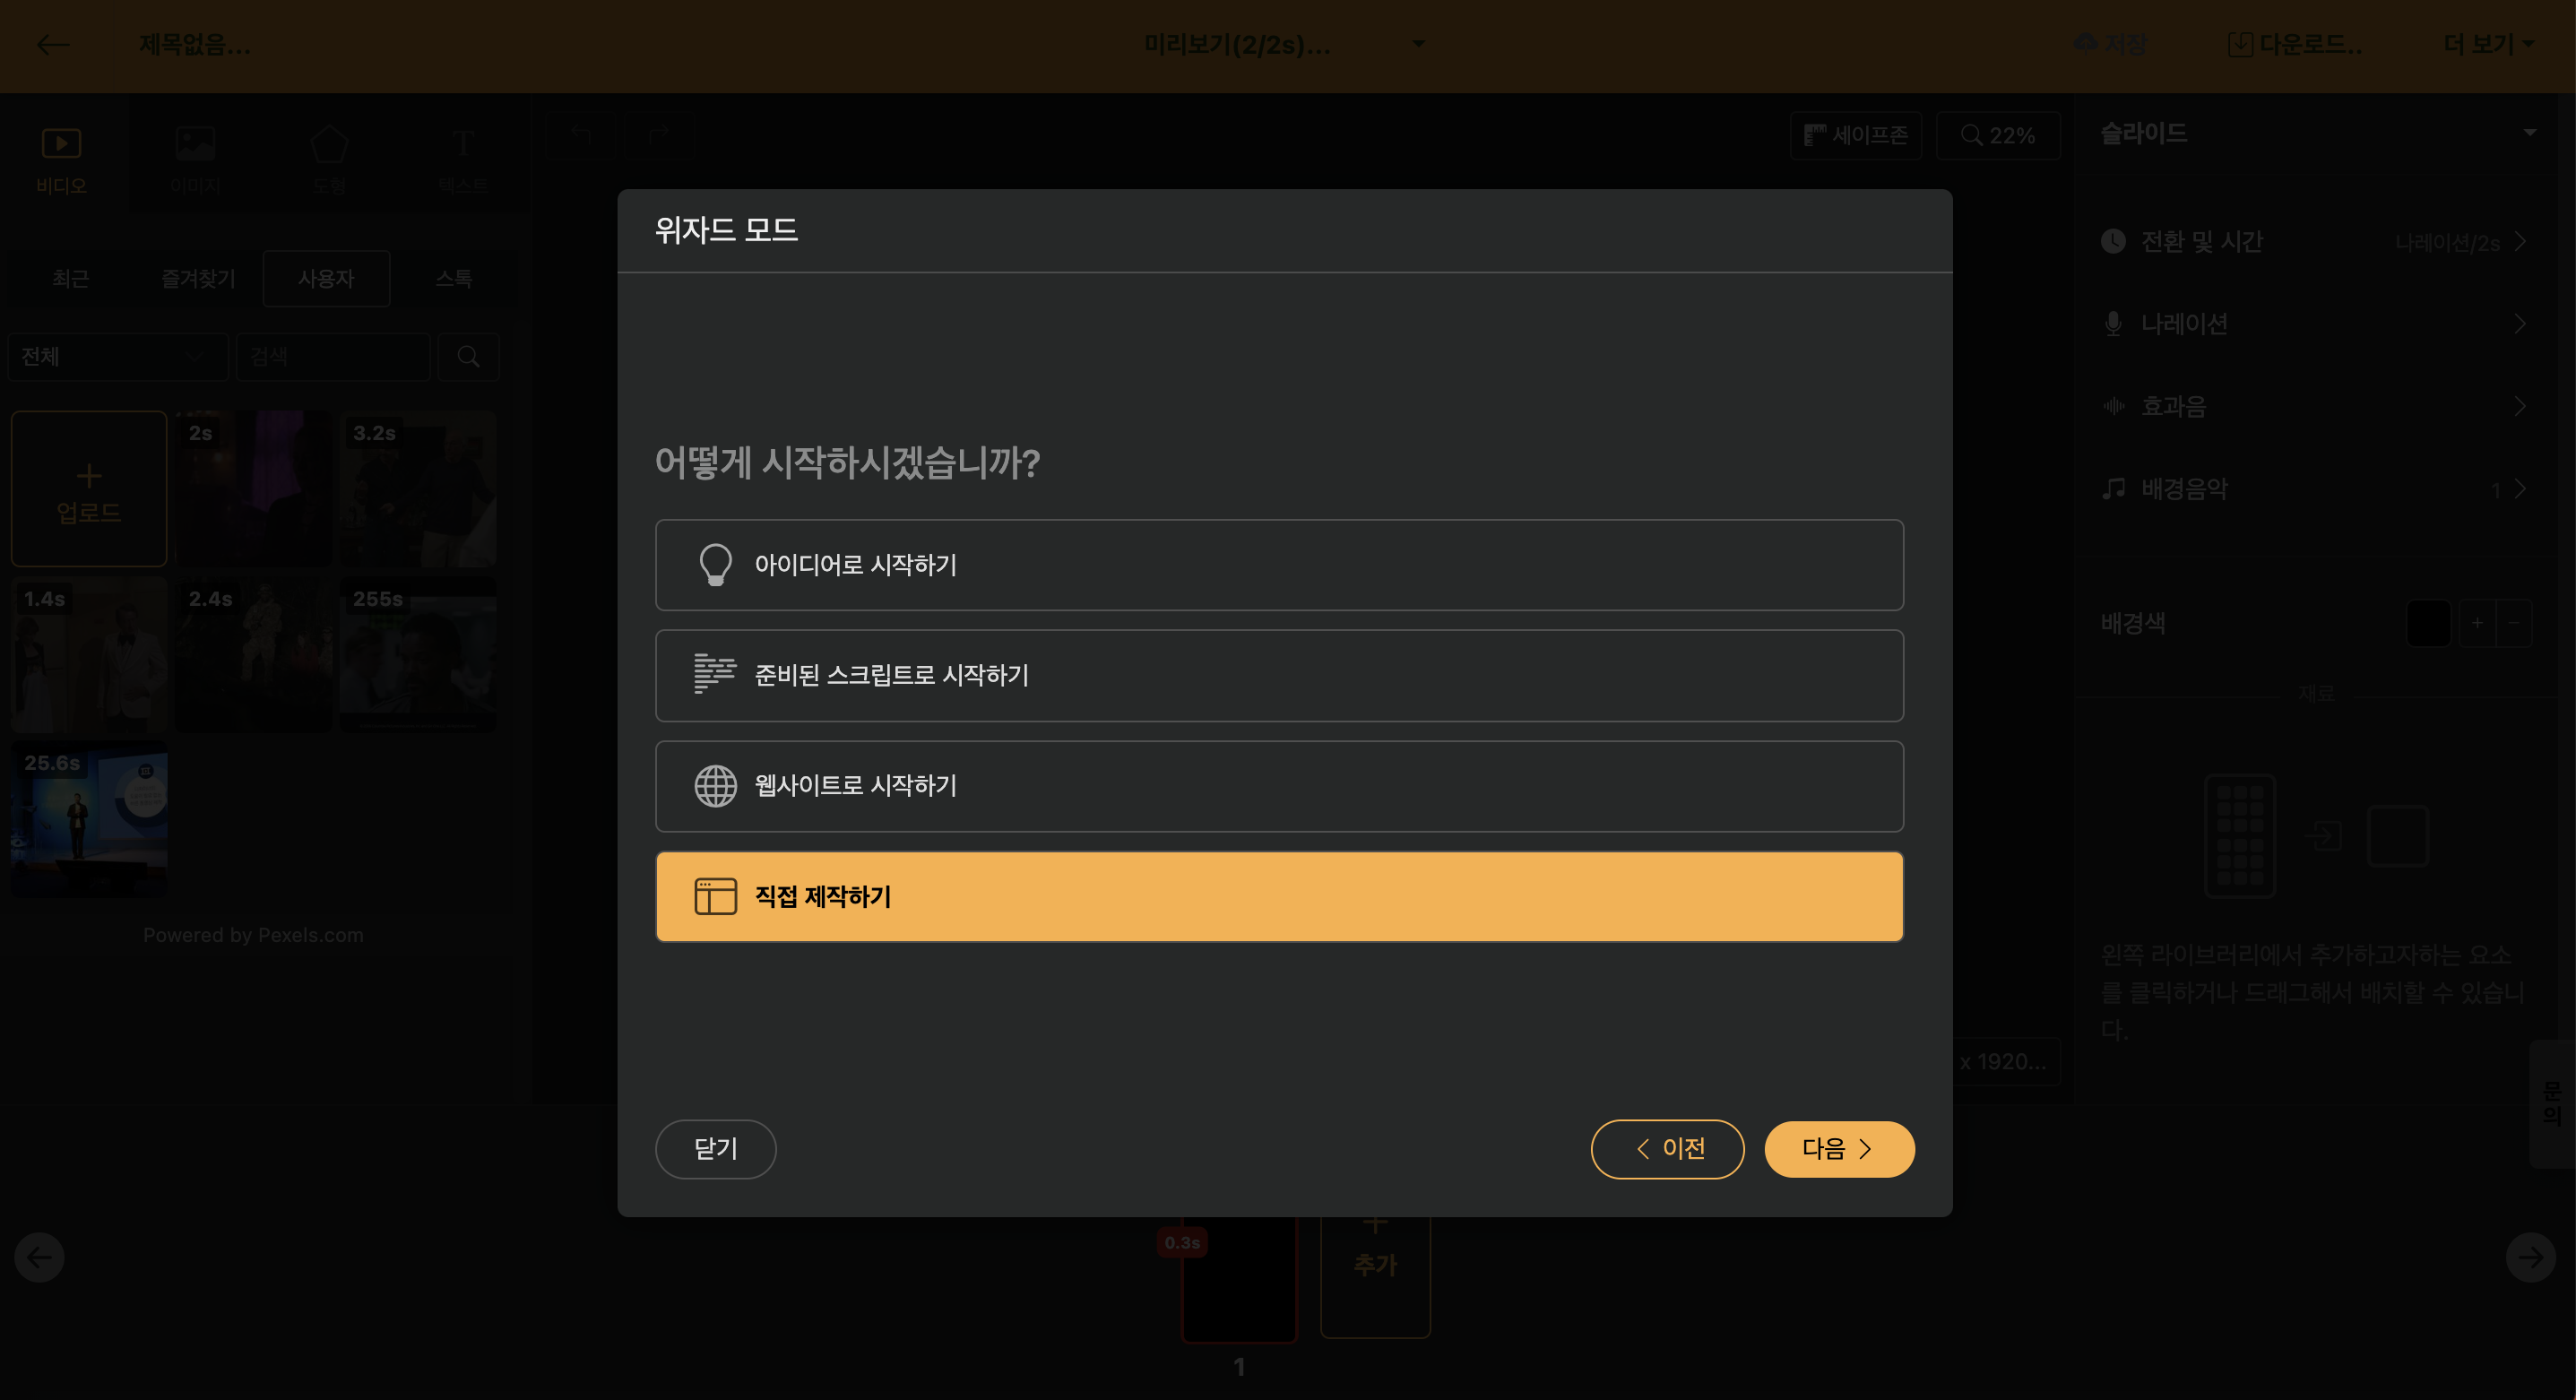
You can end wizard mode and start working directly in the editing screen. It is useful when creating intro and outro videos using Auto Animation or Language Learning Videos.
Select Widget Mode Template
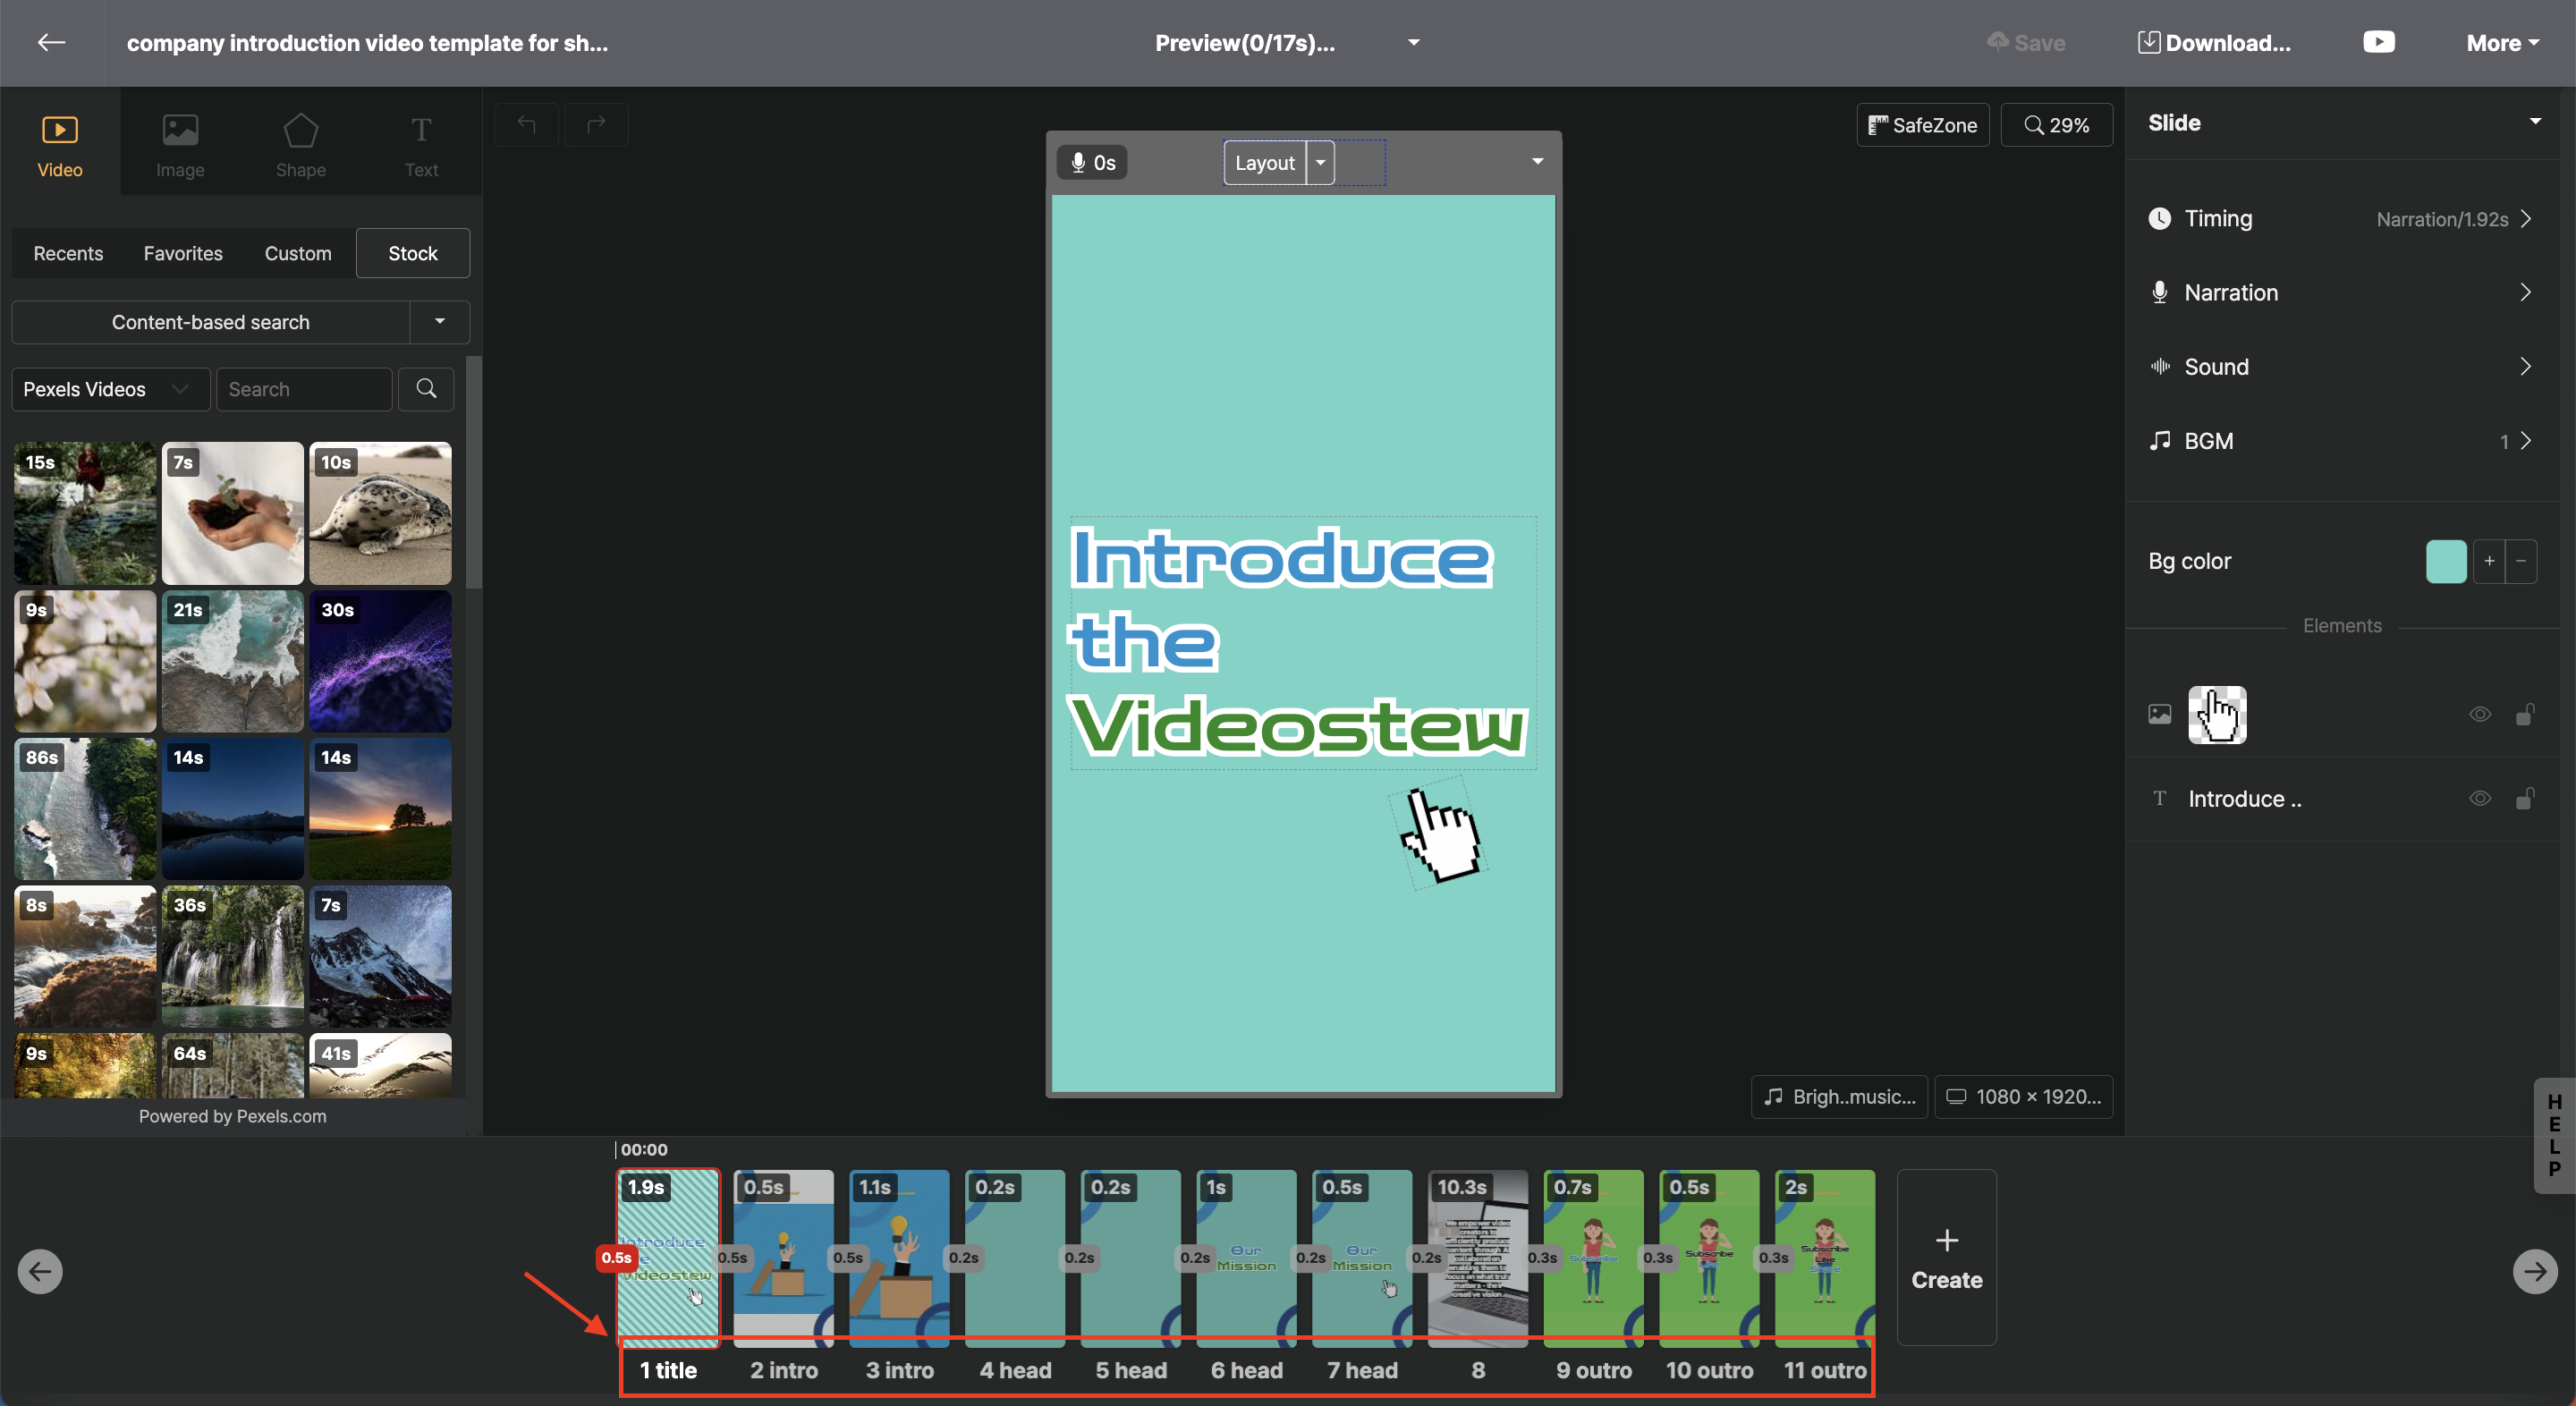
If multiple scripts have been created, the screen that allows you to select the template that will be applied afterward appears. After creating a script, the template, or stage, to which the script will be uploaded, is displayed.
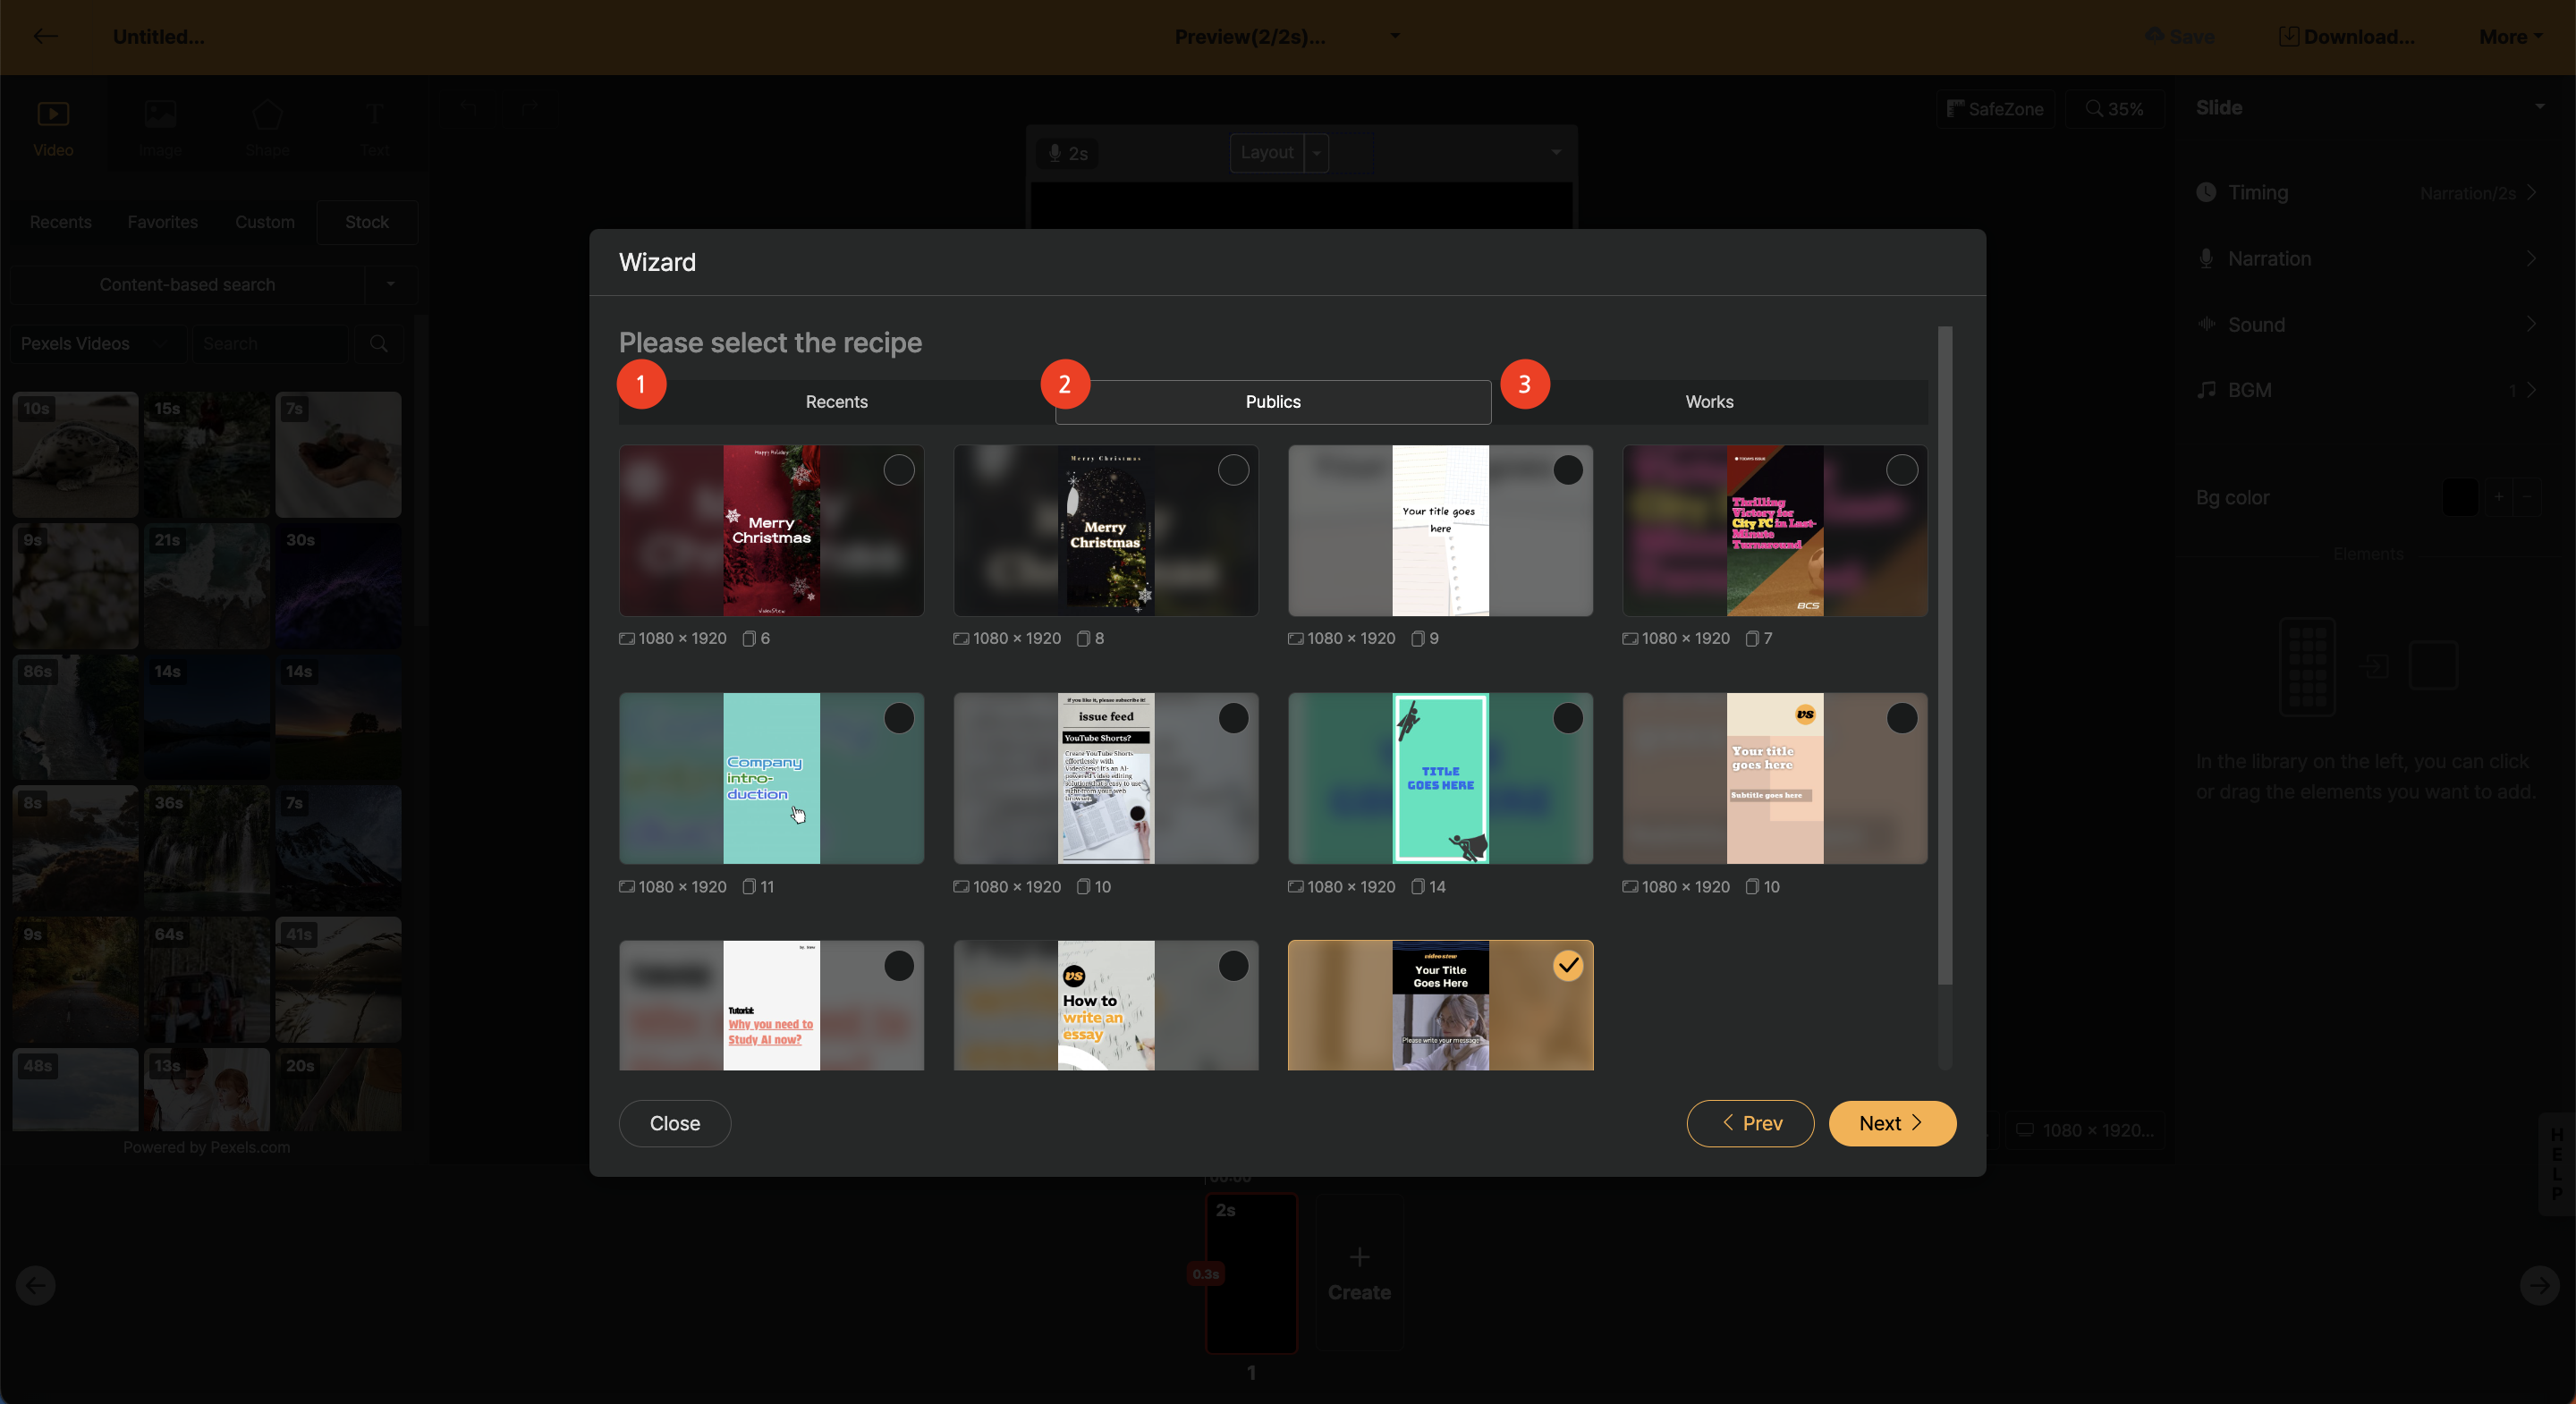
< Selecting a Template in Widget Mode >
- Recent: The most recently worked projects list is output.
- Basic Template: A list of basic templates provided by Videostew.
- My History: If you create and repeatedly use [My Template], all the projects you create will be listed here.
Detailed Settings for Widget Mode Template
In the final stage, you can view detailed information of the template to be applied and directly modify the necessary elements before proceeding to the editing screen.
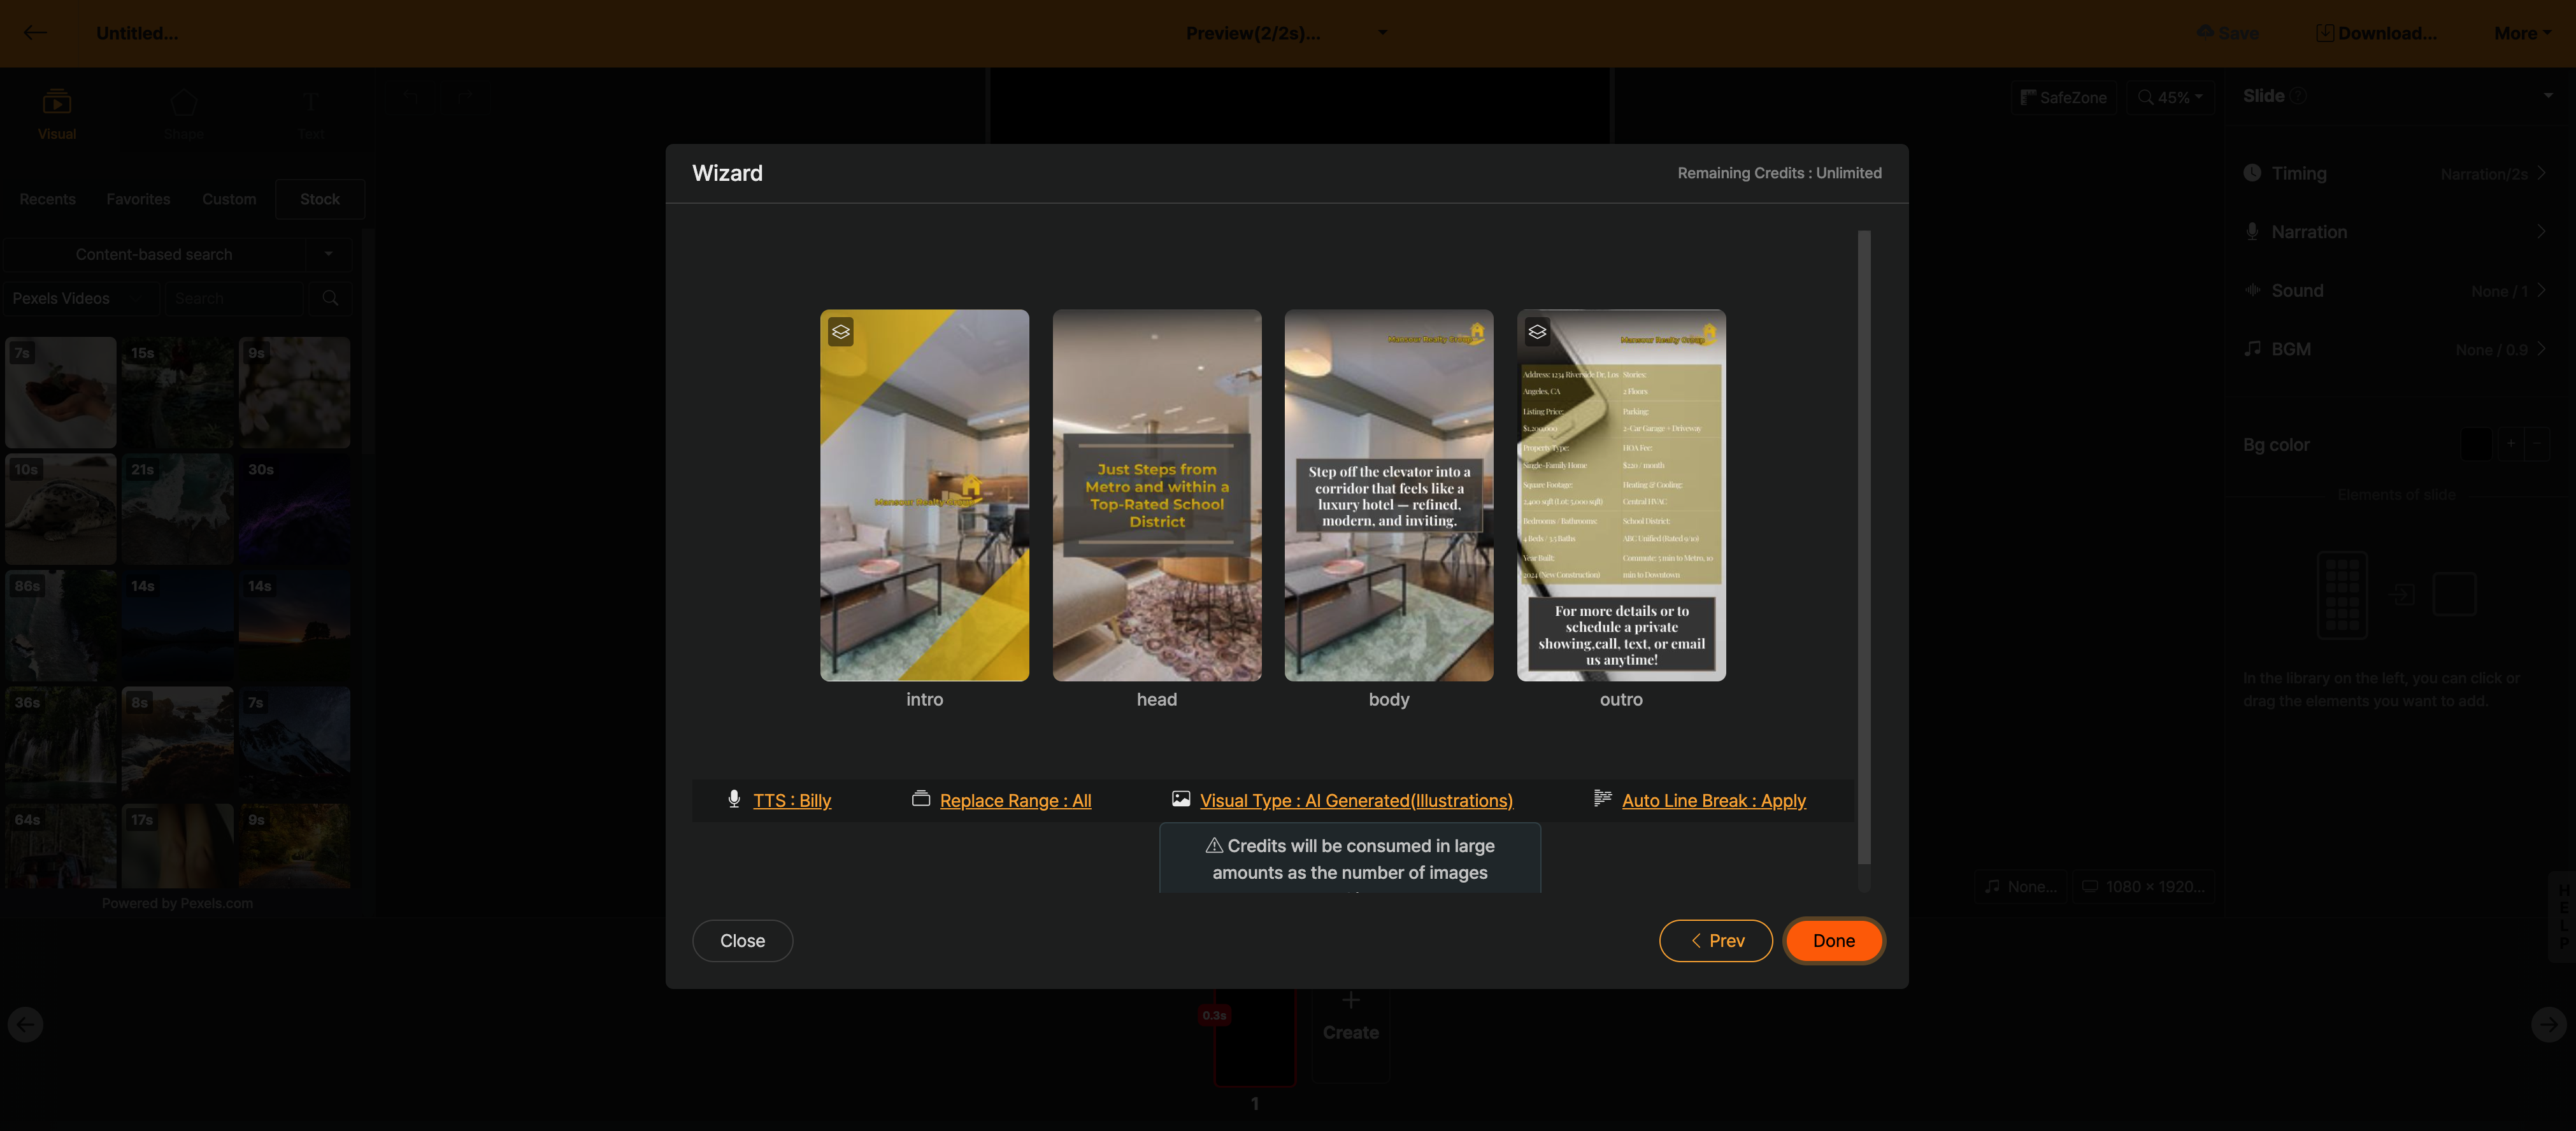
< Detailed Settings Screen for Template >
- AI Voice Actor Change: Switches the AI voice used in the generated project.
- Scope of Change: Choose whether to modify the entire template or only the actual body text. For example, if your template has an intro animation used consistently across multiple brand videos, set it to change only the body text.
- Stock Type: Select the kind of video/image library that best matches the content. You can let it auto-match the stock library to the content, or generate AI images tailored to each scene.
- Auto Subtitle Length: When a line break appears in [Text Entrance Effect] animations, the subtitle length is automatically adjusted to fit the screen. We recommend enabling this feature.
Utilizing Voice Recording Feature
Videostew allows you to record multiple voices directly or upload pre-recorded files for use instead of AI voice. Shall we look at each method?Record Yourself
Selecting 'Voice Recording' in the narration allows you to record voices immediately through your computer.
<3, 2, 1 After recording starts!>
When recording yourself, you can press the → key on your keyboard to continue recording into the next slide seamlessly. Think of it as naturally narrating while watching a PowerPoint slide. And once the recording is done, you can press the ESC key or click the "Stop Recording" button to finish the recording.
Utilizing Recorded Files
Uploading MP3 Files
If you have recorded using a different solution, you can directly upload the recorded file (MP3) to Videostew for use. After clicking "Navigation > Upload", press "Choose File" to select your MP3 file.
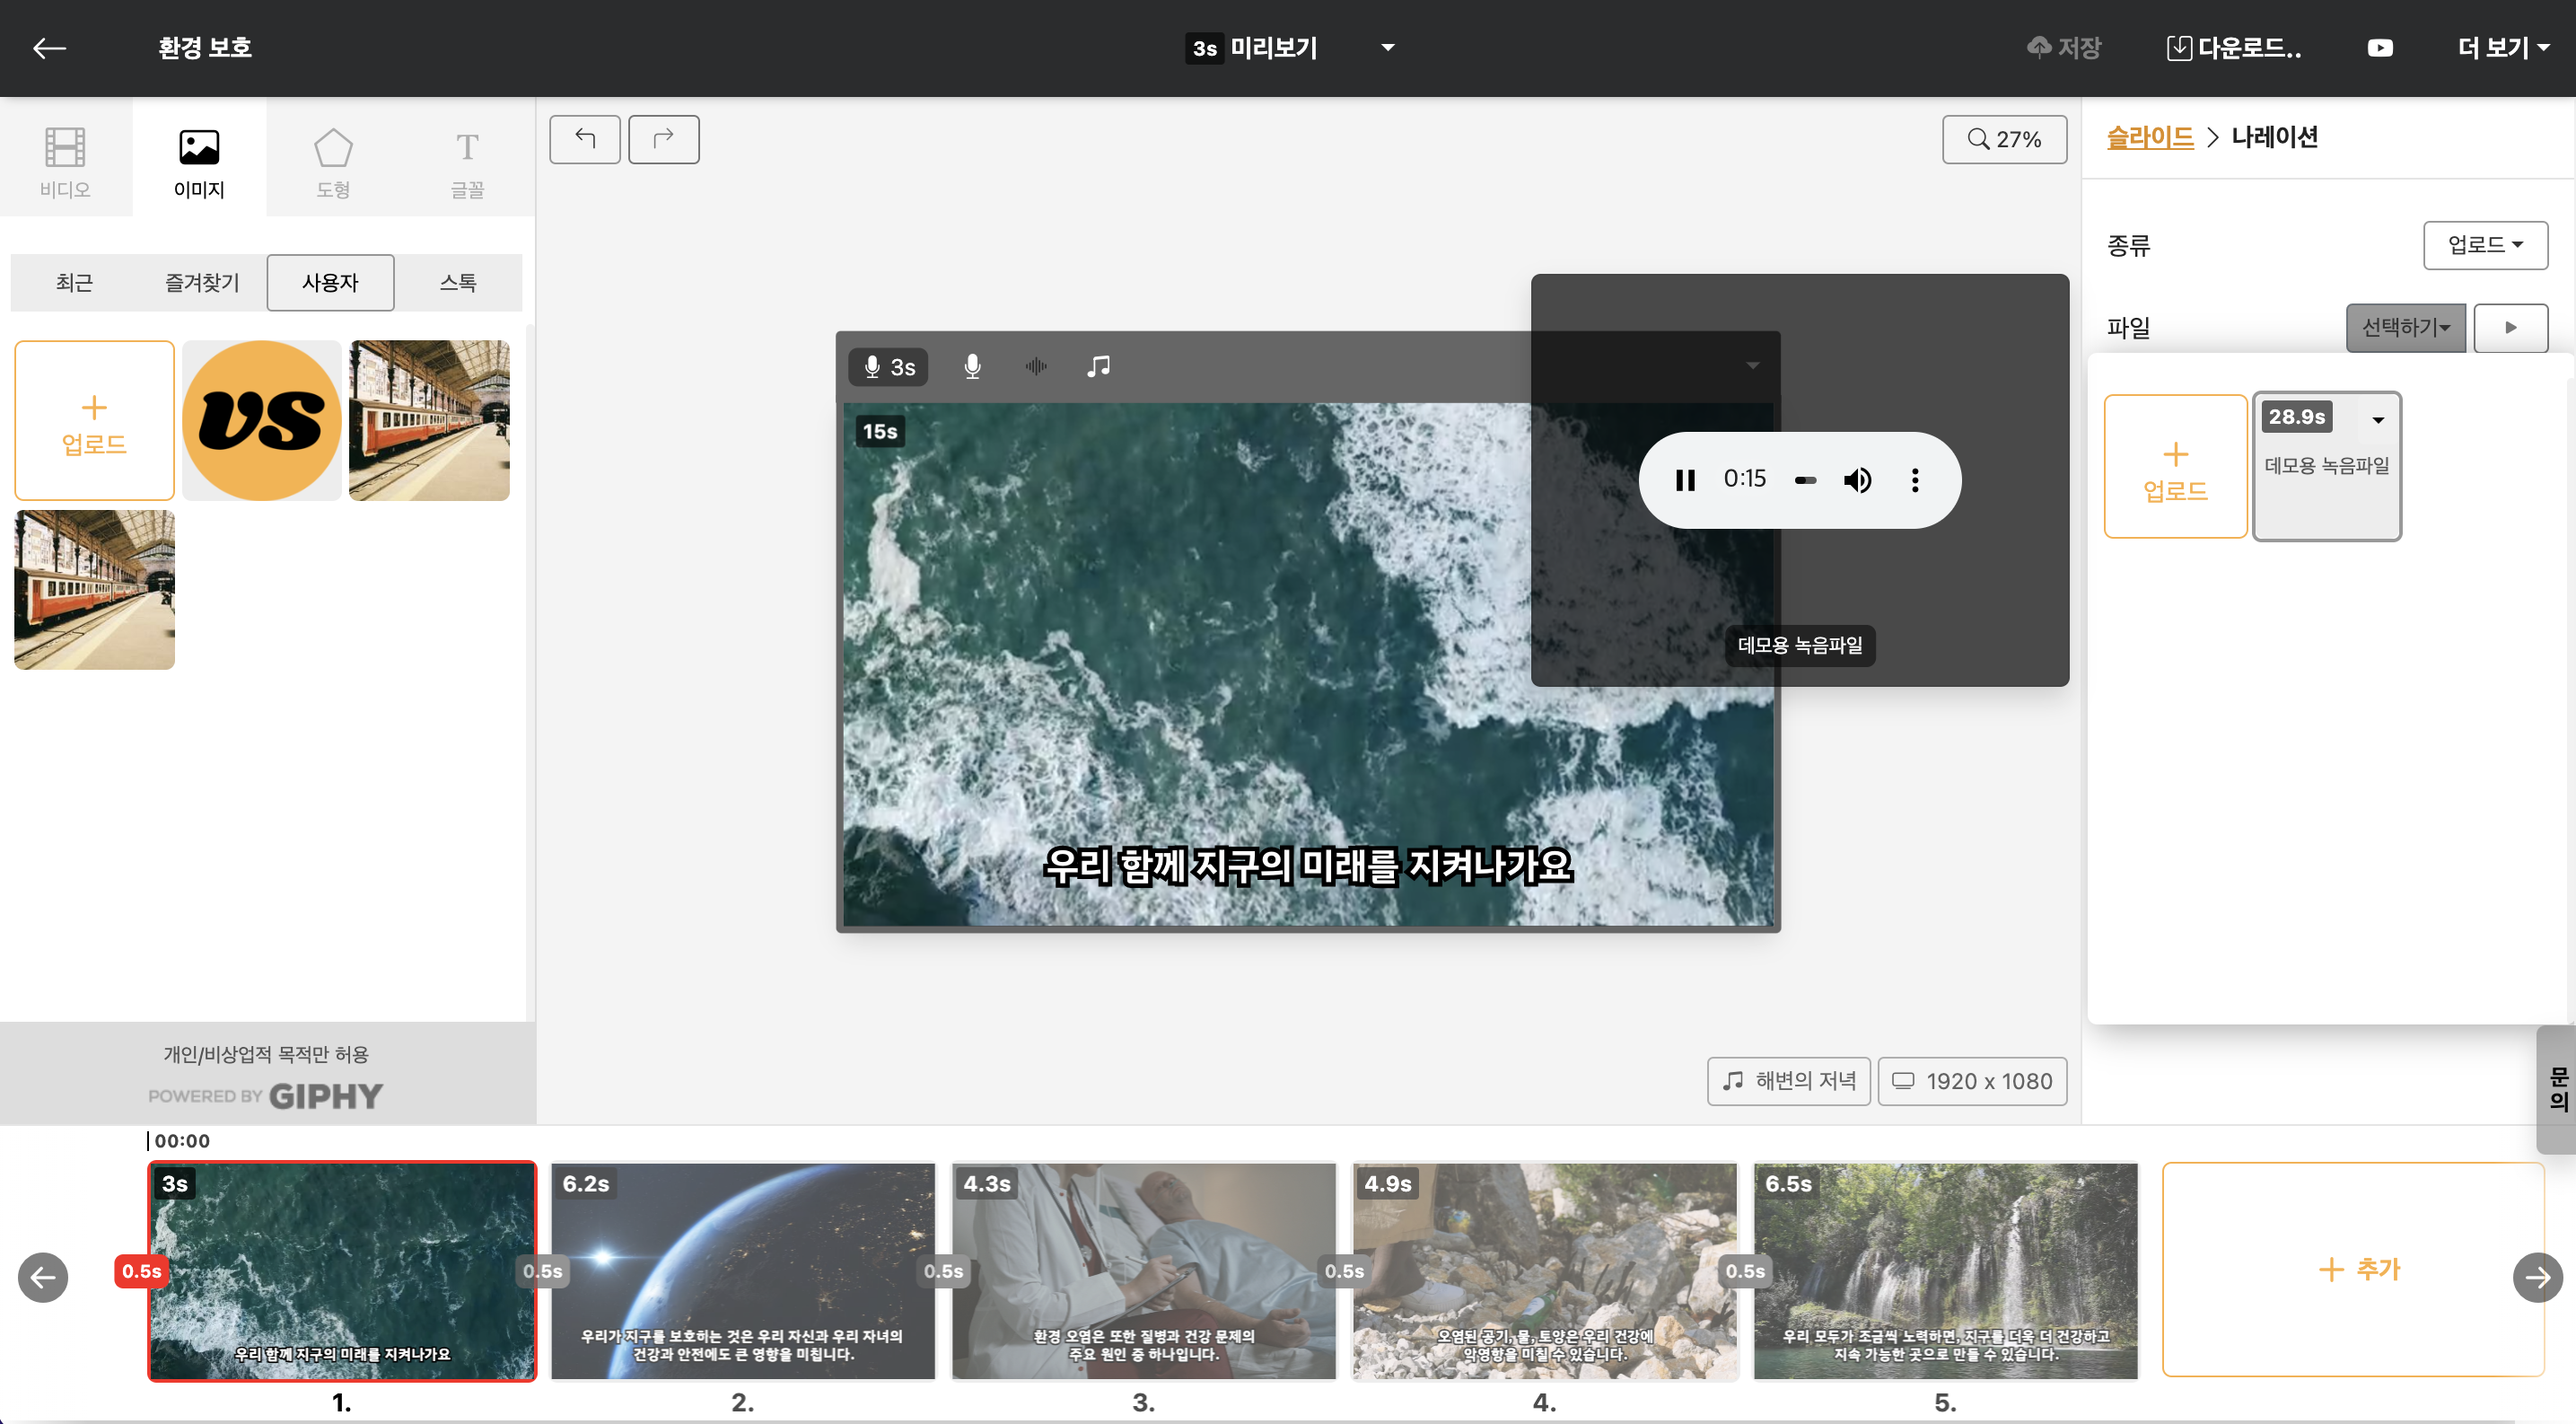
<Add User's Sound Files>
Applying Audio Files to the Entire Slideshow
In this guide, let's assume the MP3 file is not existing separately for each slide, but rather as a complete audio file for the whole presentation. First, select all the slides to edit at once and choose the uploaded audio file. However, the portions to be read for each slide have not yet been set.
So, for the next step, click 'All' next to 'Narration > Playback Interval' to set the 'Falling Interval' for each slide. Once the work is done, you can automatically check that each slide's duration has changed. The trimming method is detailed in [Playback Interval (Video Trim)], so please refer to that for confirmation.
Creating Automatic Captions
If it is an MP3 file with audio, captions will be automatically generated, and you can conveniently compose and edit slides according to the captions.
< Creating and Editing Automatic Captions >
Inviting Other Users to Workspace
Users with a Brand plan or higher can invite other users. This is a feature typically used for team projects or collaboration within a single brand channel. In addition to the invitation, the user can also utilize an individual workspace.
To invite another user to the workspace, go to “Workspace Settings(▼) > Edit” screen, enter the email address and press the “Invite” button. Please make sure to press “Complete” at the end for the changes to apply. Remember this.
< Invite another user to the workspace >
The invited user is provided with a "Default Workspace" that can be used exclusively by the respective user, apart from the cooperative workspace. It is also possible to share work materials through the project copy and transfer functions to the cooperative workspace.
How to Use Auto Animation
Videostew recognizes changes between each slide and creates animations. Generally, you can utilize this when creating intro or outro templates that require flashy movements. Please refer to the following two videos for how to use auto animation.
< Creating an animation like flipping through photos >
< Making a typographic video >
Shall we take a closer look at how to use auto animation?
Add Project
First, click the Add Project button at the top left of the home screen.
< Click the Add Project button >
[Wizard mode] will skip the setup and start "Immediately".
< Click Start Immediately on the bottom left >
Inserting an image into the first slide
You'll see an empty slide like the screen below. Let's insert a "shape" element here. After searching for any element, click it to insert into the Editing Window.

< Click to insert element >
Adding a Transition to the Second Slide
Now, click the "+ Add" button in the Slide Window at the bottom right to duplicate the first slide. Then, we will reduce the size of the elements in the second slide and arrange them in a grid.
Setting Transition Effects and Duration
Next, set the [Transition Effect] to "Auto" and the [Transition Duration] to about 2 seconds. When in "Auto" mode, the auto-animation will be generated because the system operates the animation automatically. Here, applying 2 seconds means that the movement for the second slide will be created over the duration of 2 seconds when it starts.
![]()
And if you try the preview in advance, you can confirm that the image element shrinks and moves towards the bottom right over 2 seconds in the animation that has been created.
Animations only operate when the same element is on multiple slides. Even if it's the same image, if you have uploaded it several times, it may be treated as a different element, so please be careful. If you are sure that it is the same element but the movement is not applied, please check if the [Transition Effect] is set to "Auto" or if the [Transition Duration] is more than 0 seconds.
Apply Easing
You can try out various "transition effects" from simple movements to common animations. If you look at the bottom of the "Playback Time", you will see a message that says "Transitions are applied to the entire project, currently [OutExpo]," along with a "Change" button. Here, you can set up different movement effects.
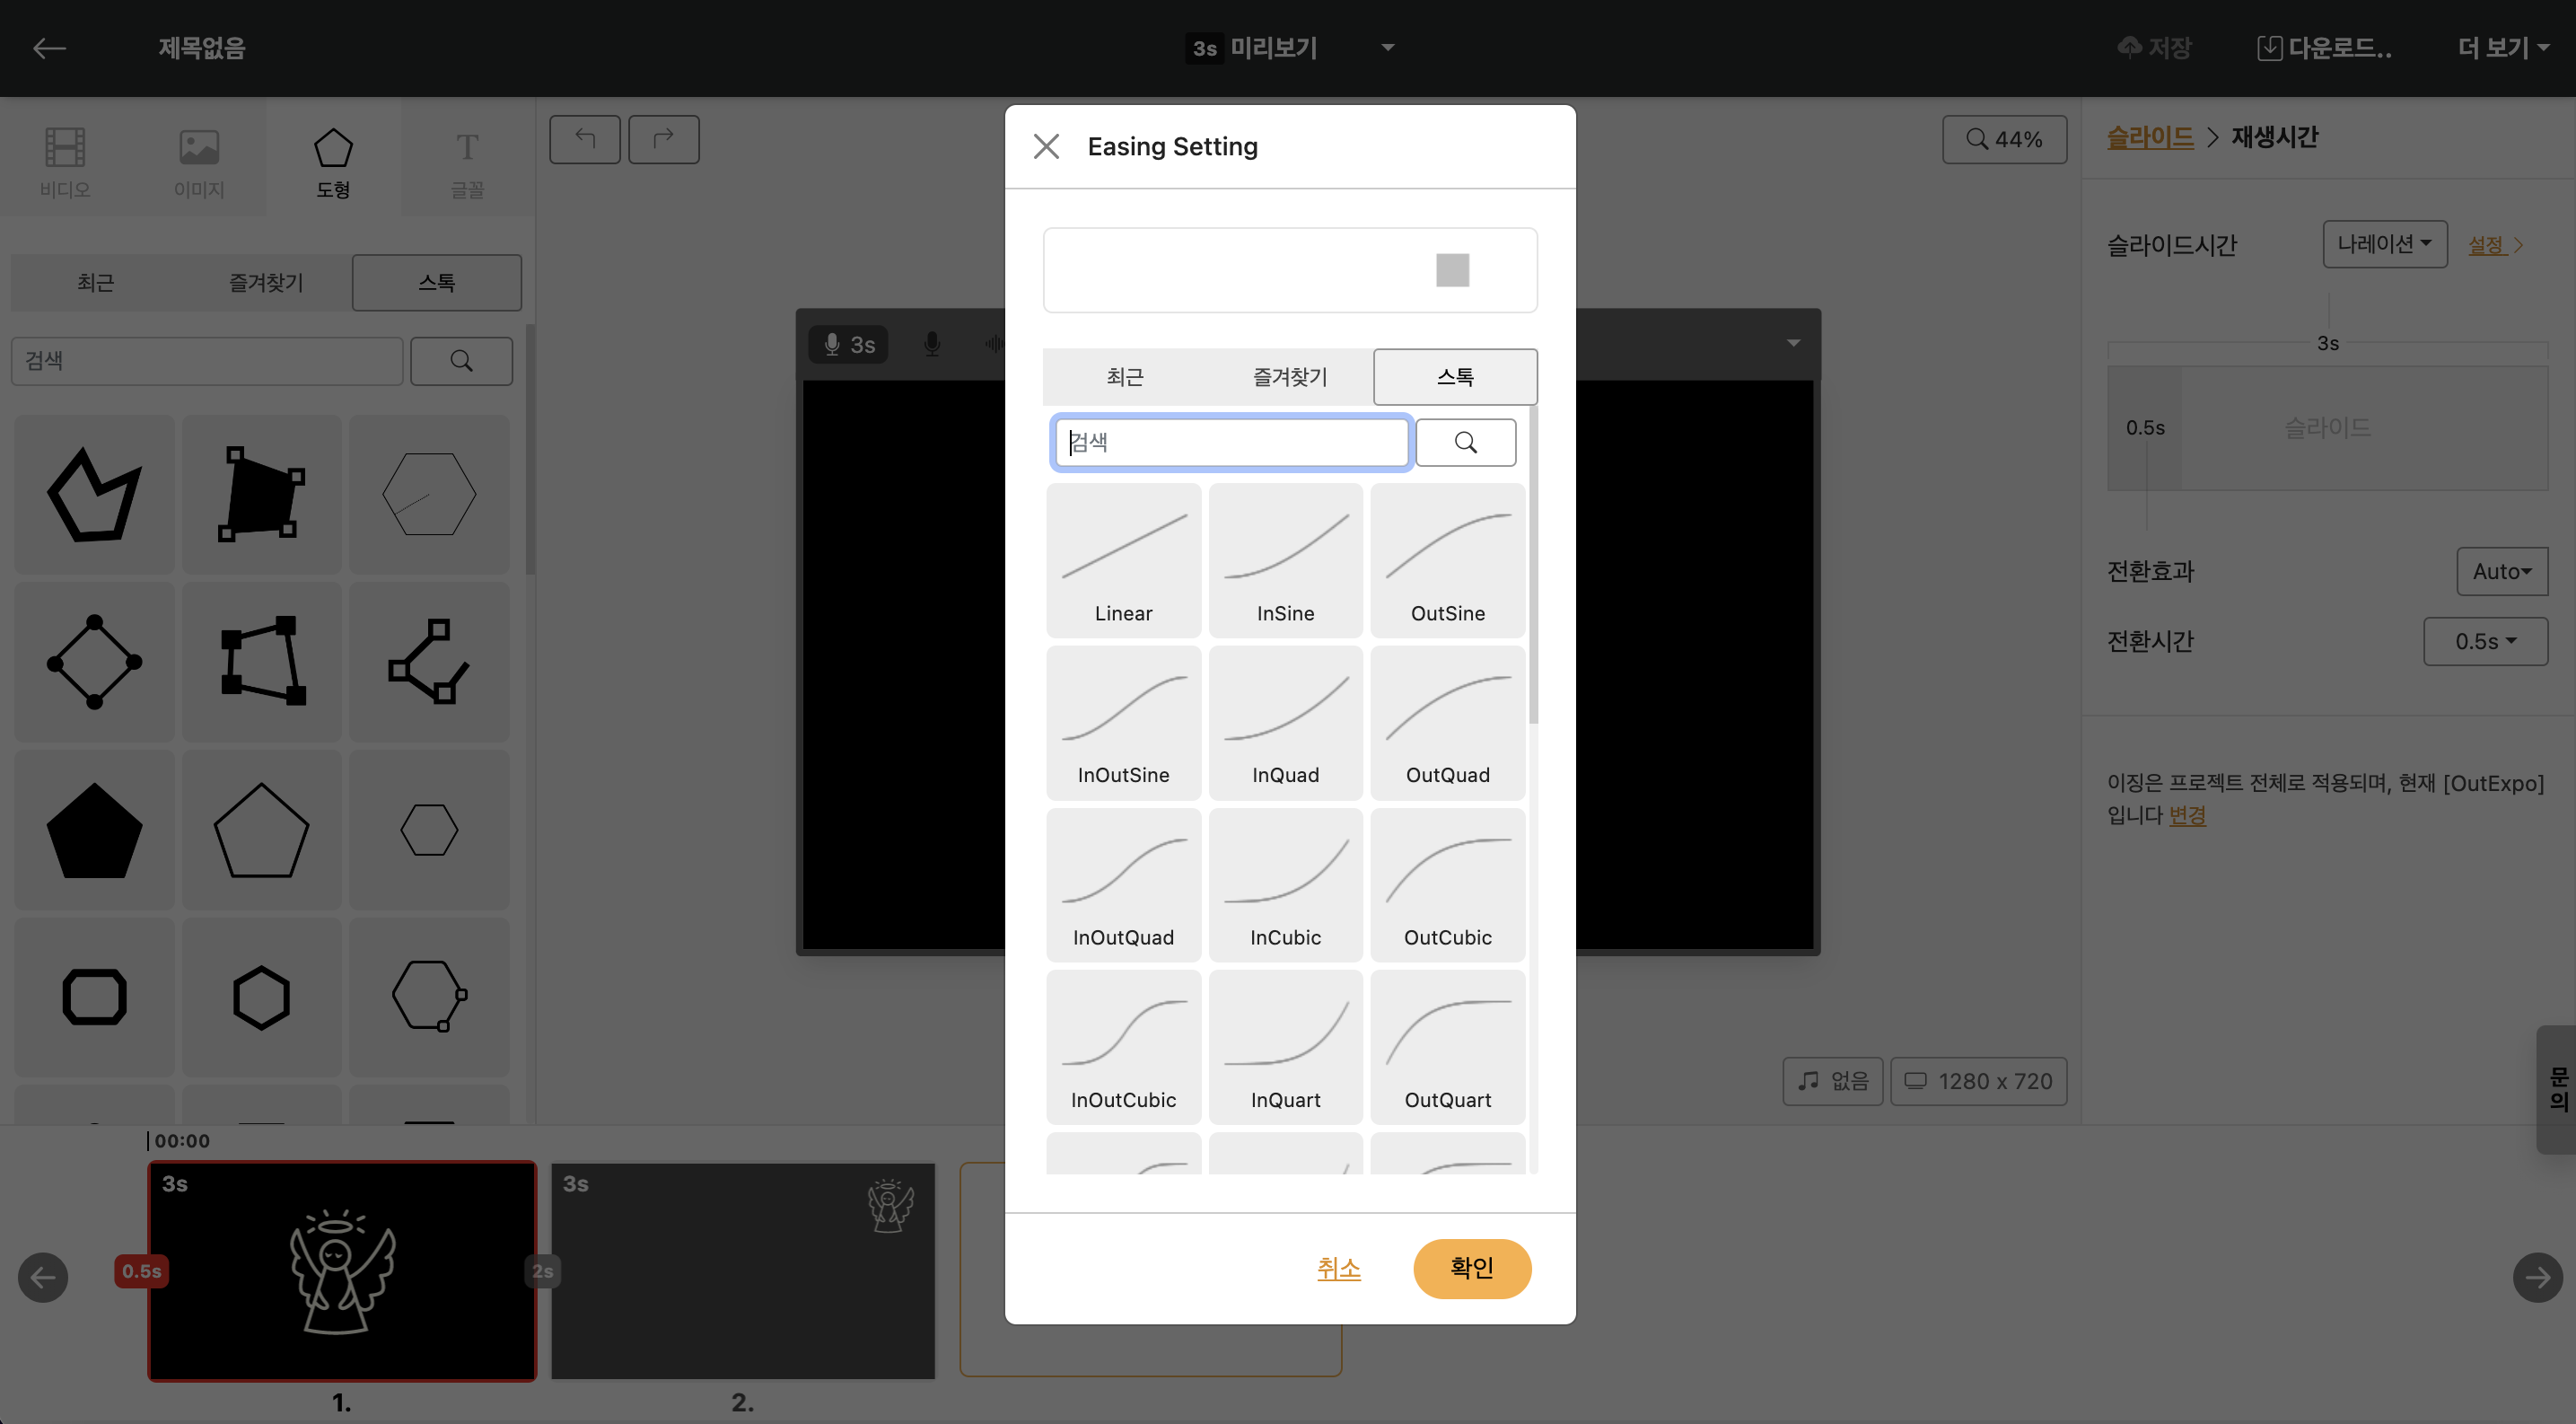
While holding the mouse, you can preview how the movement will be realized. Try setting different effects and previewing them to find the movement you want.
Creating Thumbnails
In Videostew, you can designate a specific slide as a thumbnail and download it as an image file. When set as a thumbnail, it is included in the video file itself and is automatically reflected when uploading to YouTube.YouTube Shorts does not yet support thumbnails. Therefore, you cannot use a custom thumbnail for YouTube Shorts.
Setting a Slide as a Thumbnail
Click on the settings (▼) at the top right corner of the slide and press the "Set as Thumbnail" button. The slide set as a thumbnail will also be used on the Home Screen, making it convenient to find your created works.
Downloading slides as image files
Click the settings (▼) on the upper right side of the slide and press the “Download” button to save the image file to your computer.
Creating My Template
In the editing screen, you can enter keywords like intro or outro into each slide note to create reusable templates. These templates with predefined slide notes will remain as they are when [starting with widget mode], so if you create intro or outro videos that fit my channel in advance, it becomes easier.
< Set layout-specific objectives using slide notes >
Specifying Slide Notes
First, create a new project or open a project that you have already worked on. The first thing to do is to specify slides that will be repeatedly used as intros and outros, as well as the thumbnail images. When you click the number in the Slide Window, the 'Slide Note' menu appears. Here, you can assign the role for each slide.
The available slide note types are as follows.
| Code | Role |
|---|---|
| title | Specify the first slide of the project for the thumbnail. It will not be included in the actual video as it is excluded from rendering. |
| intro | Use to display the channel logo or convey important core messages |
| head | A slide for expressing transitions between scenes or the sequence of first, second, etc., in the middle of content |
| body (optional) | A new script will be applied to the slide |
| outro | Placed at the end of the project and used for CTA (likes, subscription requests) |
When using the [start with this template] function from my past works, if no slide note like intro or outro is specified, the [wizard mode] will not be invoked. If it's a template that doesn't use separate intro or outro, a slide named body is needed.
Start editing videos with my templates
The way to start video editing by inserting a new script into a template made just for me is in two ways.
Select My Past Projects in Wizard Mode
When you start a new project, you can begin editing your video by entering the title and content through the wizard mode. At this time, if you select my works in the final step, you will see the projects that you and others have edited in the past.
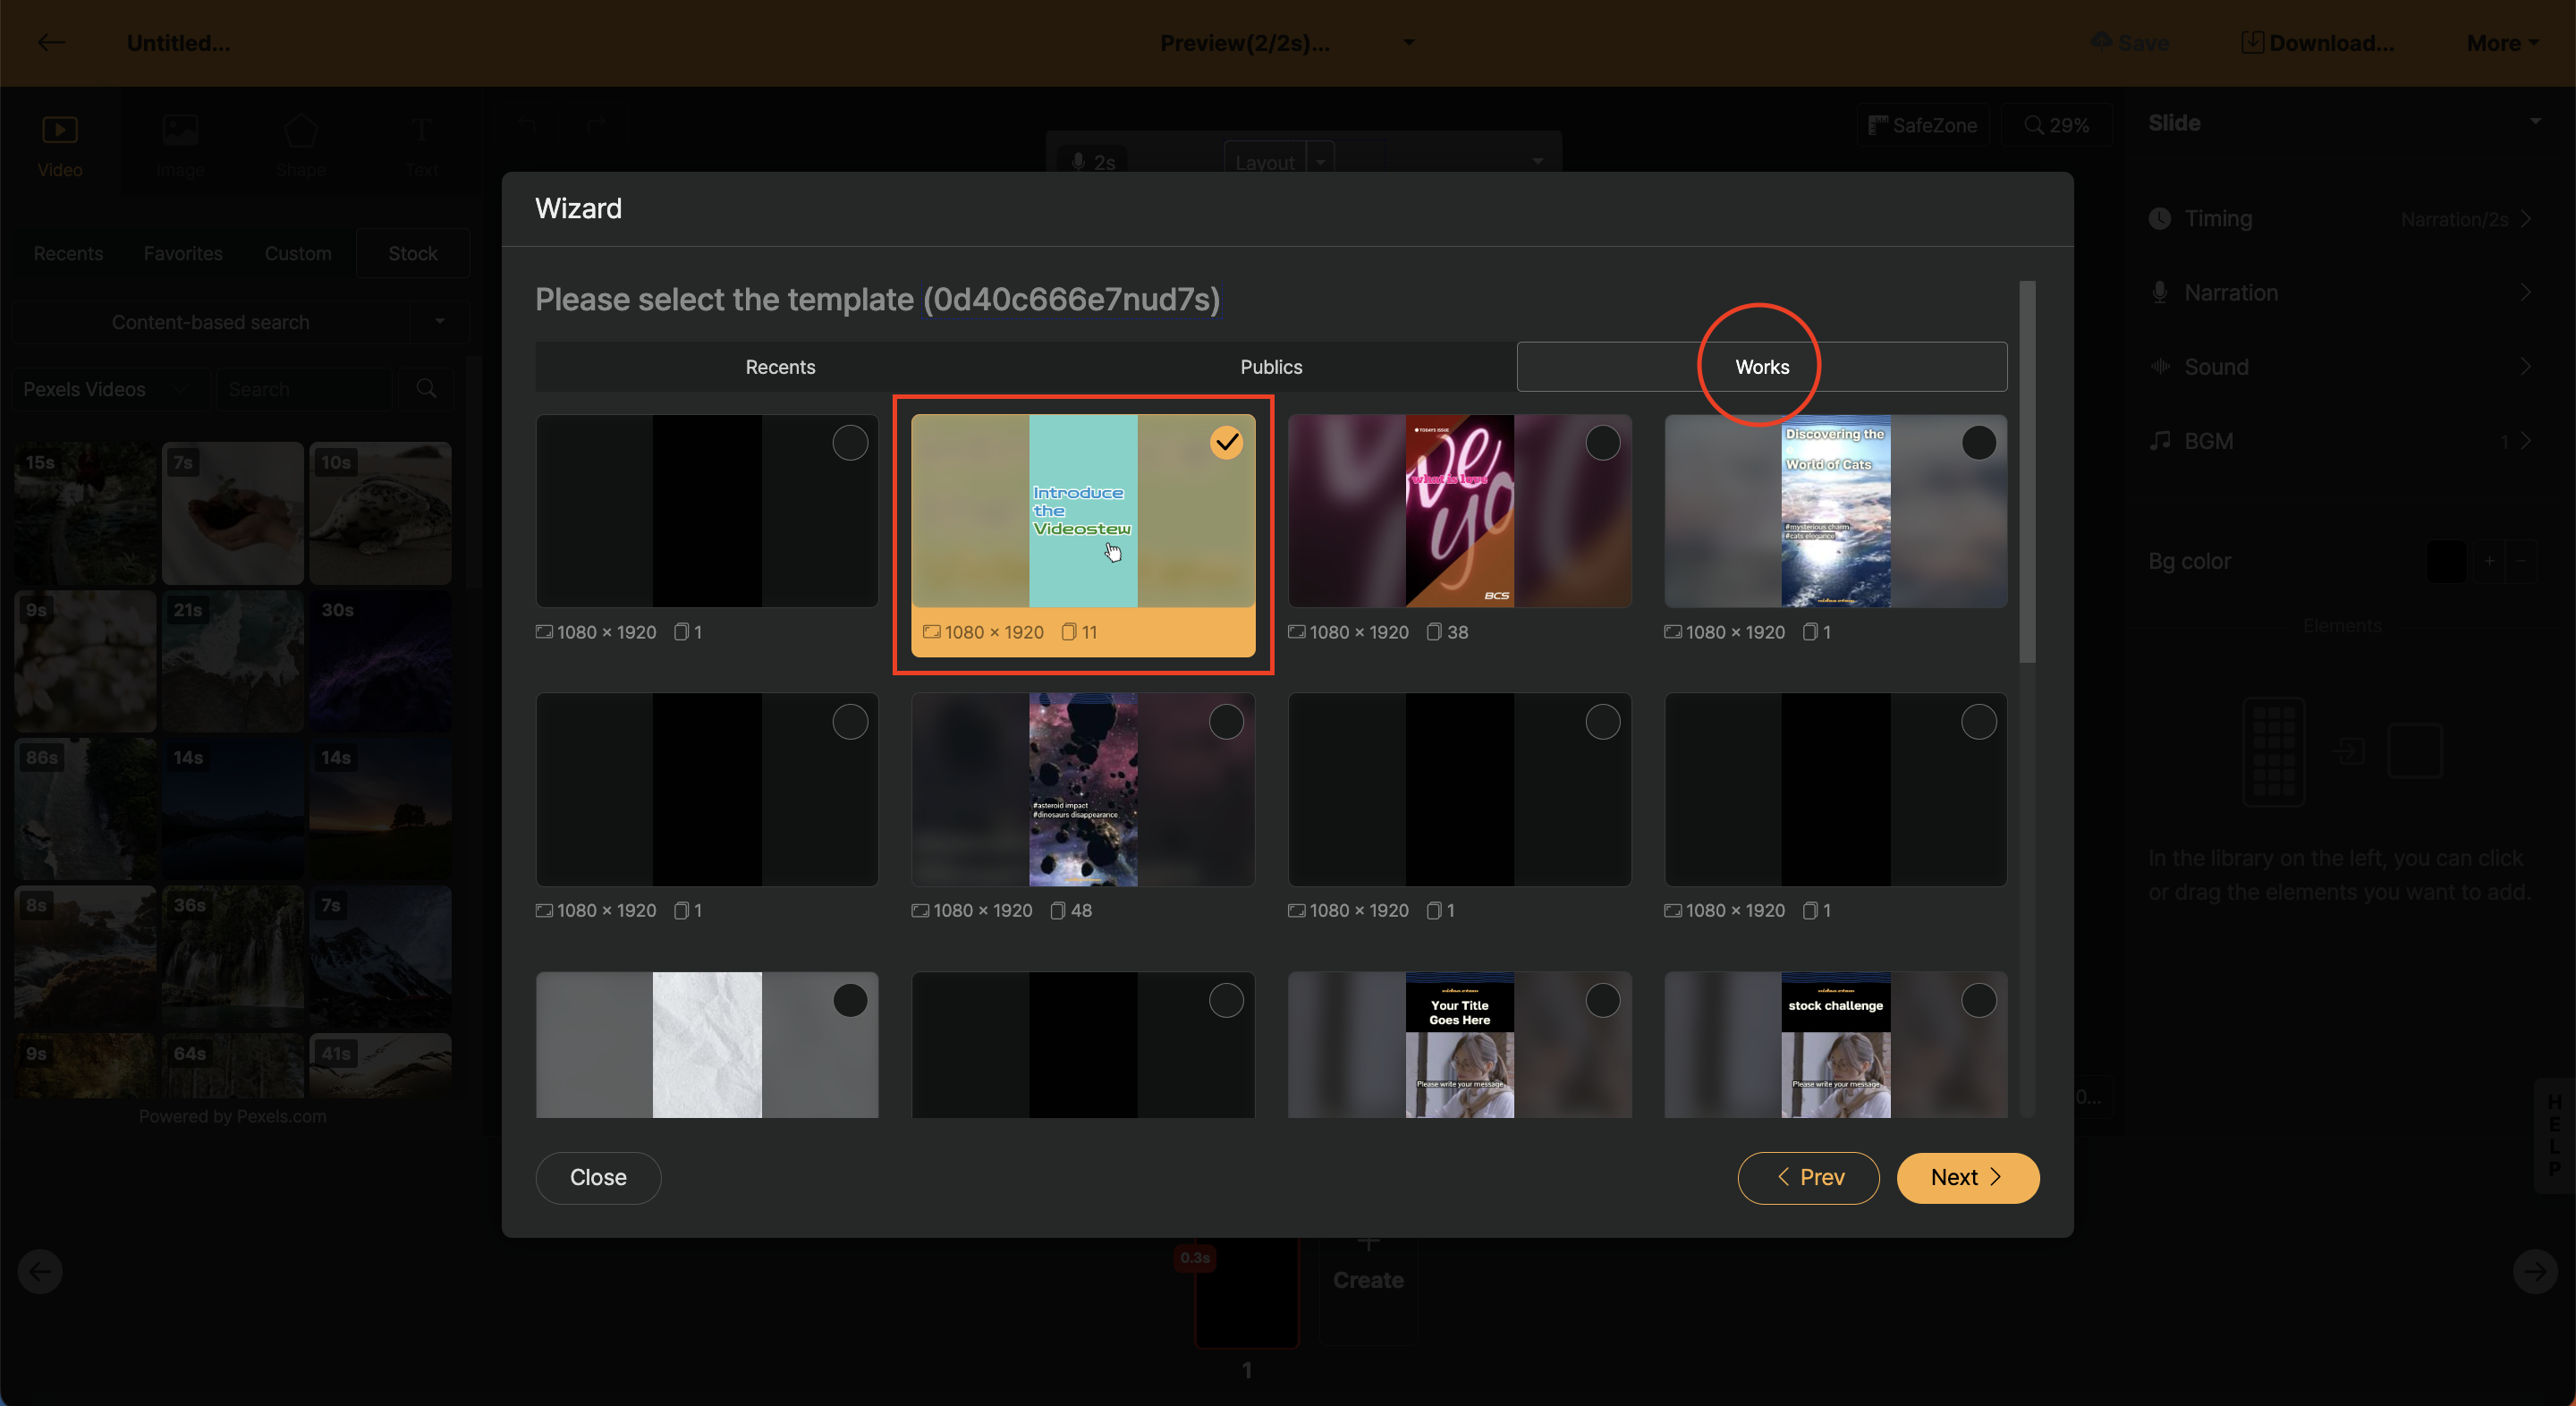
You can choose a project that will be utilized as a template among these.
Start video editing easily with a template from My Project List
The second method is to open the drop-down menu of the projects you want to use as templates in the project list and start the project immediately with the Start with this template function.
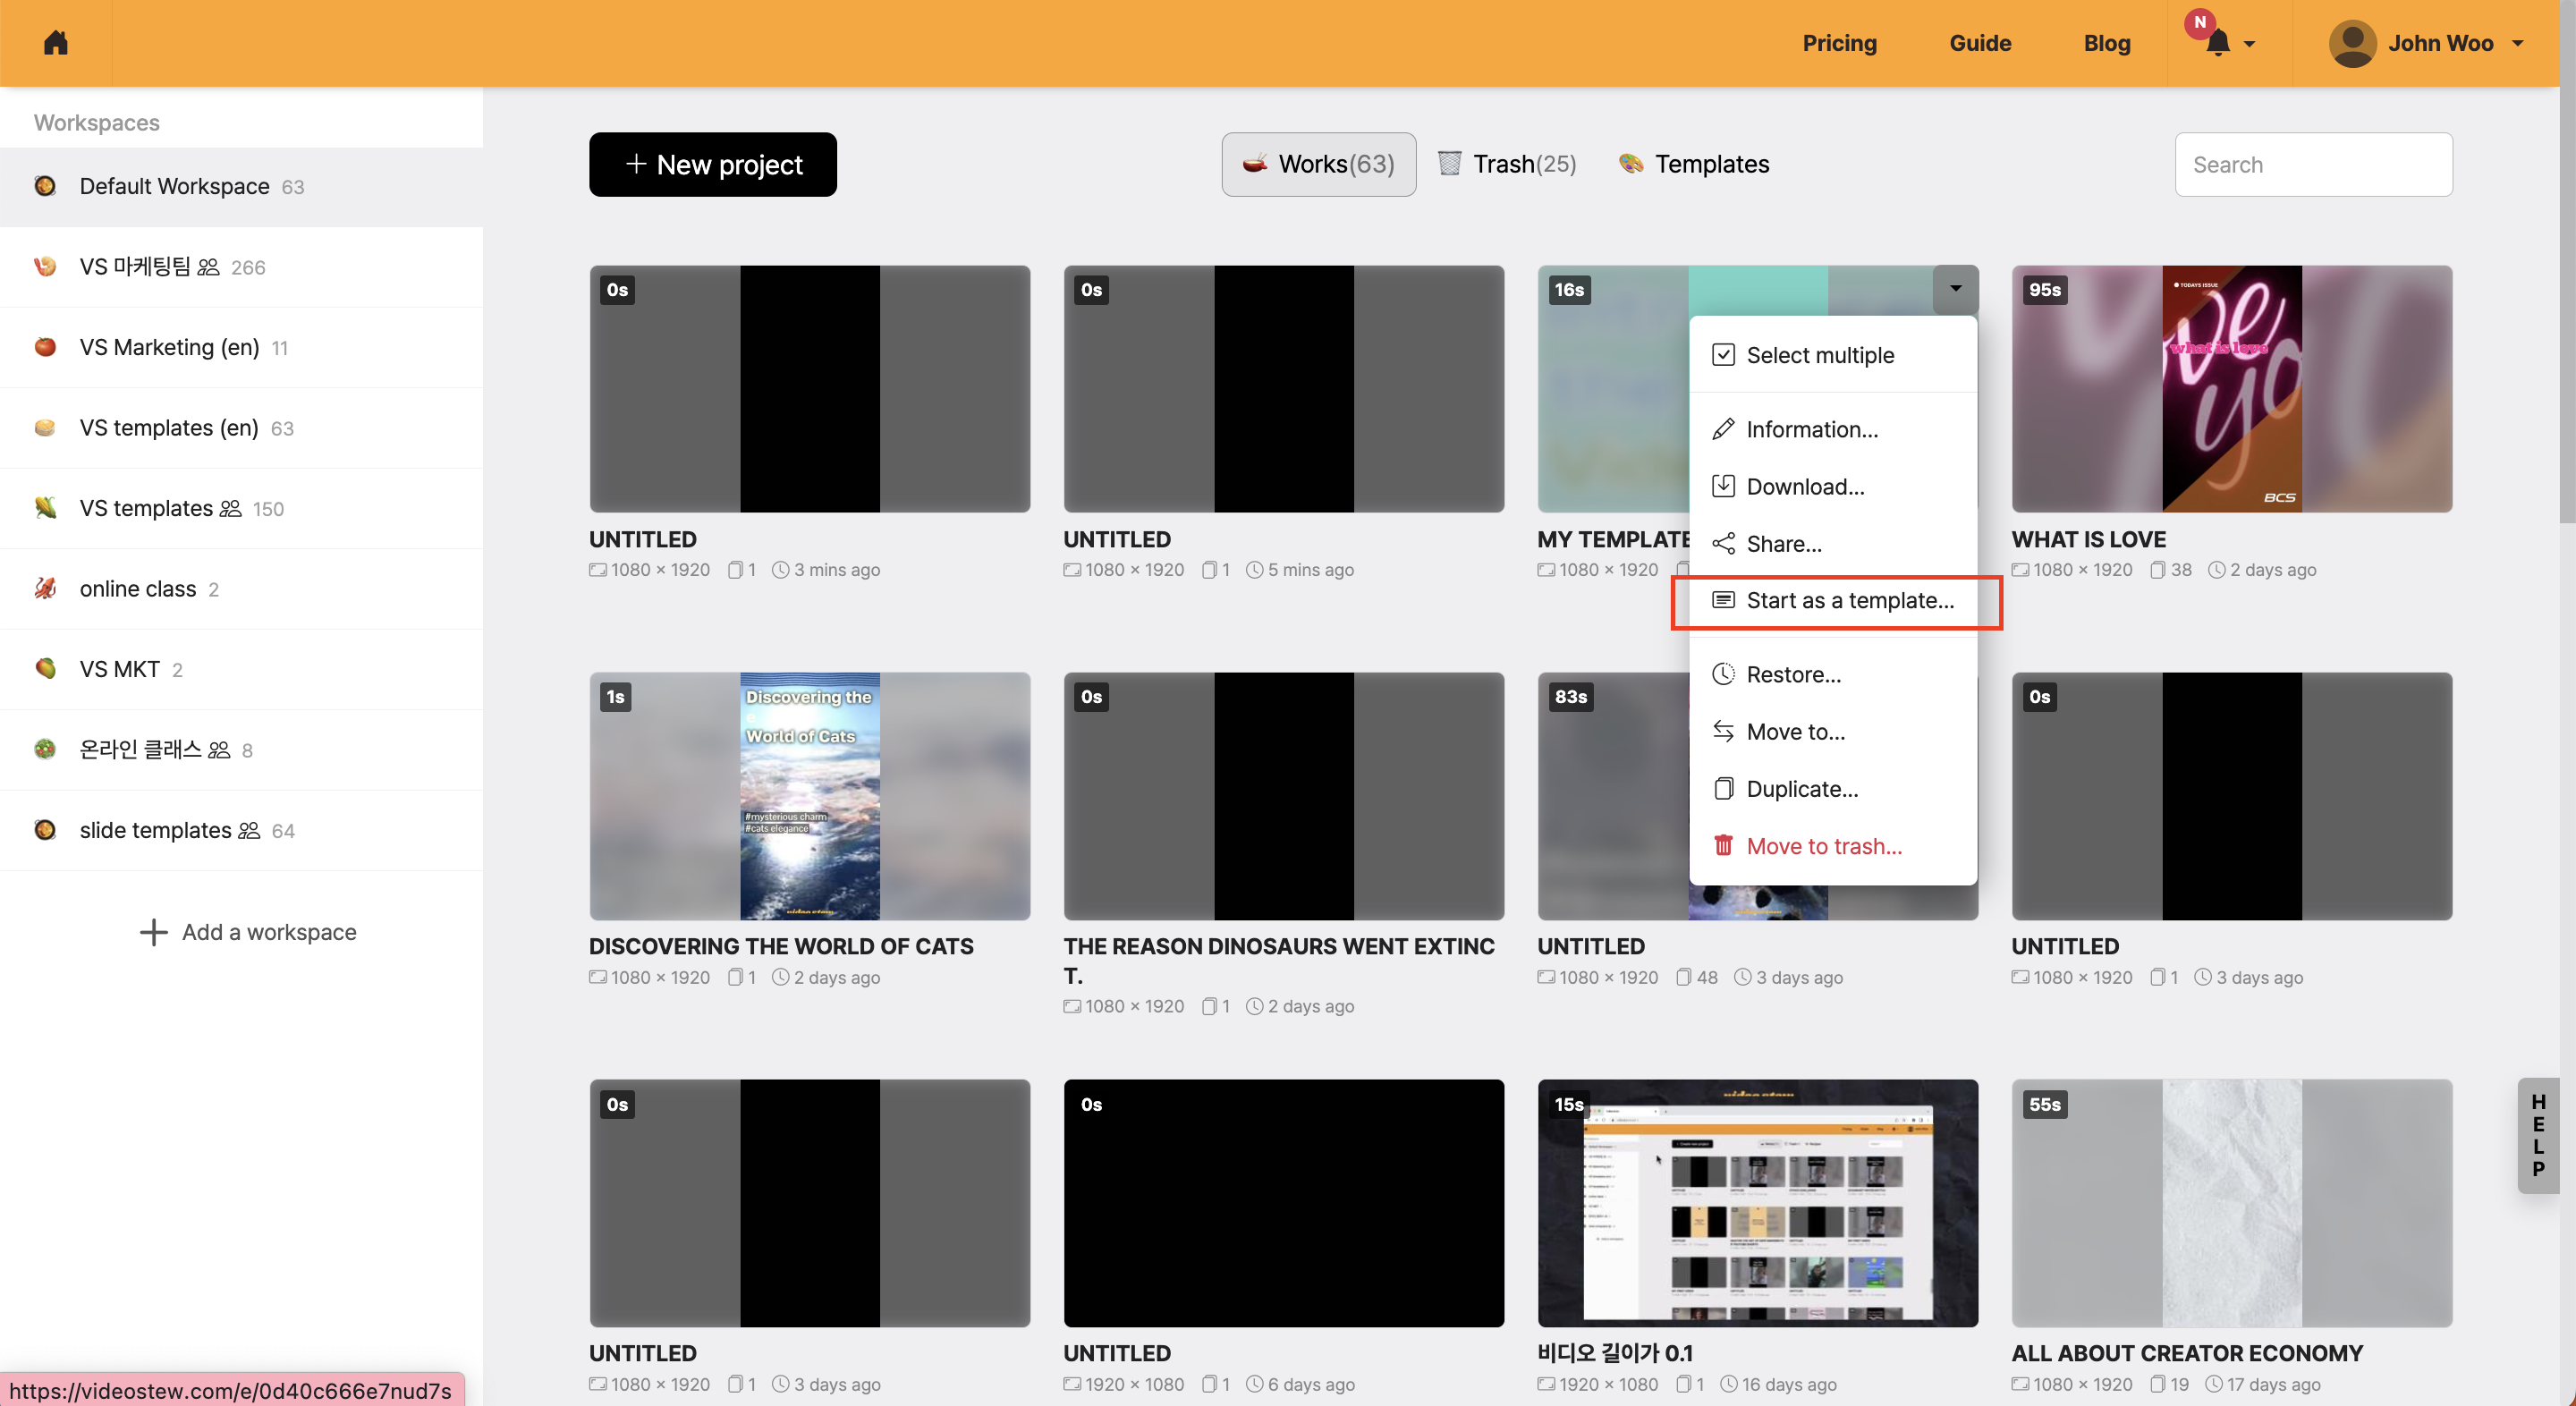
< Start with this template >
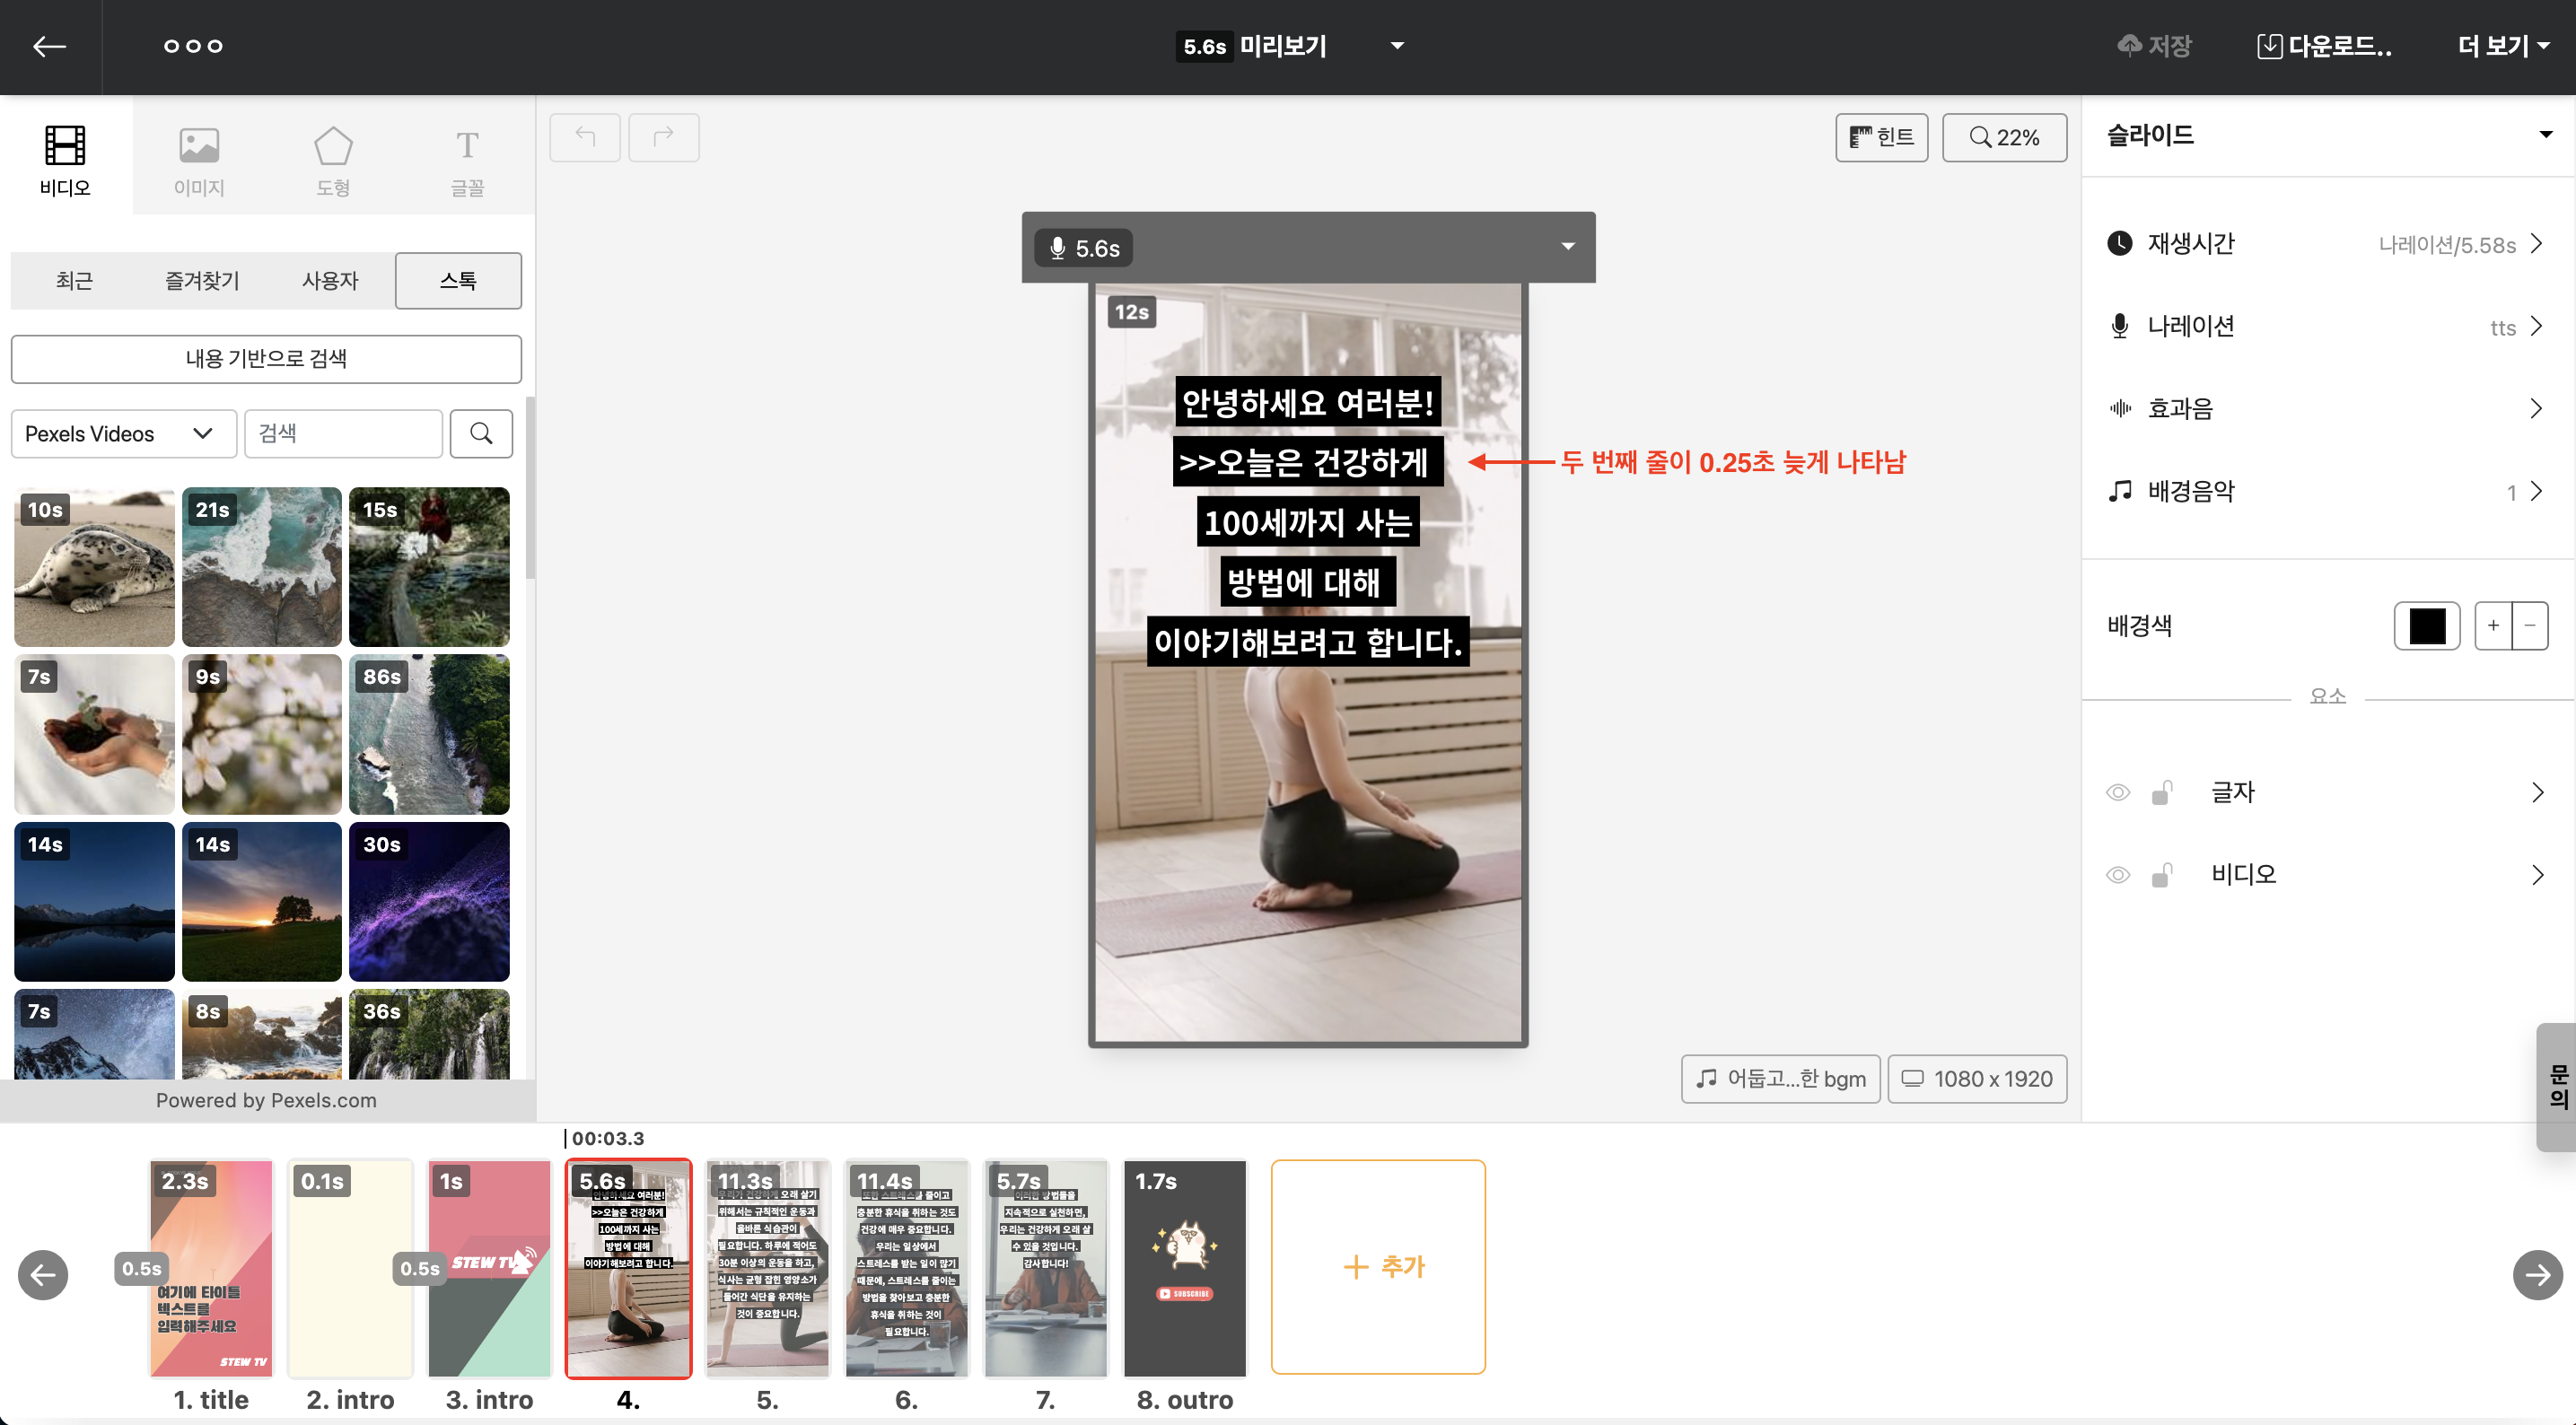
Manually syncing subtitles
Even though several lines of text are included in the slide, only one line is displayed in the state where [text appearance effect] animation is set.
Videostew automatically adjusts the timing at which text appears, designed to sync with the voice, but occasionally the sync may be off. In such cases, you can insert special characters in the text to delay or hasten the timing of the content's appearance.
| Special Character | Description |
|---|---|
<< |
This character makes the line appear 0.25 seconds faster. |
>> |
This character makes the line appear 0.25 seconds slower. |
To manually change the speed, it is good to use the Enter key to separate each line. Then, by using the preview, insert the character in front of or behind the line where timing adjustment is necessary.
The example below shows how to insert the '>>' symbol after the sentence 'Today, stay healthy' appears faster than the voice and slightly delays it. If the timing is much off, you can use multiple special characters. In the case of '>>>>', it will be delayed by 0.5 seconds, right?
Adding a custom color with transparency to the cursor
- If you select any color, the color selection window will open.
- There, select the "User" tab.
- In the user tab, click "Add".
- Specify the name and adjust the transparency to 0.
- Click "Add" to confirm.
When using box-shaped text, do not apply transparency to the font color; to insert transparency only to the box, add a color with transparency applied when adding user colors.
Uploading video files to Naver Blog
To upload video files downloaded from Videostew to Naver Blog, you can use Naver's video upload feature.
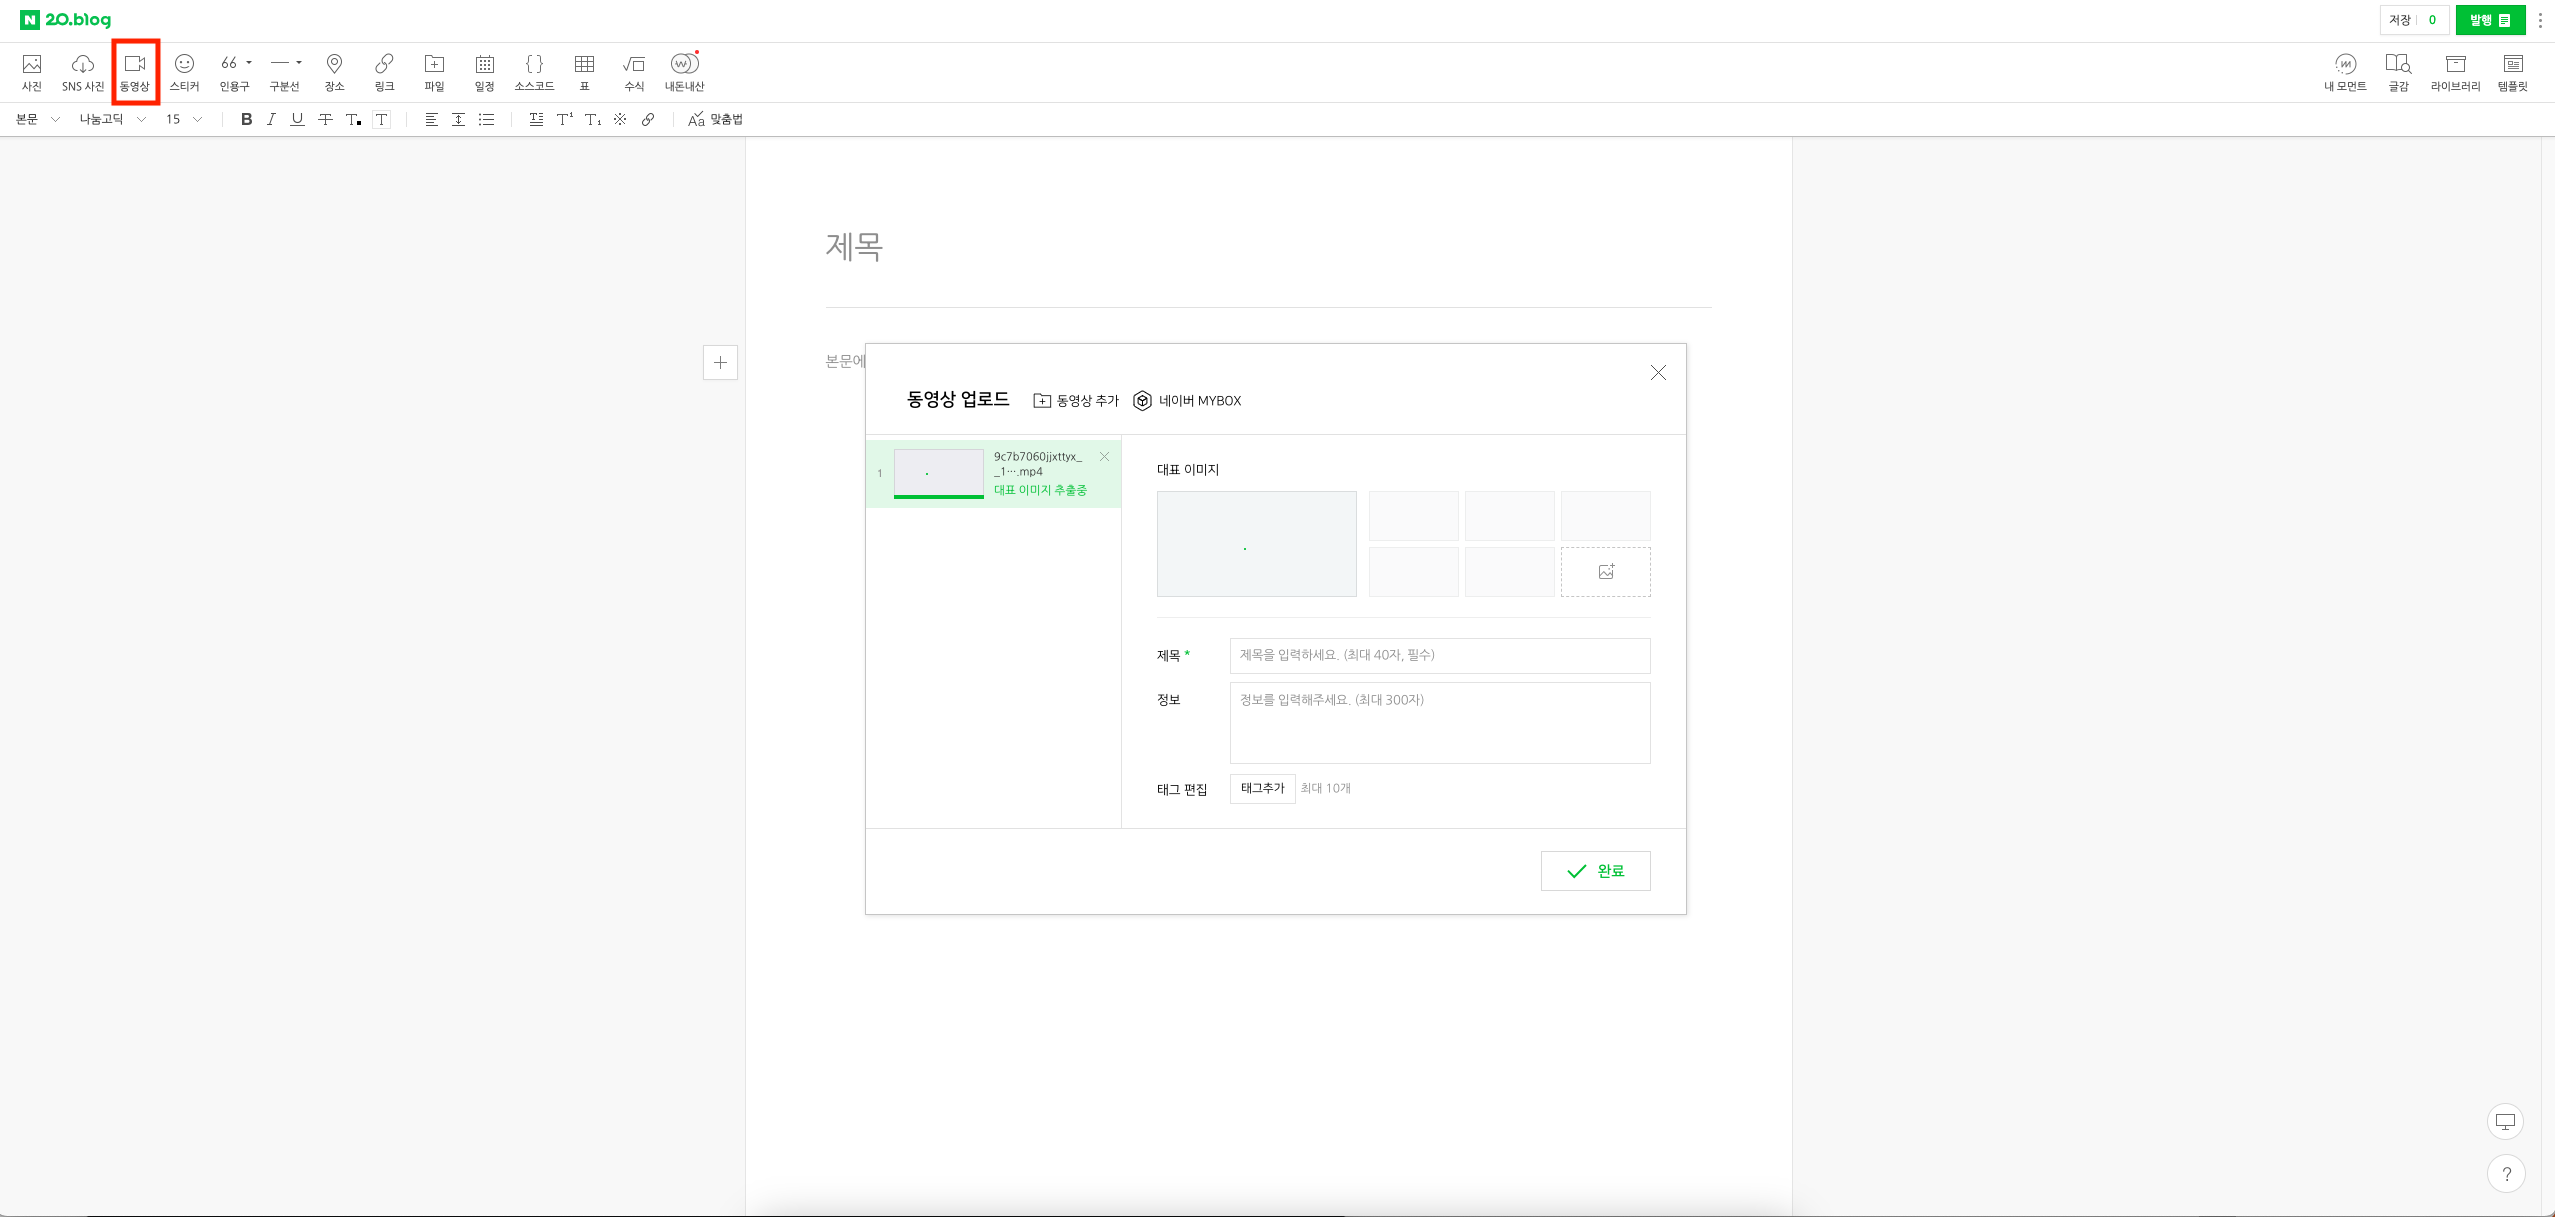
After clicking the "Video" button on the blog editor toolbar, upload the downloaded file (mp4), and a window like the one above will appear for you to enter the basic information of the video.
Uploading videos/images shot on smartphones
If you access Videostew from a smartphone Chrome browser, you can quickly upload videos and images from the mobile device's gallery to your account.
Log in to Videostew from your smartphone
Connect to Videostew from the Chrome browser on your smartphone. Depending on the user's login method, you can log in with social one-click login or by entering your email and password.Select Upload File
Click the "Select Upload File" button in the center to select files from your photo album or file manager..png?_=1iisbp1)
If you wish to change the workspace before uploading, please change the workspace first and then click "Select Upload File".
Verify Upload Results on PC
After the upload is complete, you can check the uploaded files on each user tab in the PC Chrome browser. If there are additional files needed during the operation, please continue to upload. New files can be confirmed soon in the library without needing to refresh.Titles do not appear on the screen, only narration is inserted
Generally, Videostew reads the text on the screen with an AI voice. However, if you're editing a video, there might be cases where you need only narration and no subtitles on the screen.
In such cases, placing subtitles outside the slide window can easily solve the problem. If only the [Read by AI Voice] option is active for the respective text element, subtitles will not be displayed on the screen, and only the voice will be heard as set.
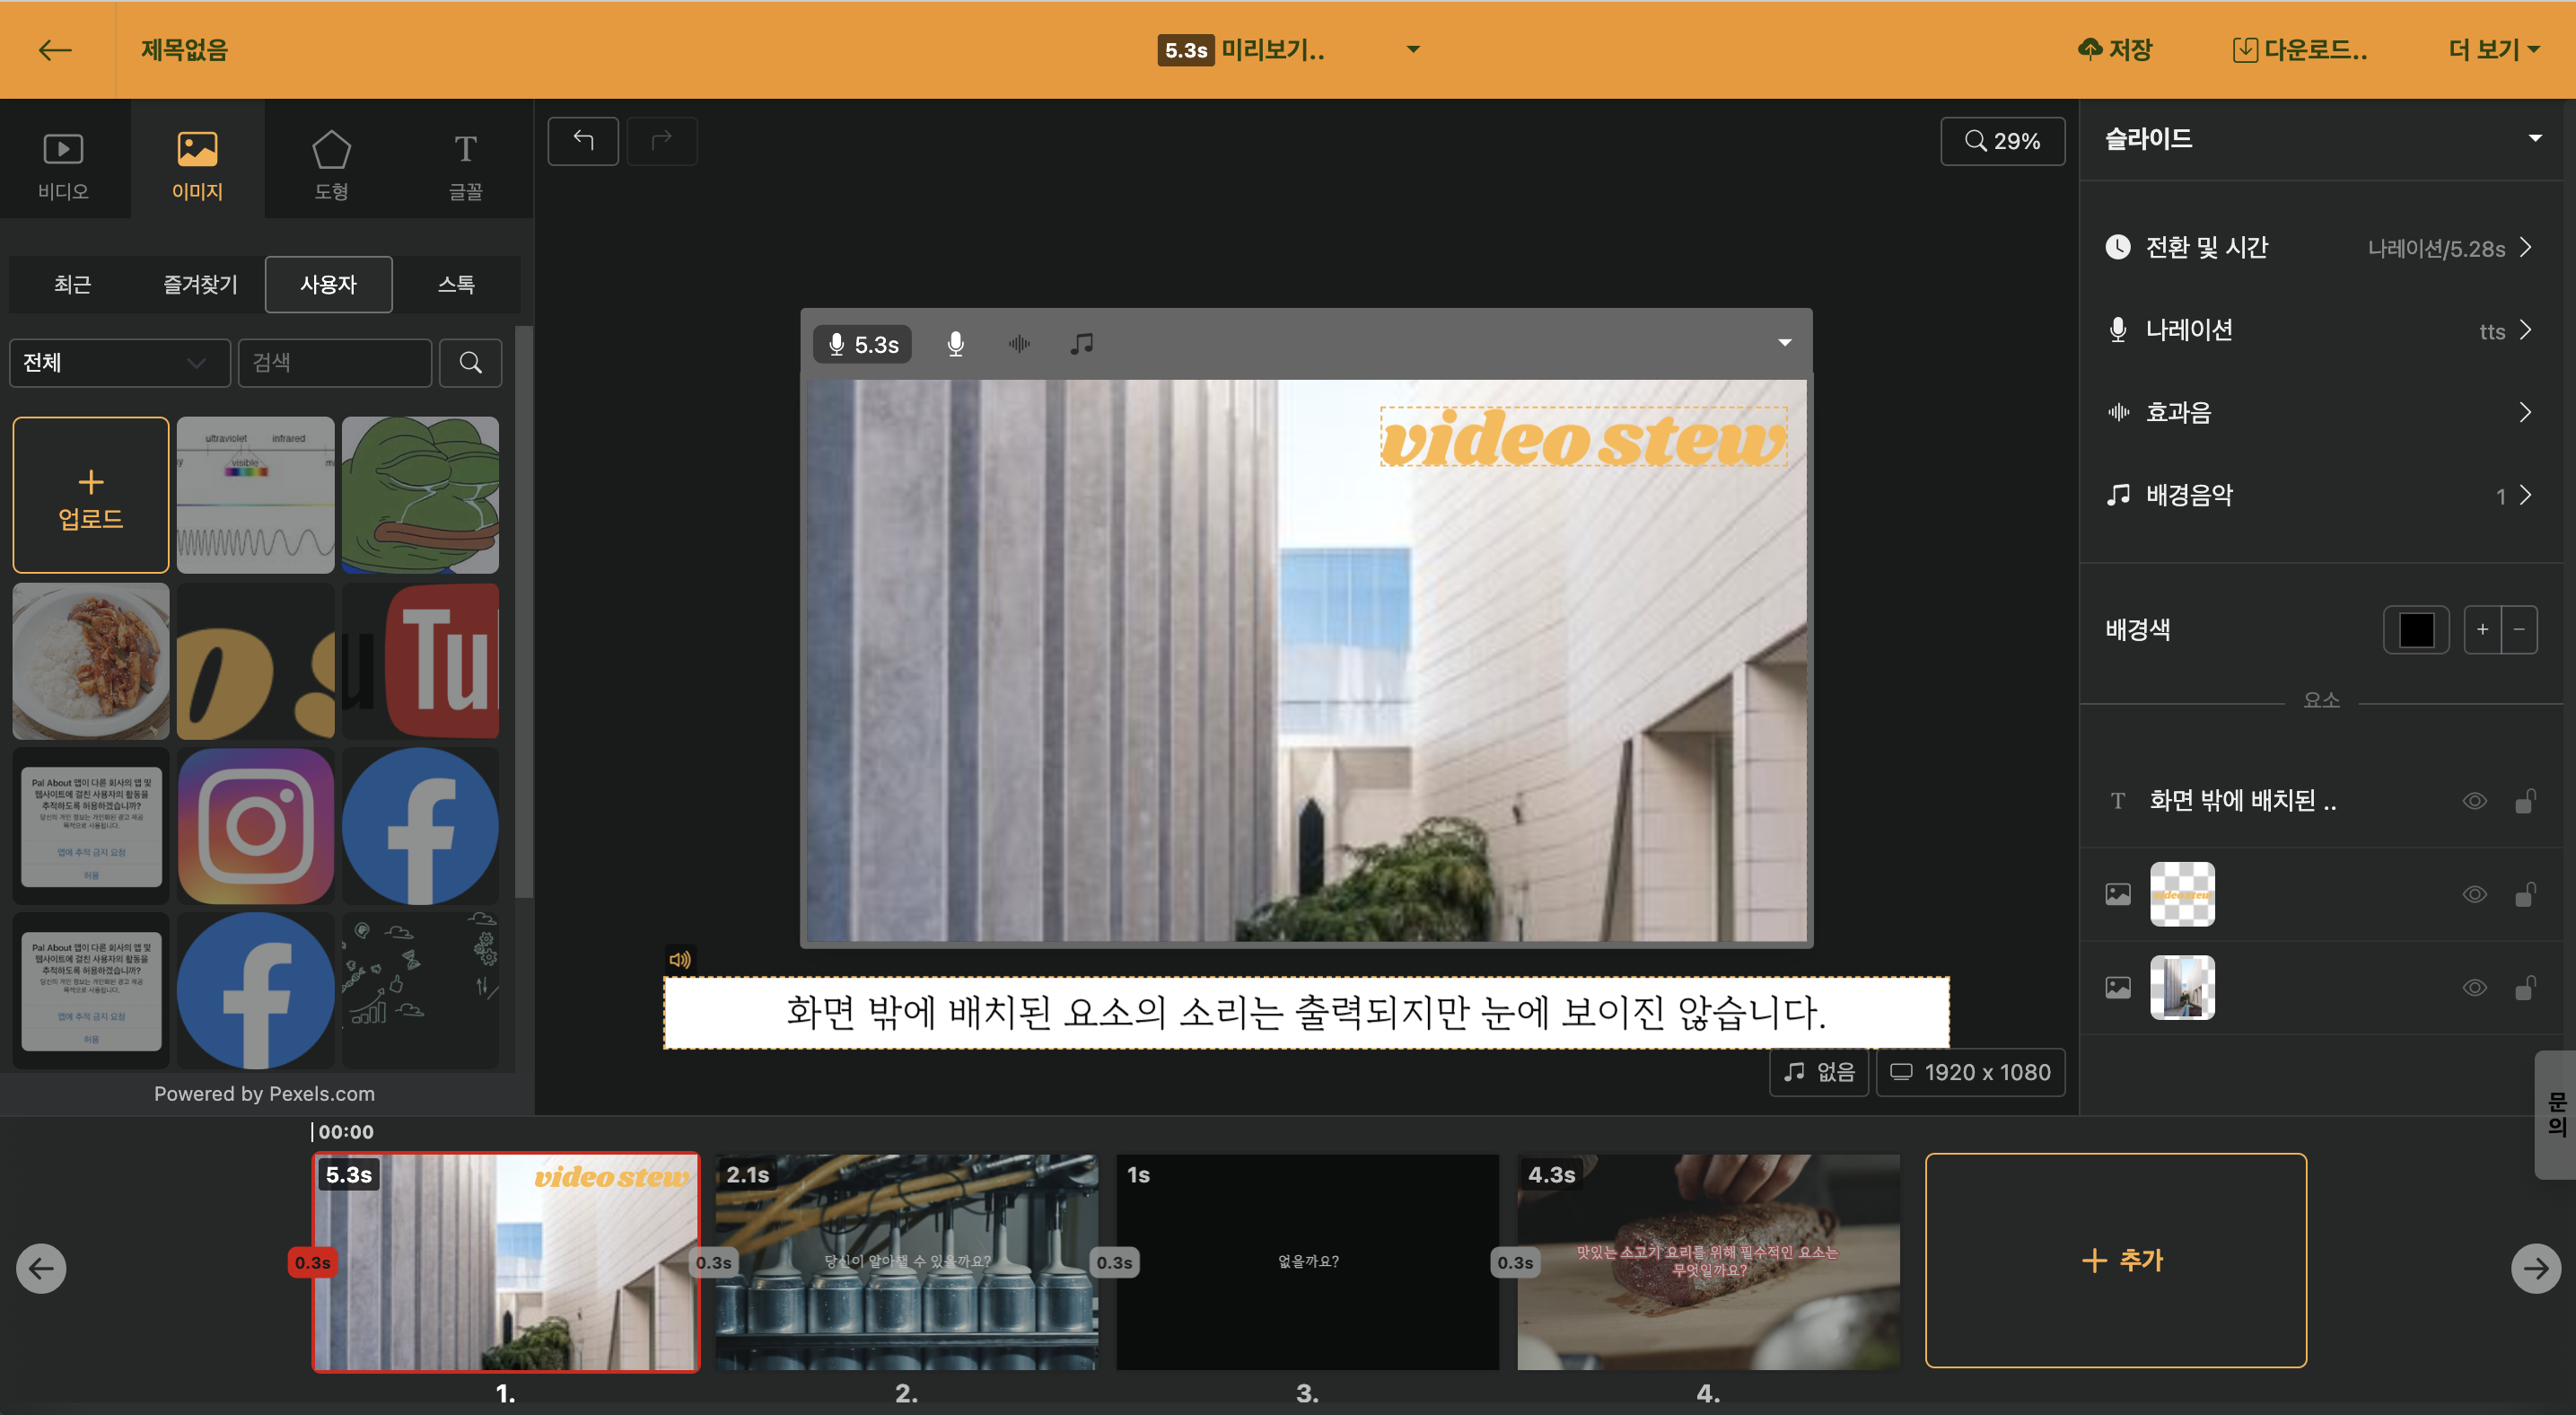
< Place the text to which the AI voice is applied outside the Editing Window slider >
Sometimes, only the keywords appear on the screen, and the explanation needs to be longer, right? In such cases, constructing a slide like below works great.
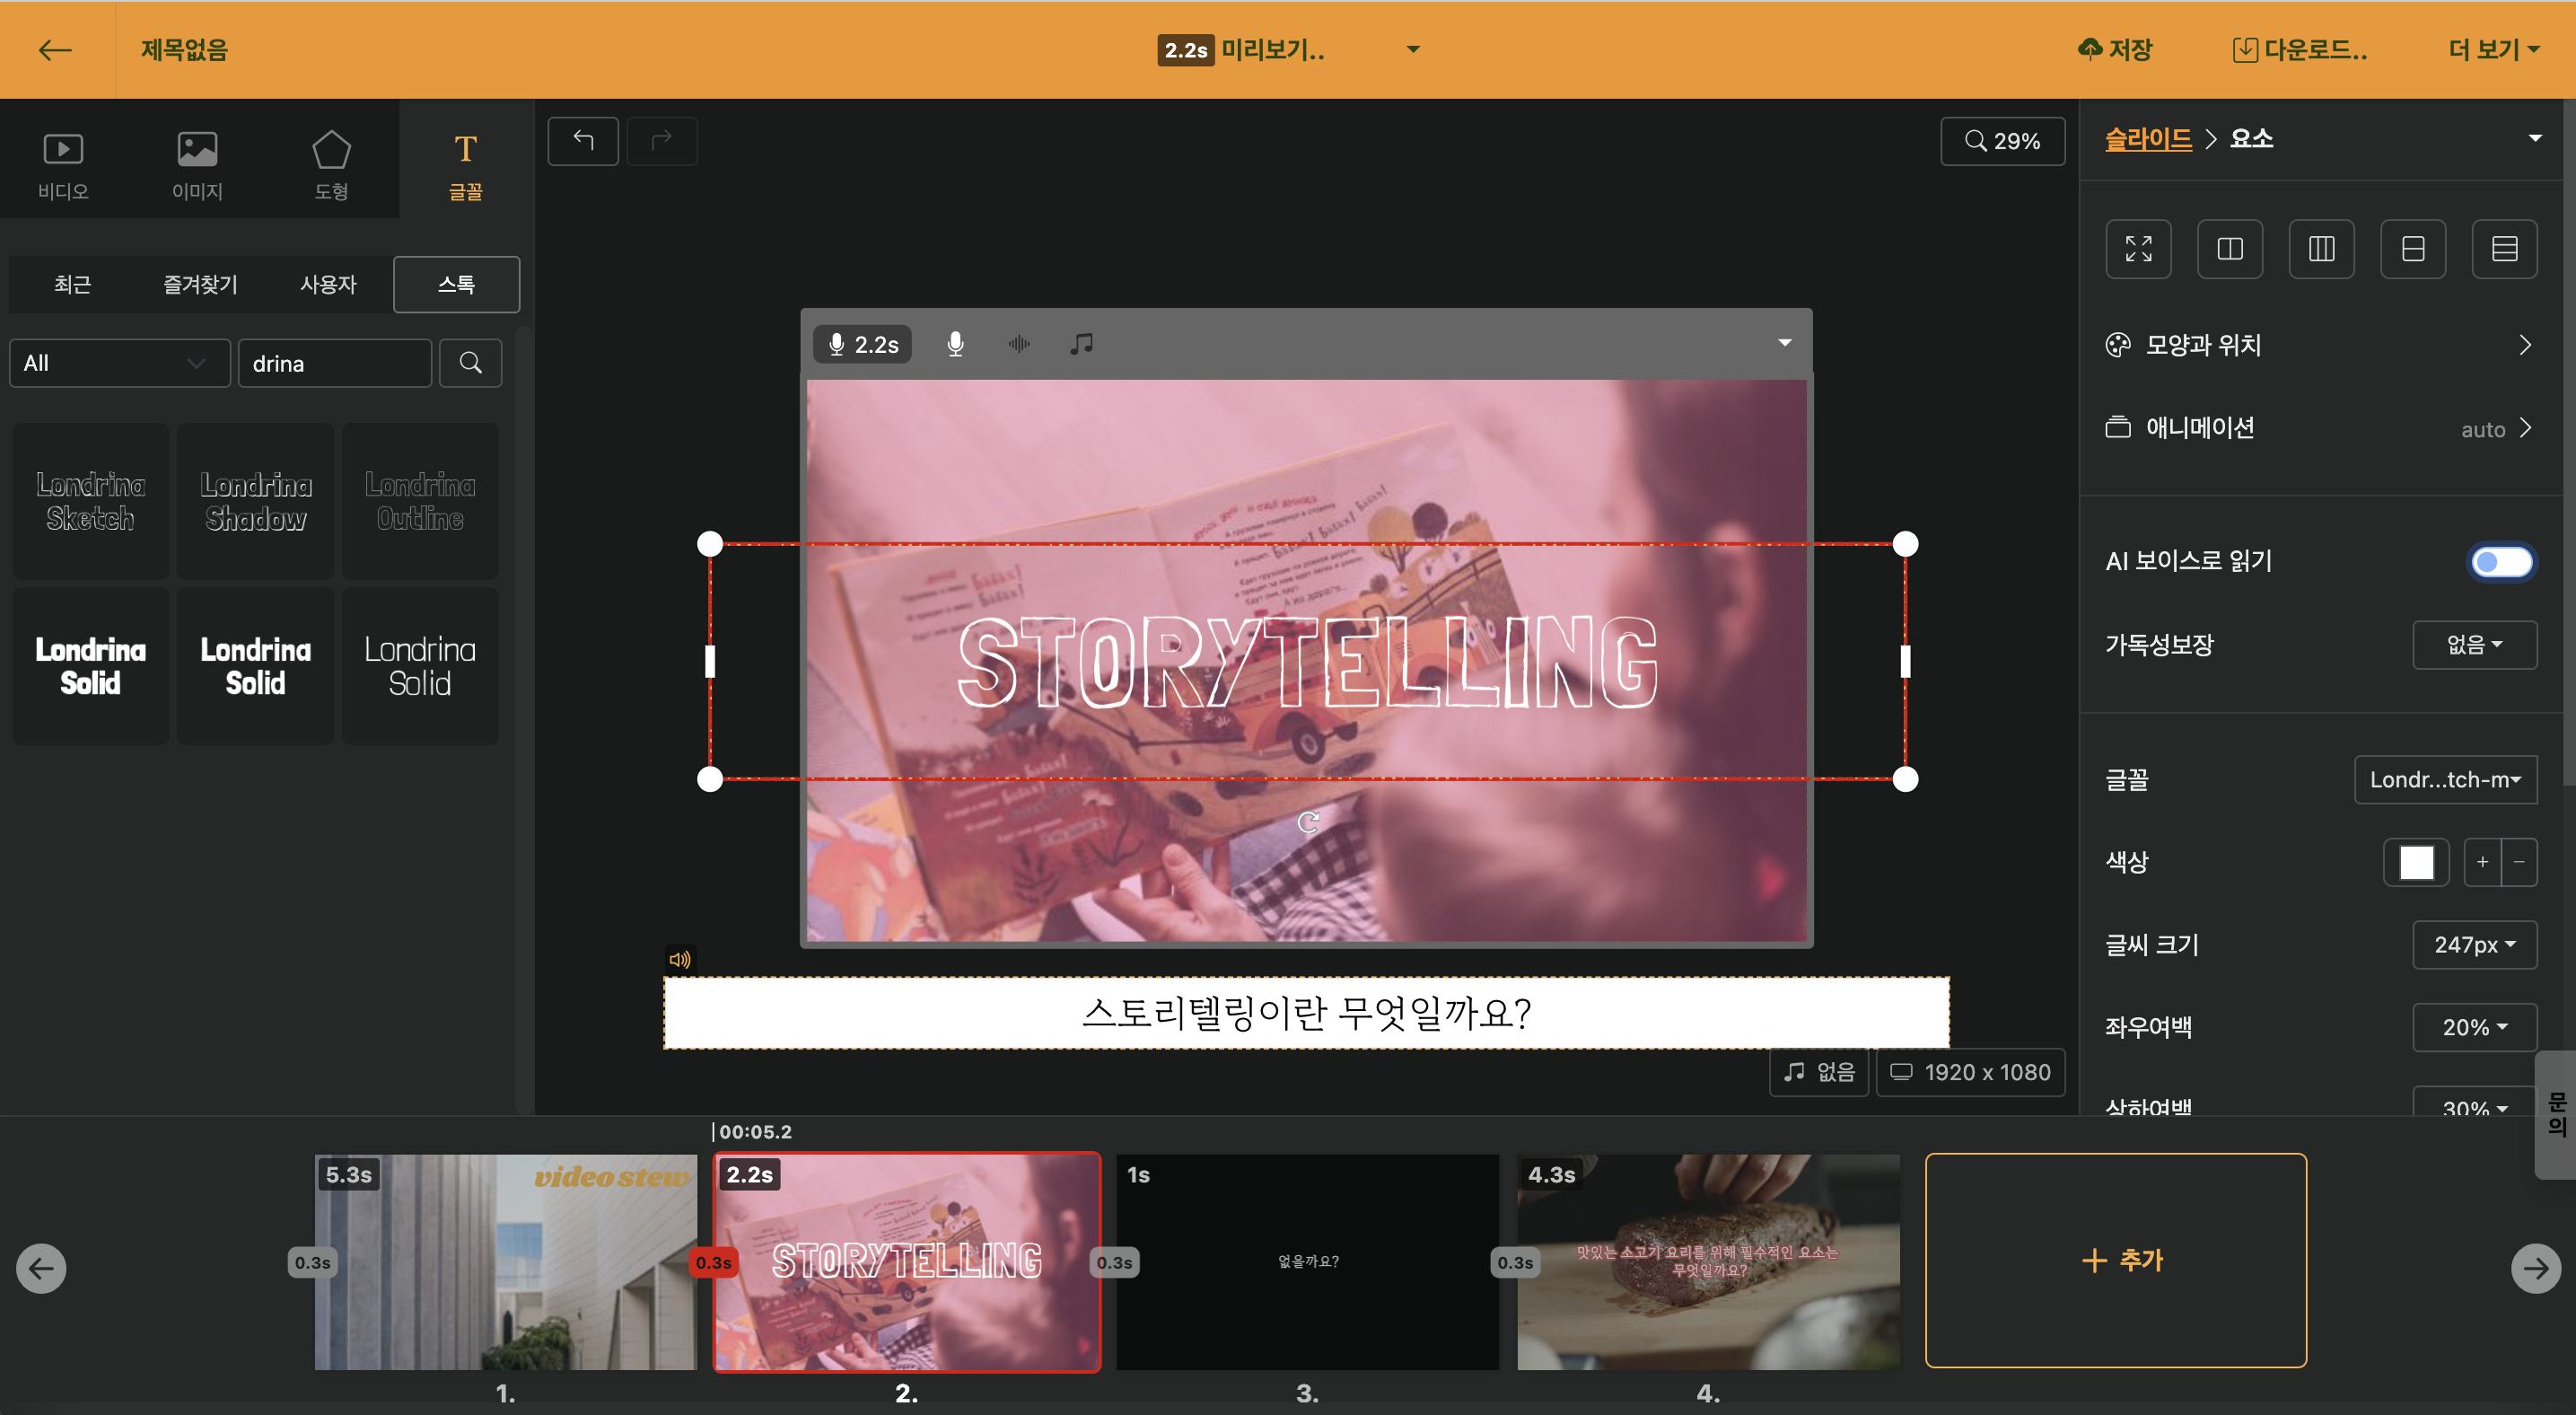
< Display only the keywords inside the slide, and place the actual reading content outside the screen >
- Please deactivate the [Read by AI Voice] option in the text box within the screen.
- Place text elements outside the screen and write the actual content to be read. The [Read by AI Voice] option must be activated, and the slide must have Narration applied.
Create a dialogue-type content with multiple narrations on a single scene
Videostew allows you to apply only one narration per slide. However, by using the [Auto Animation] feature, you can easily create dialogue-based content that alternates between two different [Narrations] as the scene progresses.
You can also easily create dialogue-based content through the video below.
To create dialogue-type content, using two slides set as Auto in the [Transition Effect] allows you to create content with various voices while the screen is fixed. Below, we will explain how to simply apply two different voices to create content.
Create one slide and insert two text elements.
In the example, insert a picture and proceed as if the characters are having a dialogue.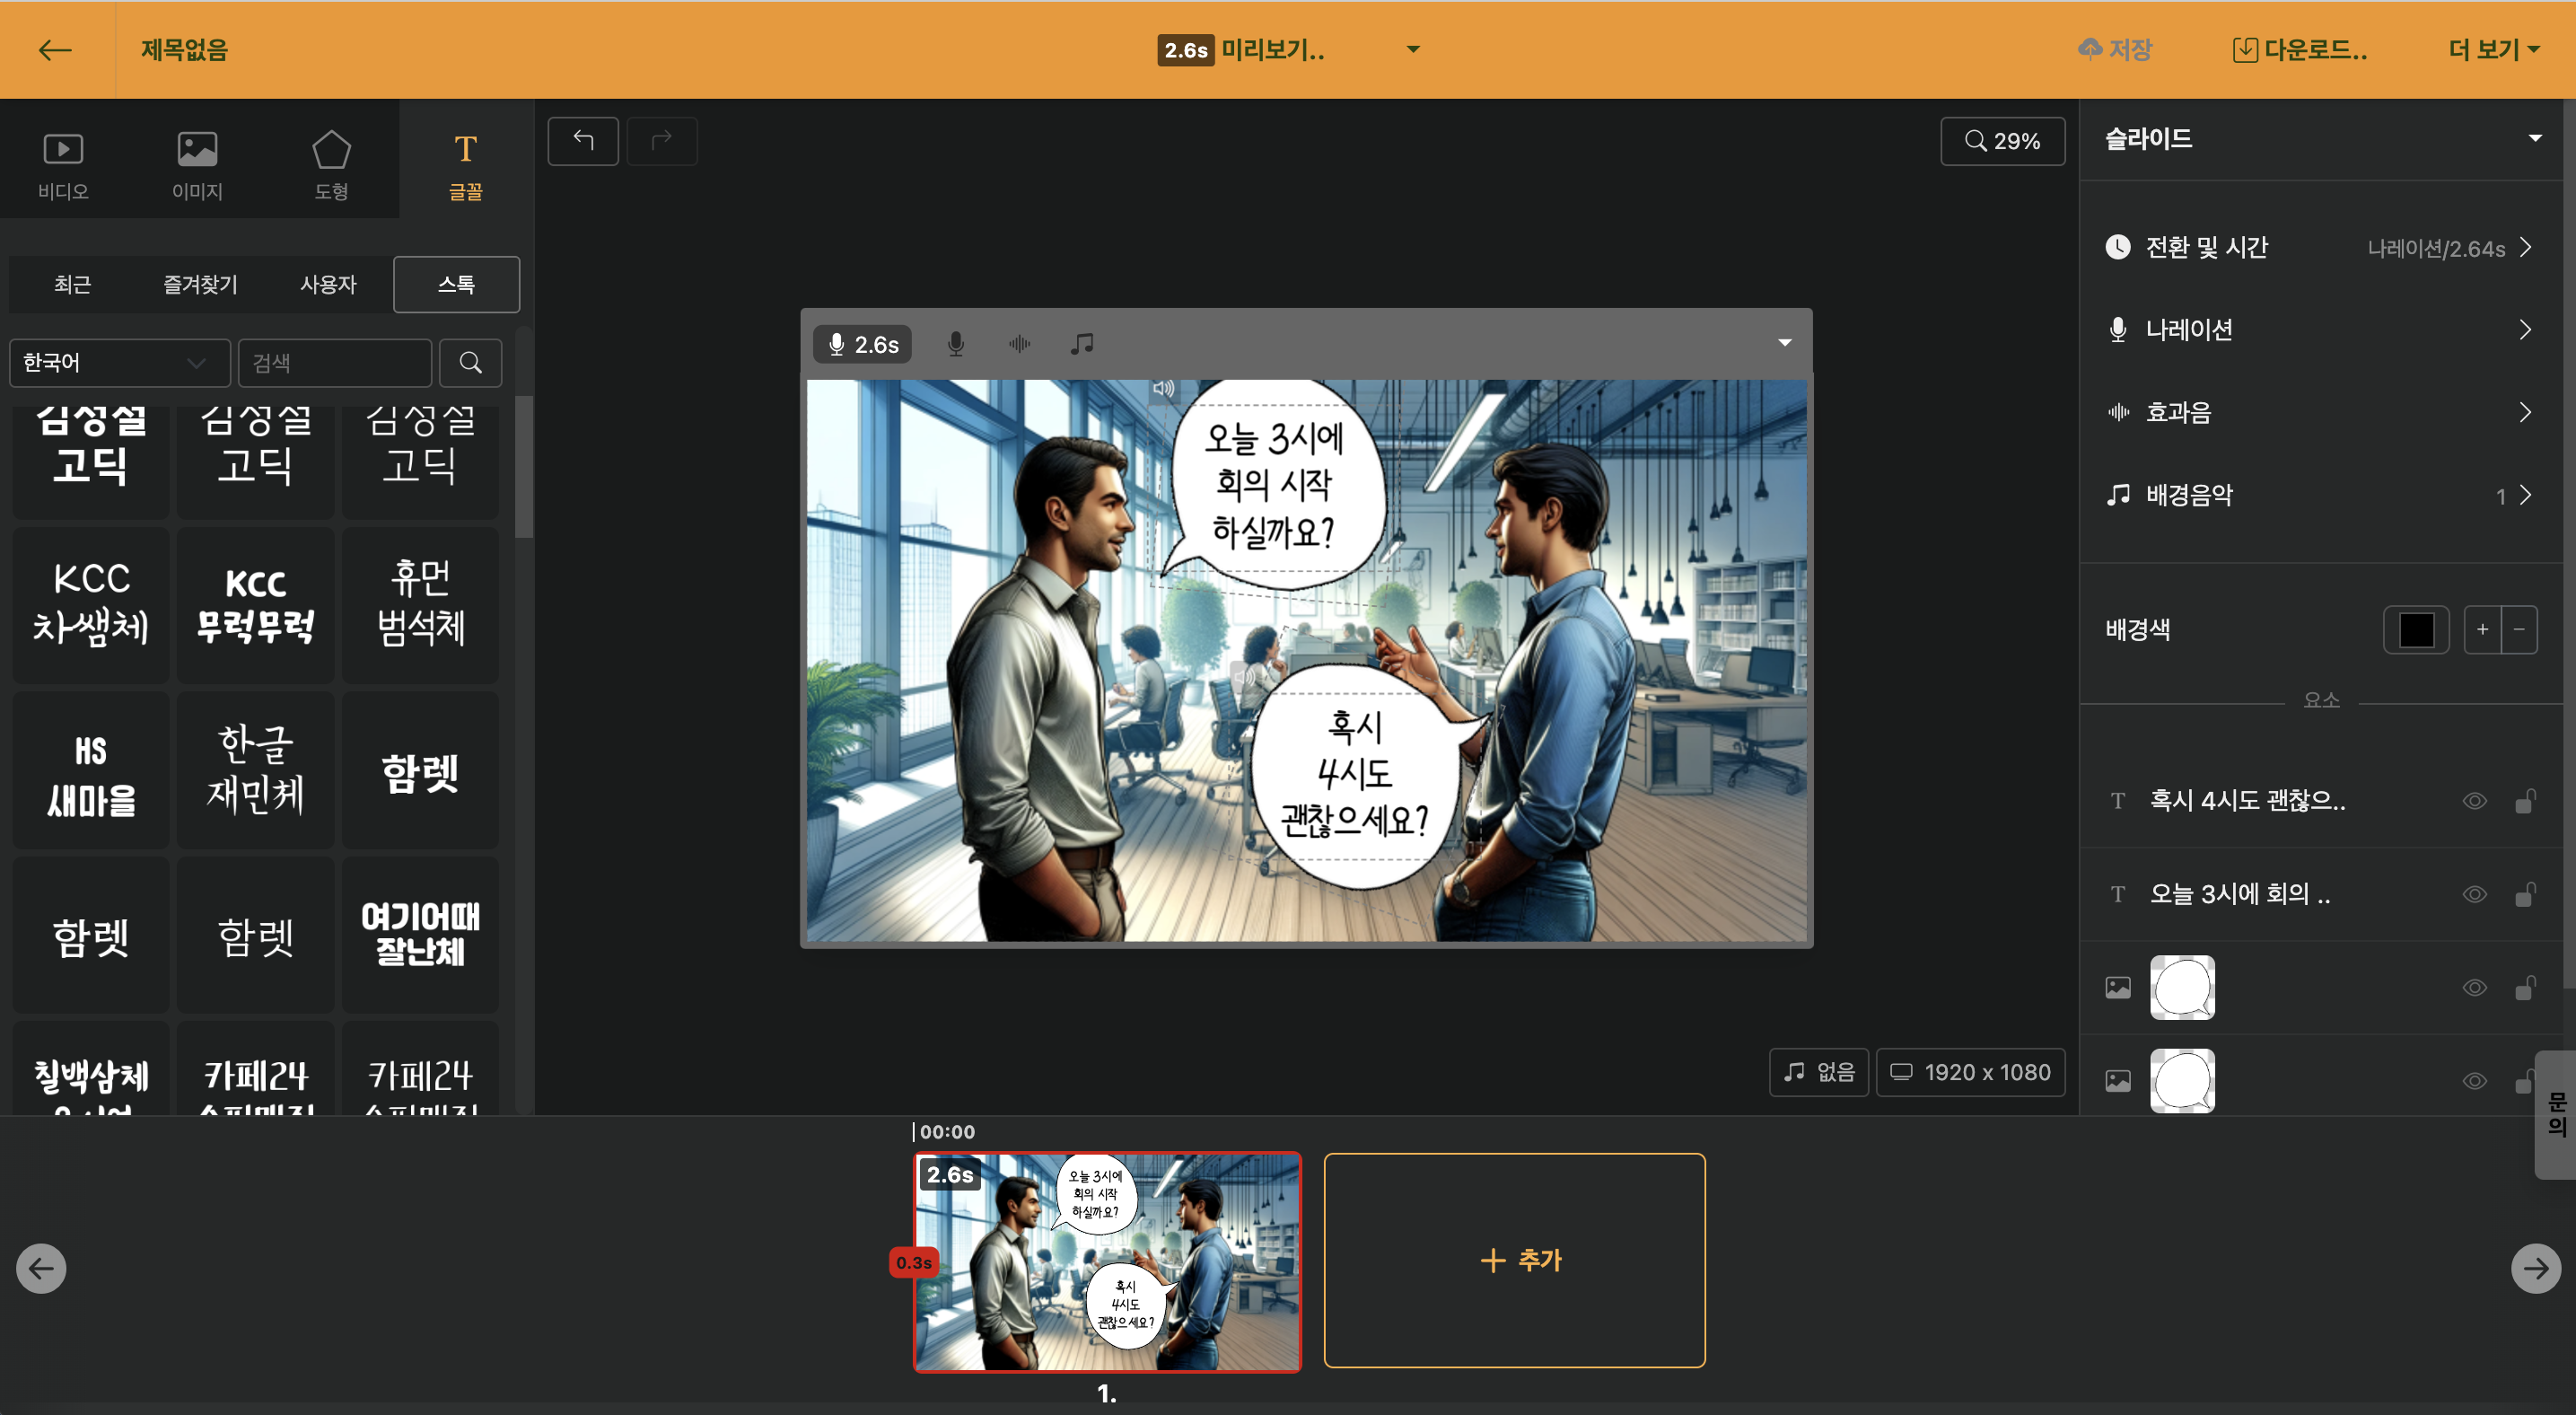
< Insert a comic image made in Clip Studio, and a speech bubble from GIPHY >
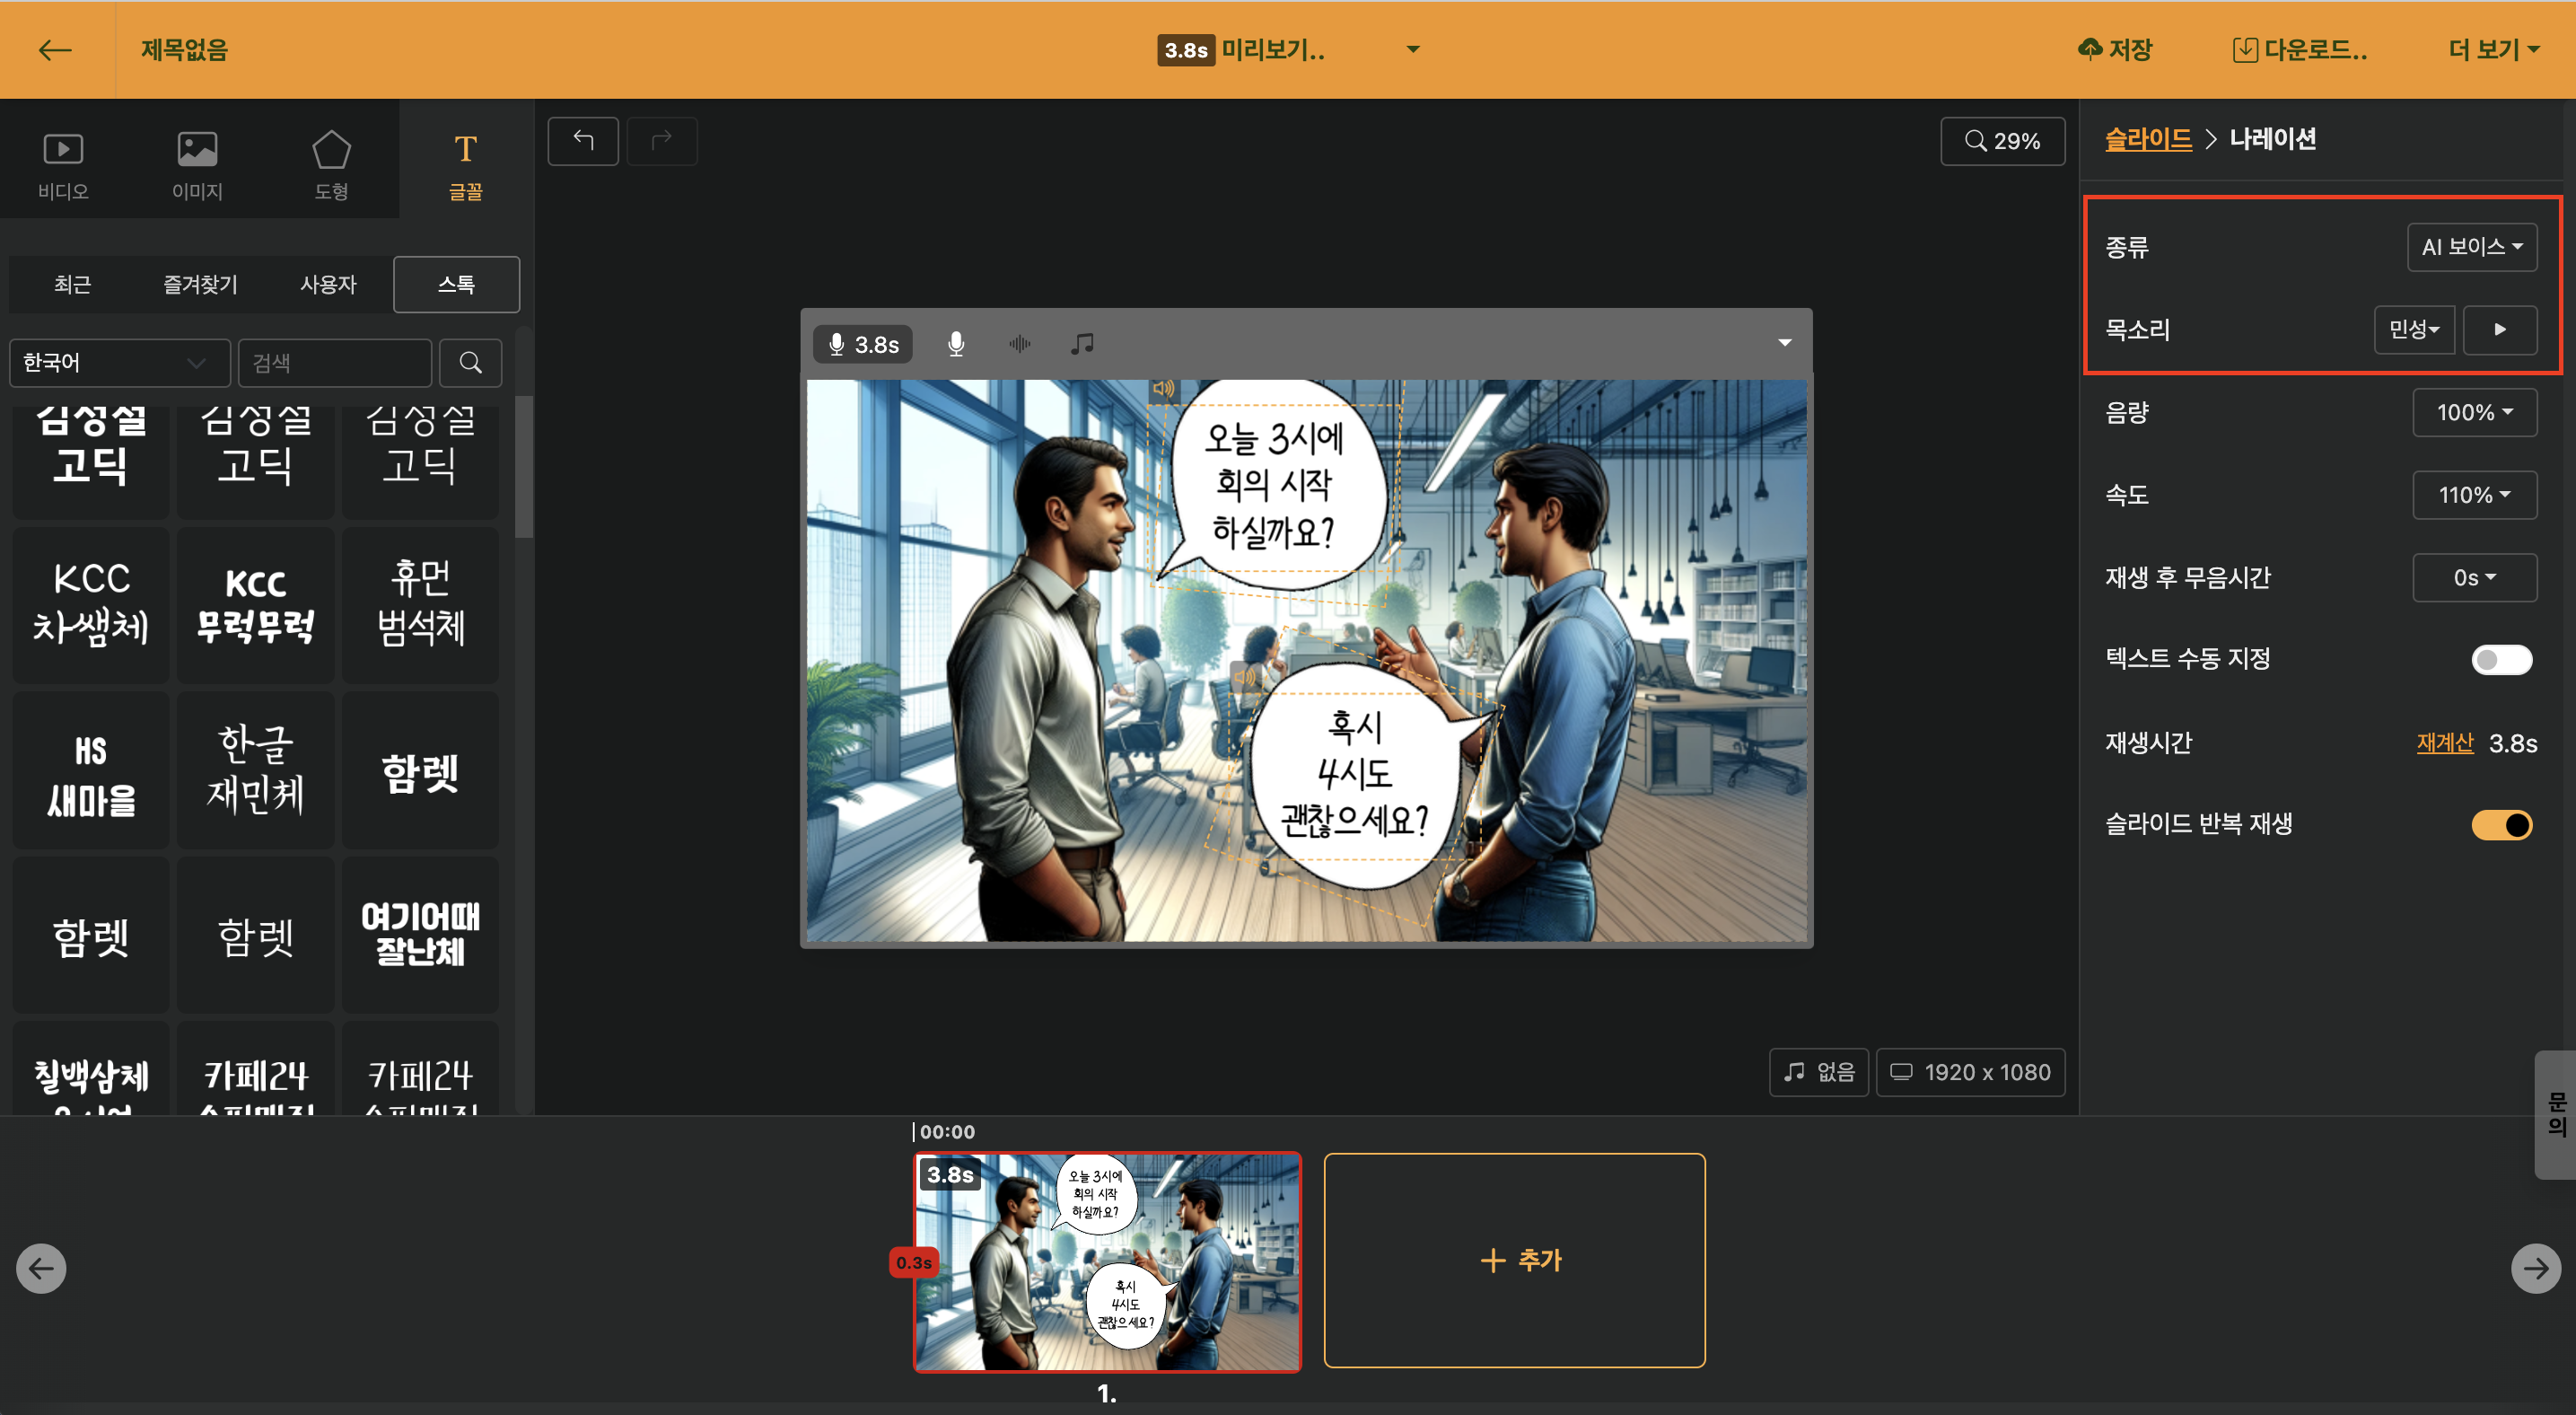
Now set up [AI Voice] on the slide.
Select AI Voice in "Slide > Narration" and insert a male voice.
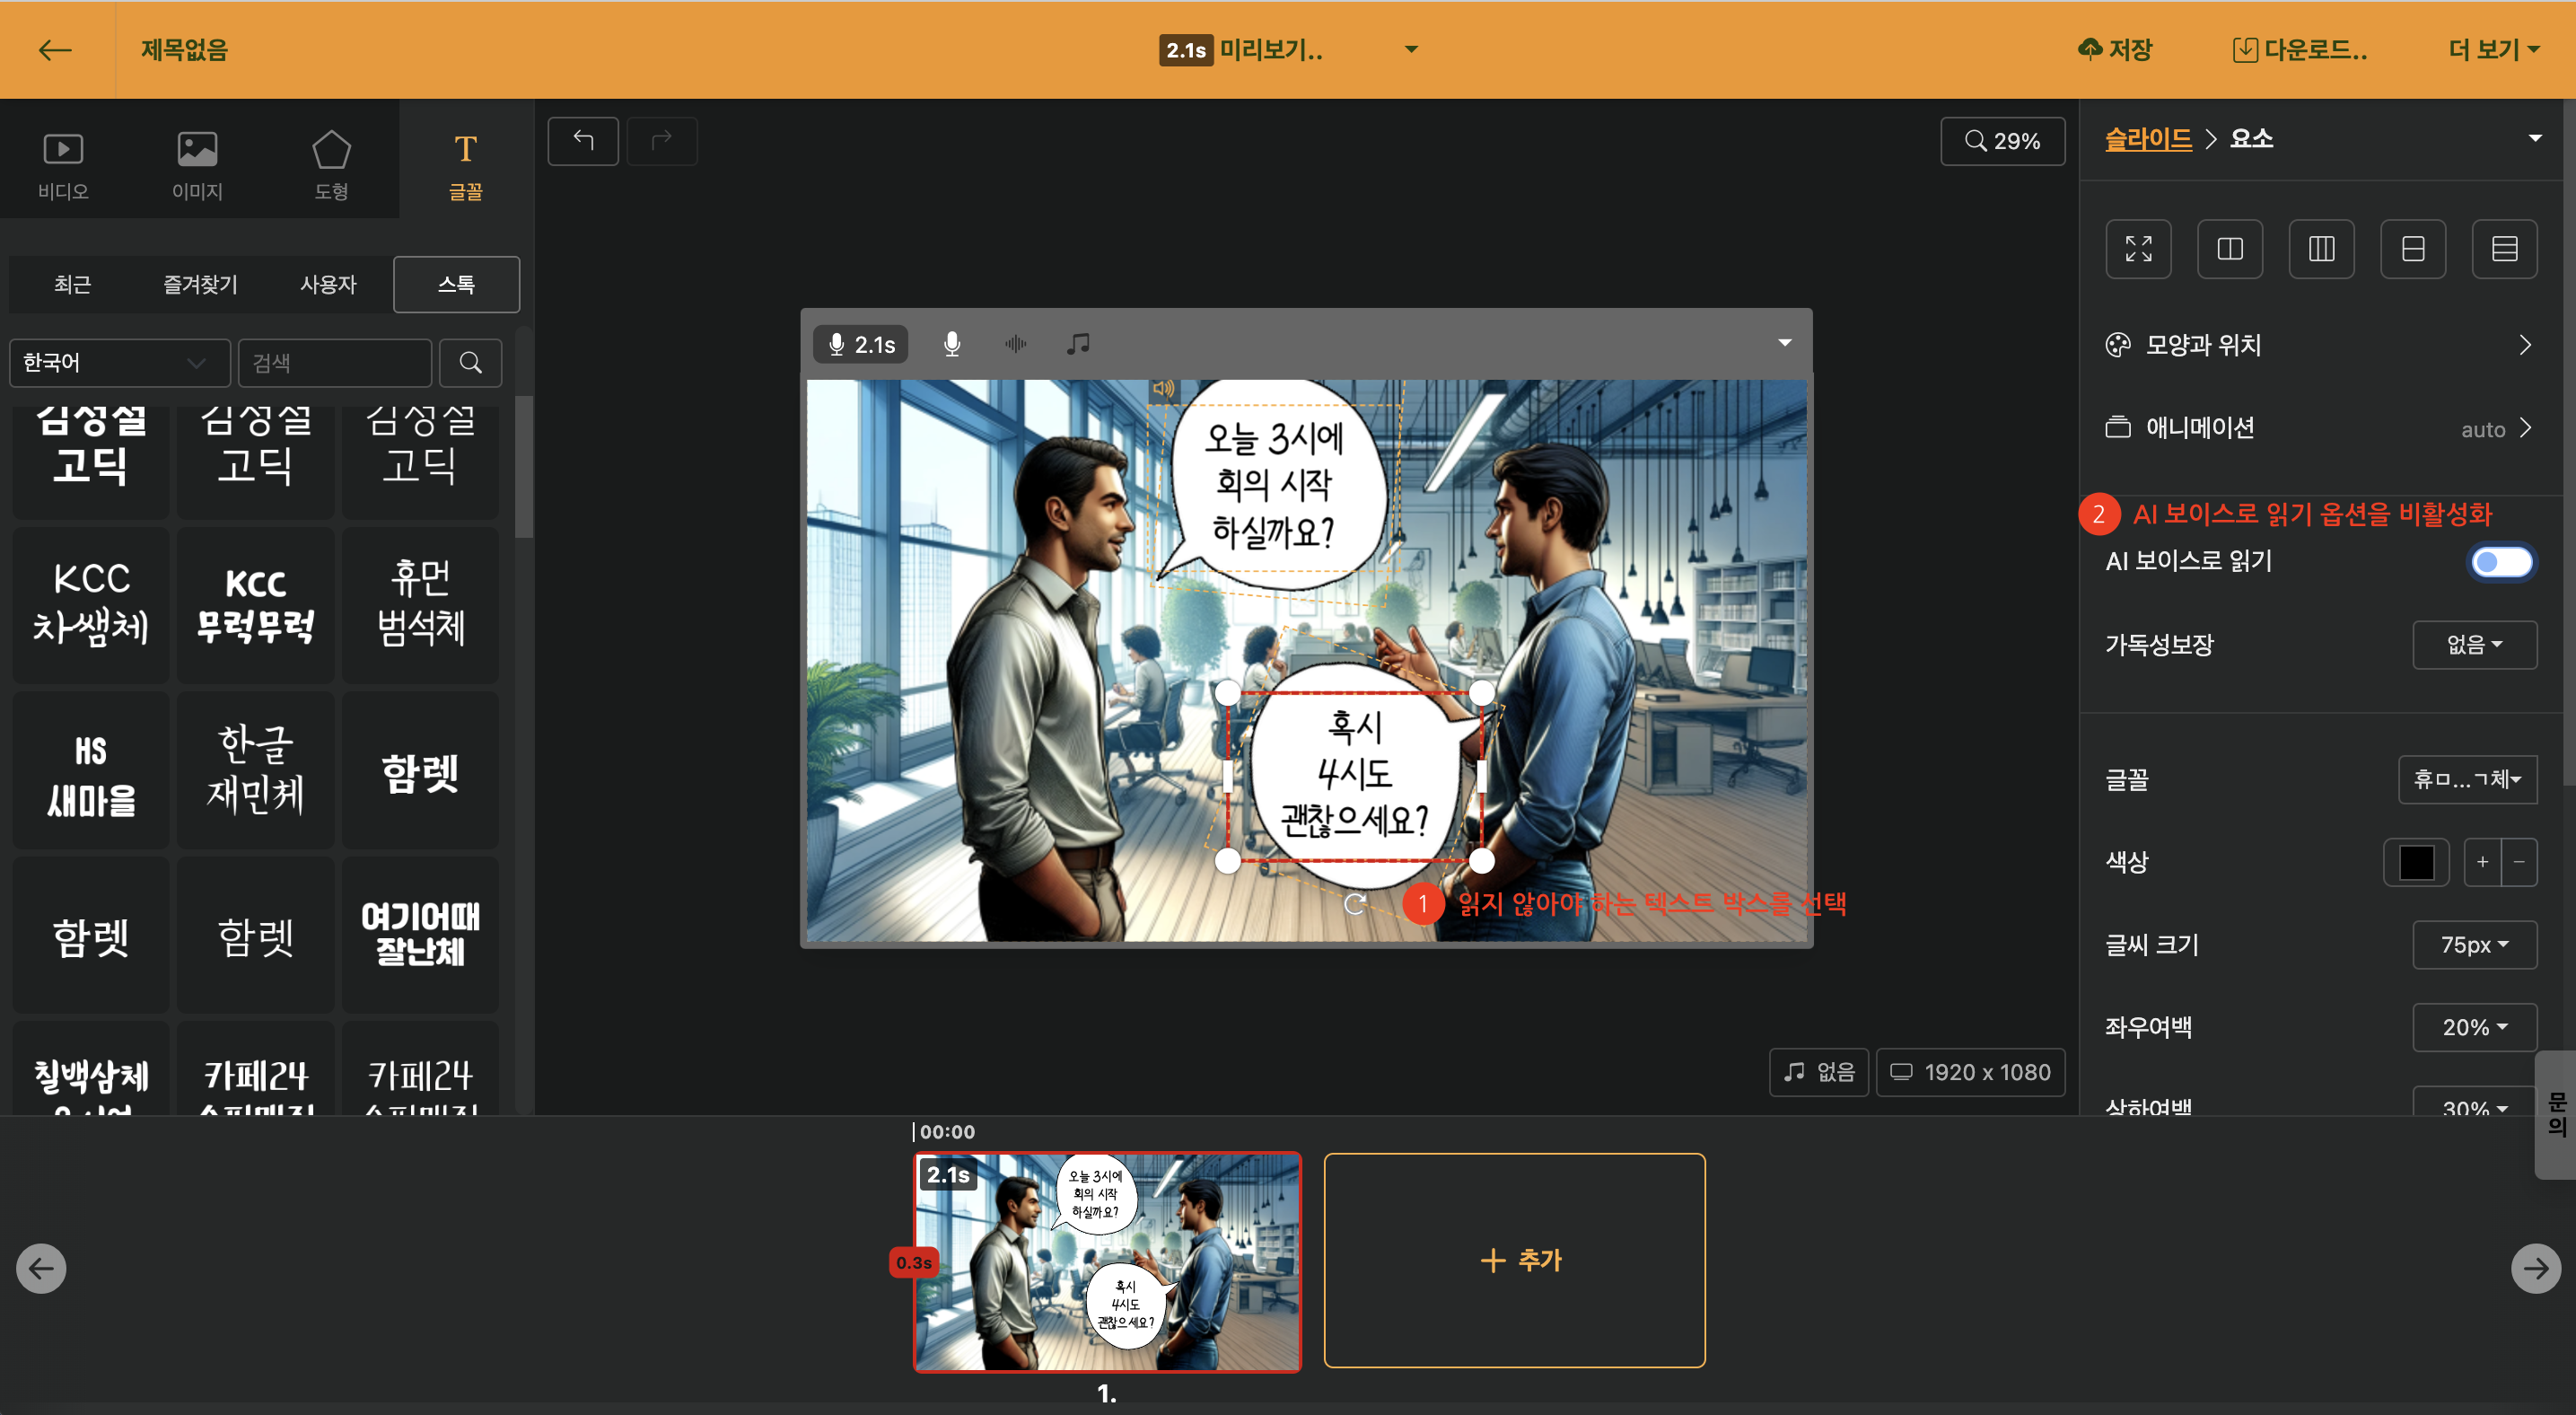
Activate the [Read by AI Voice] option only for the text box you want to be read.
Text that should not be read should have the [Read by AI Voice] option deactivated.
After copying the slide, set the reading option to the opposite for AI Voice and apply a different voice.
For the slide that was read in the previous slide, deactivate the [Read by AI Voice] option, and activate it for the text that needs to be read.< Create conversational content and apply different voices individually >
Invite Students with Student ID in the School-exclusive Solution
If you are using the School-exclusive Access Slide, students can use the service without any separate registration process.
Of course, teachers must register via email. In the state logged in with the teacher account, you will learn about how to add workspaces and invite students.
Adding Workspaces by Class
Typically, when you conduct classes, you will add workspaces by class. You can add workspaces in the following steps.
Add a New Workspace
Click the + button under the default workspace to add a new workspace. You can add workspaces by class or group, and only the invited students for each workspace can view it.
Invite Students to the Workspace
You can invite students through the "Collaborators" menu right below. Since the school solution allows joining with the student ID of each school, you can copy and paste the student ID list from Excel. You can copy multiple lines at once and a single workspace can invite up to 60 people.
If you invite to only one workspace together, each personal workspace is added separately. We recommend that students submit their projects through the Share feature.
Manage your own templates with Project Enjoy Finder
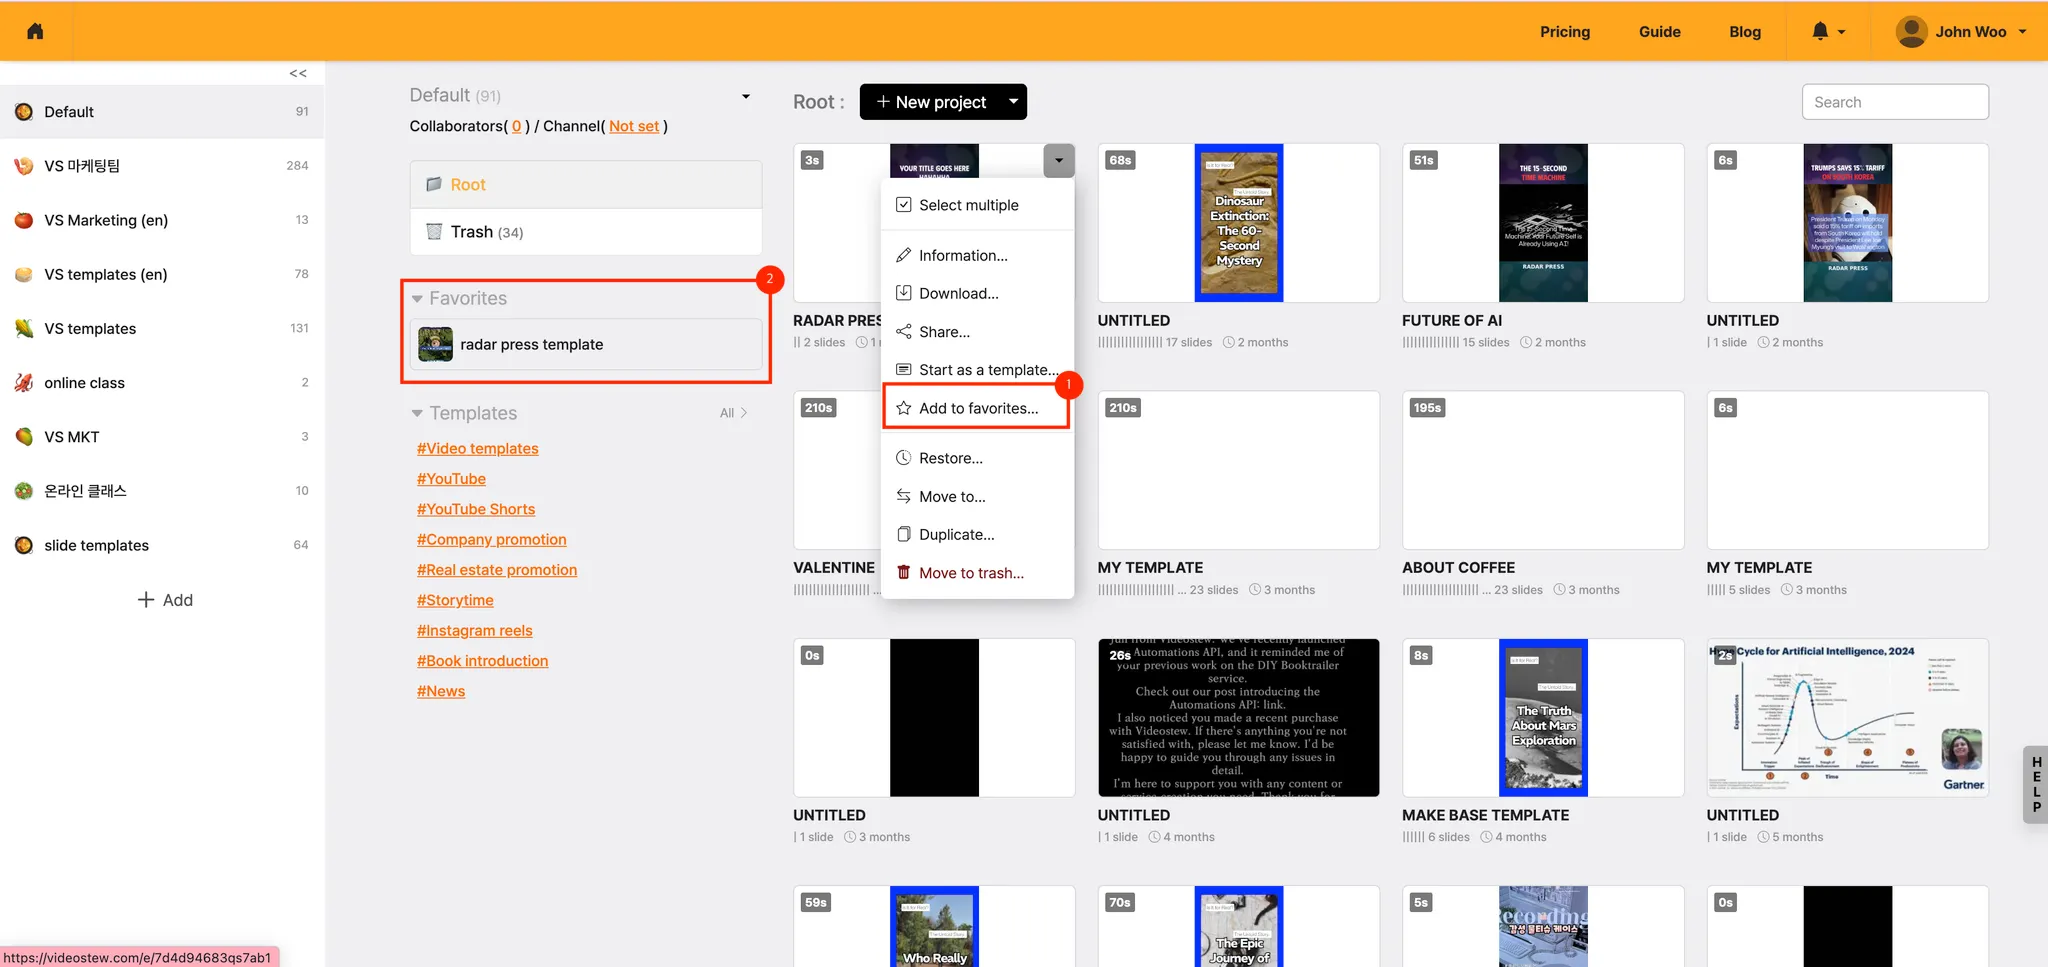
If you have created multiple templates, it's convenient to upload only the templates you use frequently to Project Enjoy Finder and use them like a “shortcut button”.
If you add Enjoy Finder from the settings menu of the project card, you can immediately create a new project with the Start with this template button from the Enjoy Finder area at the top of the home screen. You can add up to 20 items to Enjoy Finder.
Organize templates to upload to Enjoy Finder
First, collect only the projects you repeatedly use and organize them as “template projects”.
Example name)
- Template_Blog→Scene default layout
- Template_Lecture-style video
- Template_Book introduction scene (concise)
These projects are not for making final videos, but are the original templates you use repeatedly.
Add projects to Enjoy Finder
- On the home screen, click the settings button (▼) of the project card you want to write with a template.
- Select "Add to Overlay".
- The added project appears in the Find area on the home screen.
Tip. Since you can add up to 20 items to Favorites, it’s best to keep templates you use frequently every month/season in Favorites.
Instantly 'Start with this template' from Enjoy Finder
Enjoy Finder acts as a “template storage + shortcut key”.
- Check the Enjoy Finder area at the top of the home screen.
- In the new template project of the desired type, click Start with this template.
- The layout, font, color, and slide structure of the selected project will be imported as is; only the content will be replaced to create a new project.
Using this flow, you can start work with a single click in "Favorites → Start with this template" without having to go back through the entire project list.
Creating a long video by chaining projects
Home screen > Assets > Project settings > Scenes > Chain projects
Videostew limits the maximum length per plan. However, using the project-chain feature lets you stitch multiple projects into one long MP4 file.
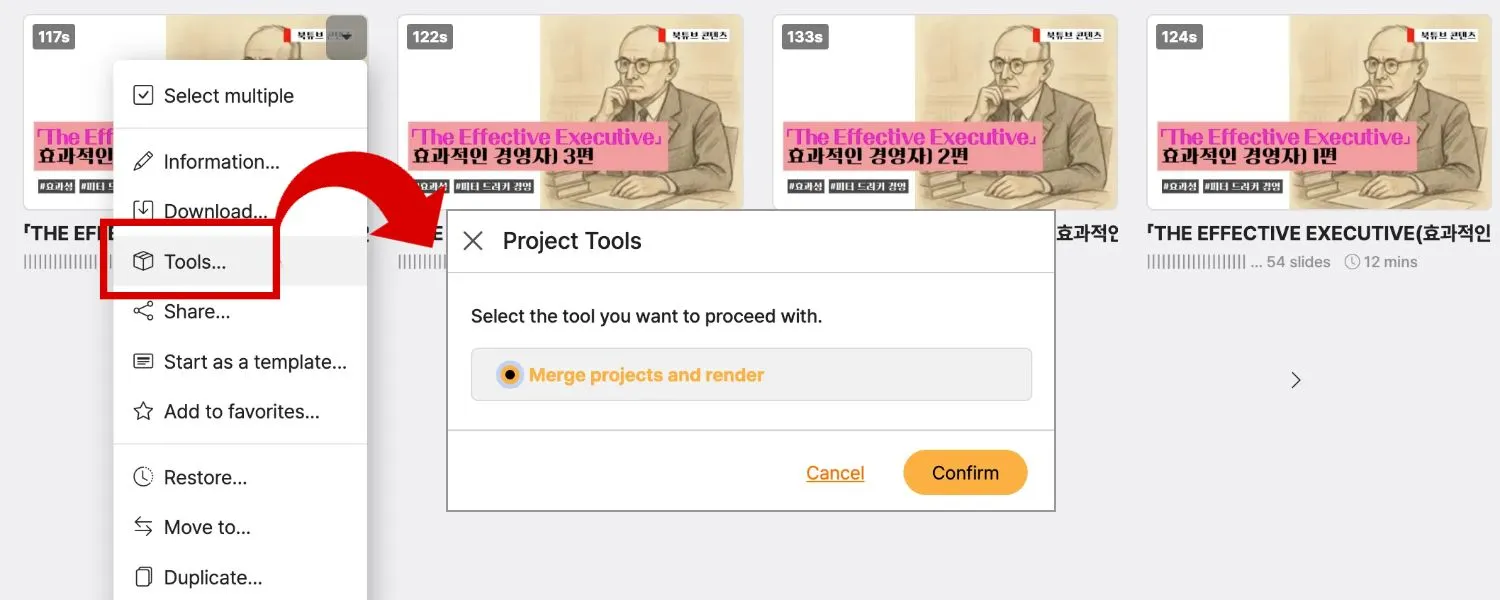
This is a way to merge individually rendered projects into one. Projects that haven't been rendered yet appear with the [Render] button in gray, and you must render the project first.
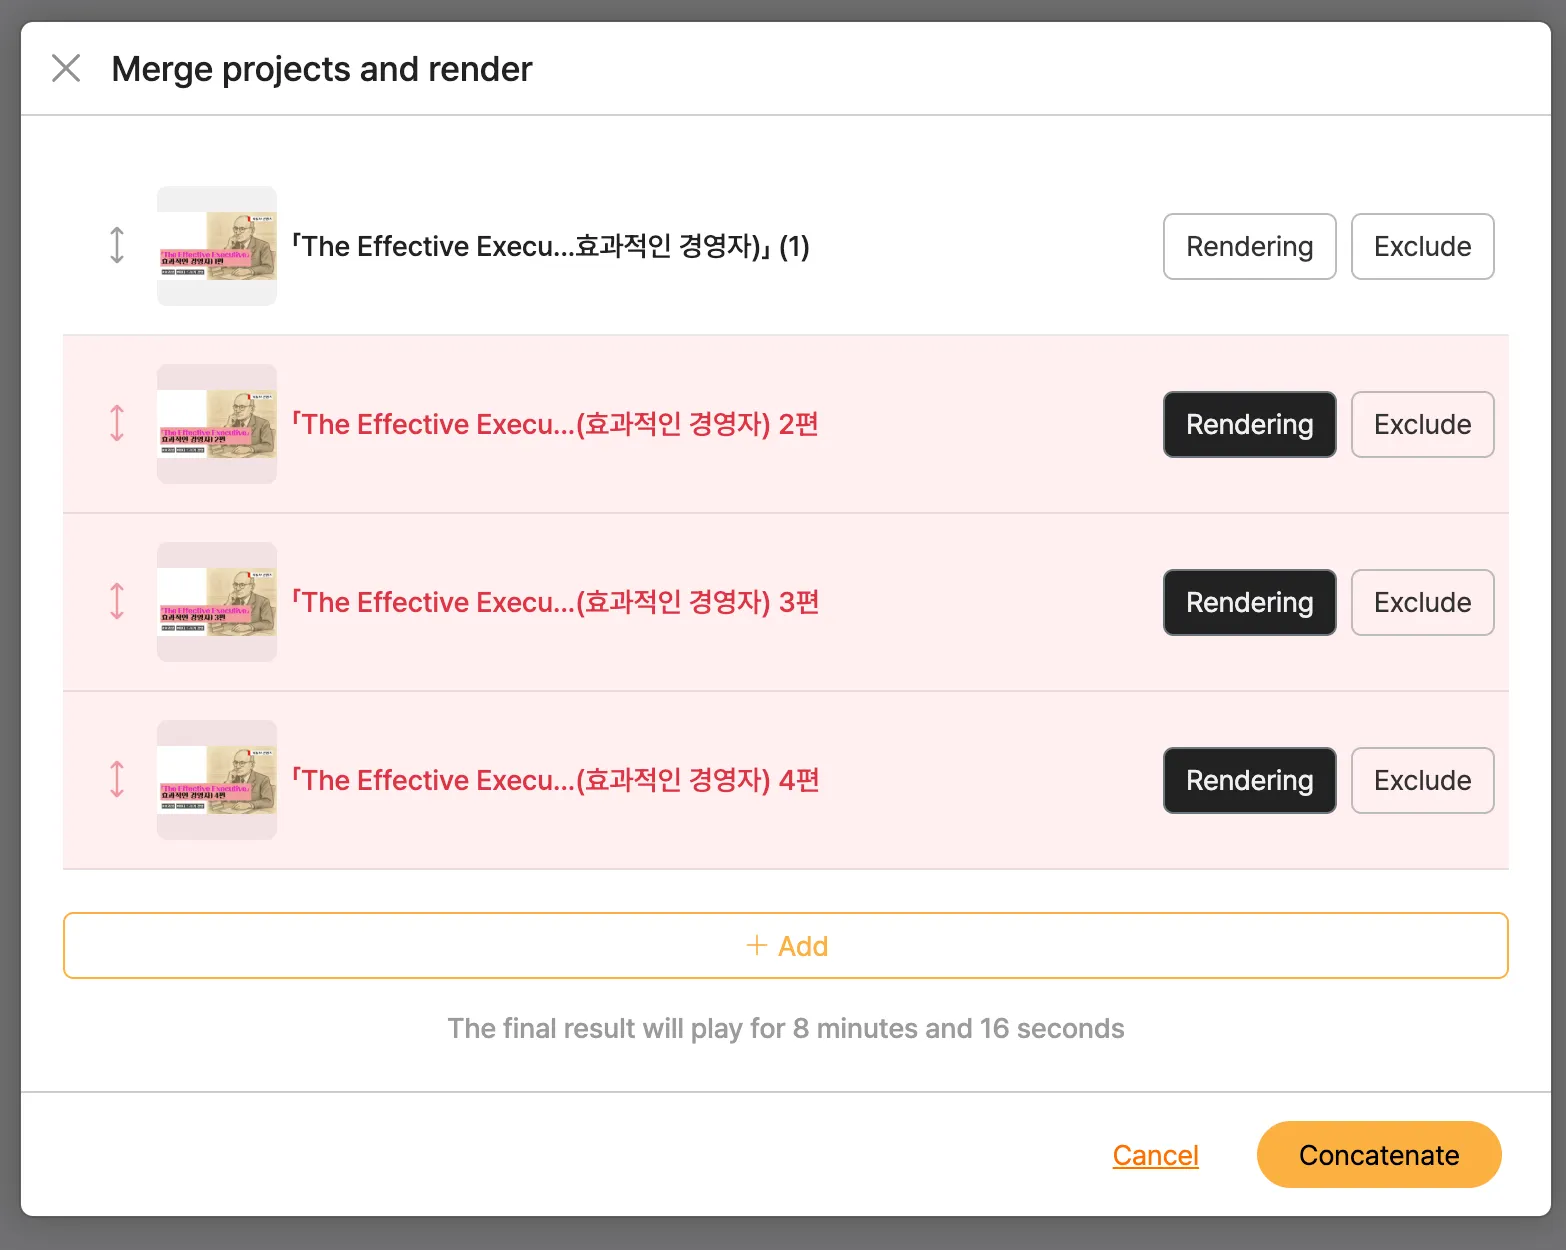
< Import Multiple Projects >
Once every project is rendered, the [Chain] button at the bottom of the screen becomes active. Clicking this button downloads the selected projects, in order, as a single MP4 file.
This feature is especially useful for tasks like the following:
- When you want to bundle several series / chapter videos into one complete file for upload
- When you need to combine projects edited under plan limits into a 12-hour long lecture, class, or webinar video
Translate into multiple languages
With Videostew, you can translate already created projects into multiple languages and set the AI voice and font for each language at once.
First, open the editing screen and select "더보기 > 도구들" from the top right menu.
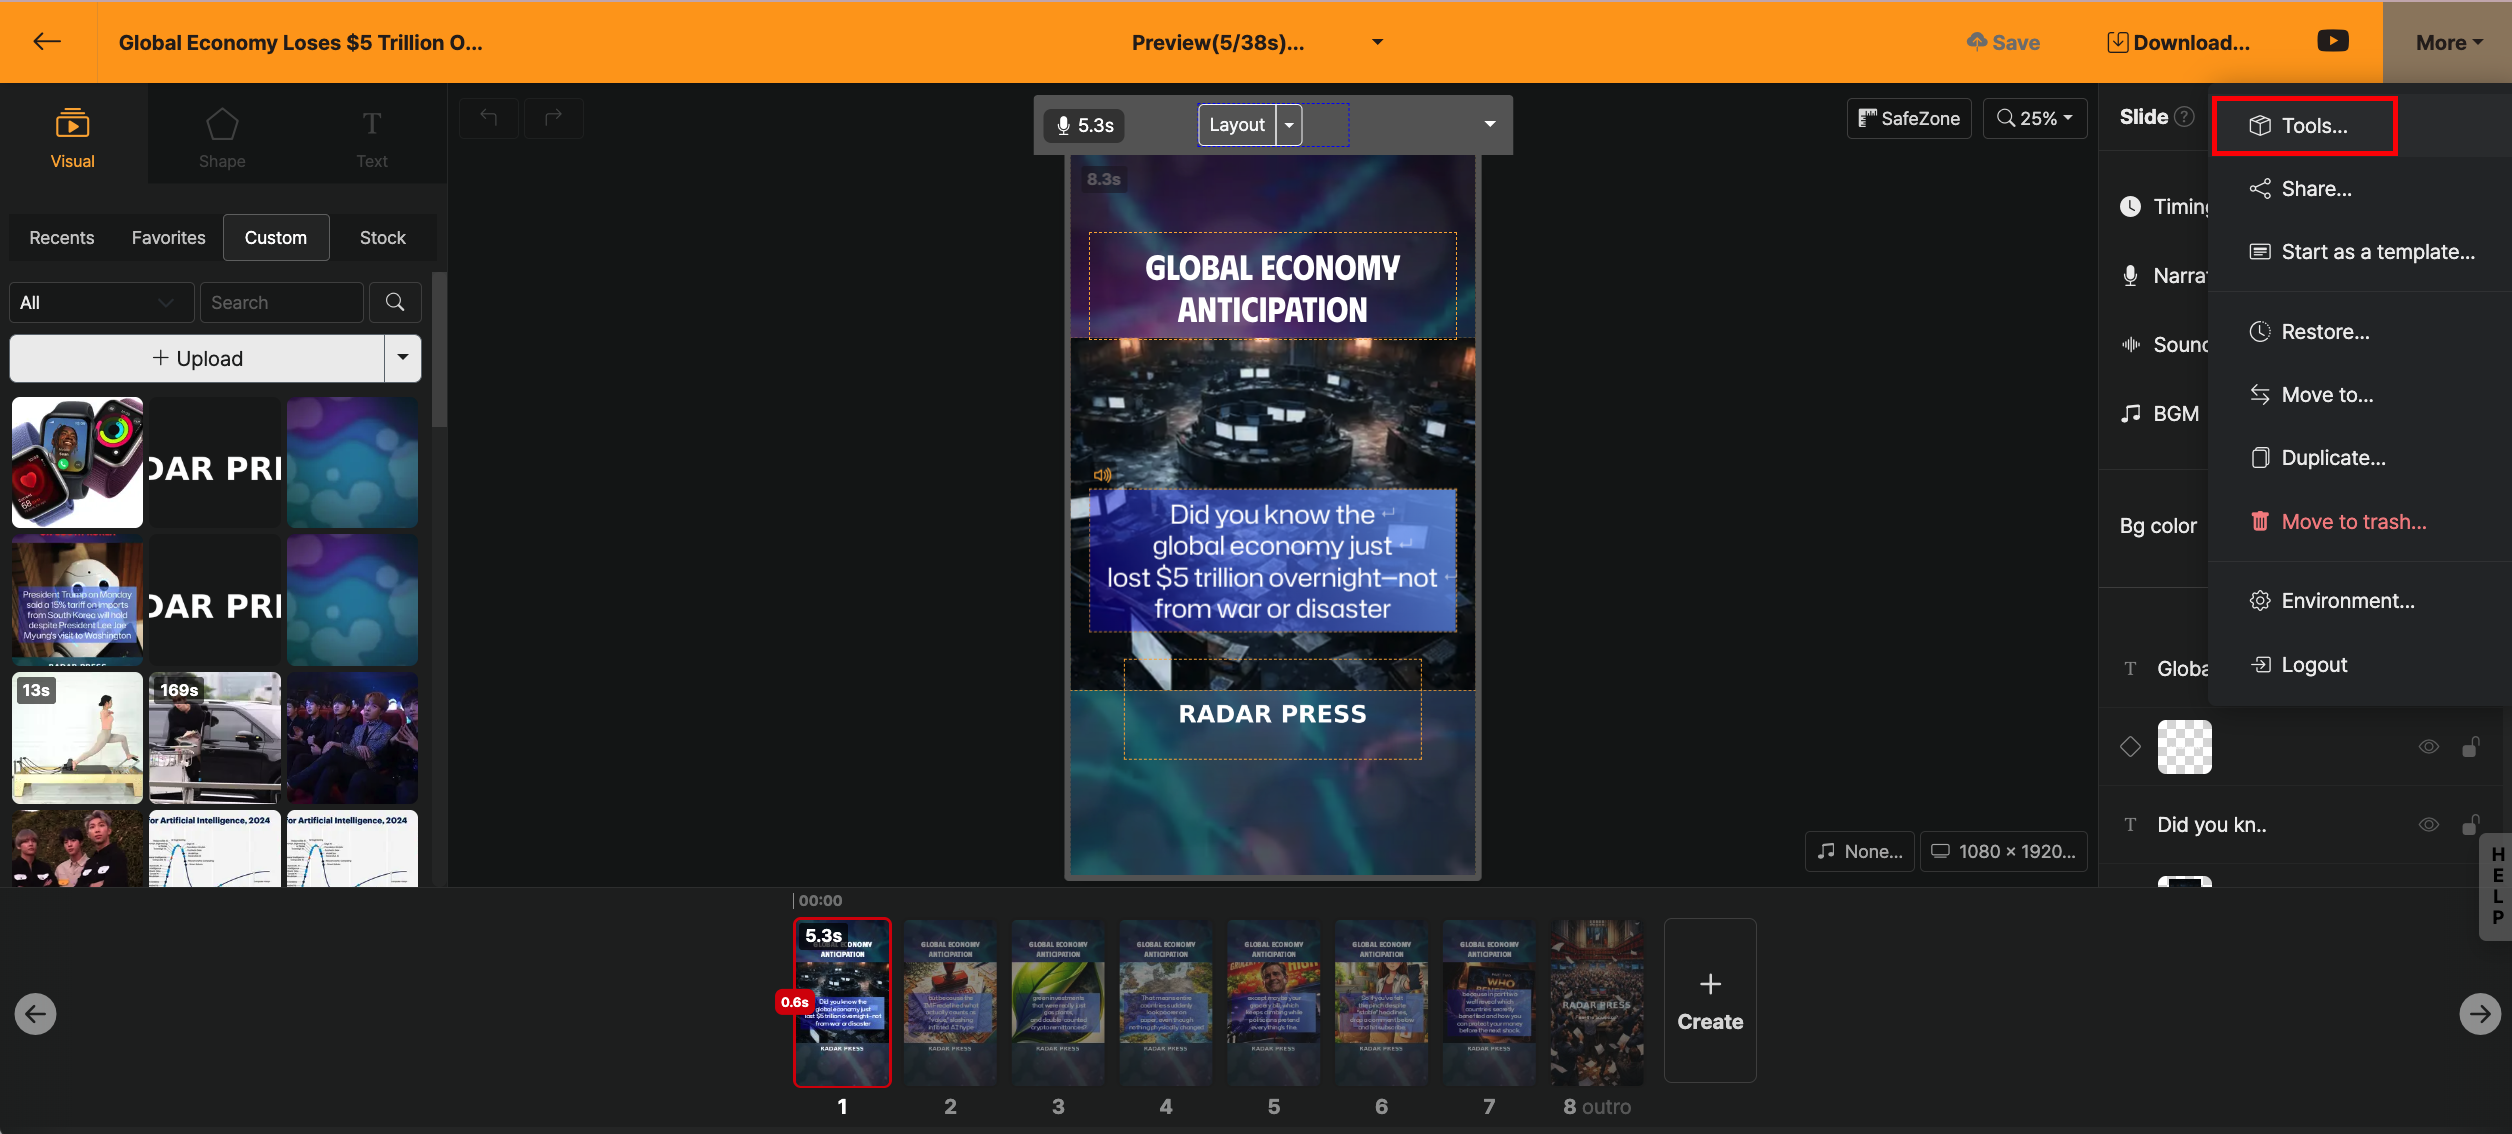
Please select the "번역" feature and proceed to the next step.
Please set the language and AI voice you want to translate into.
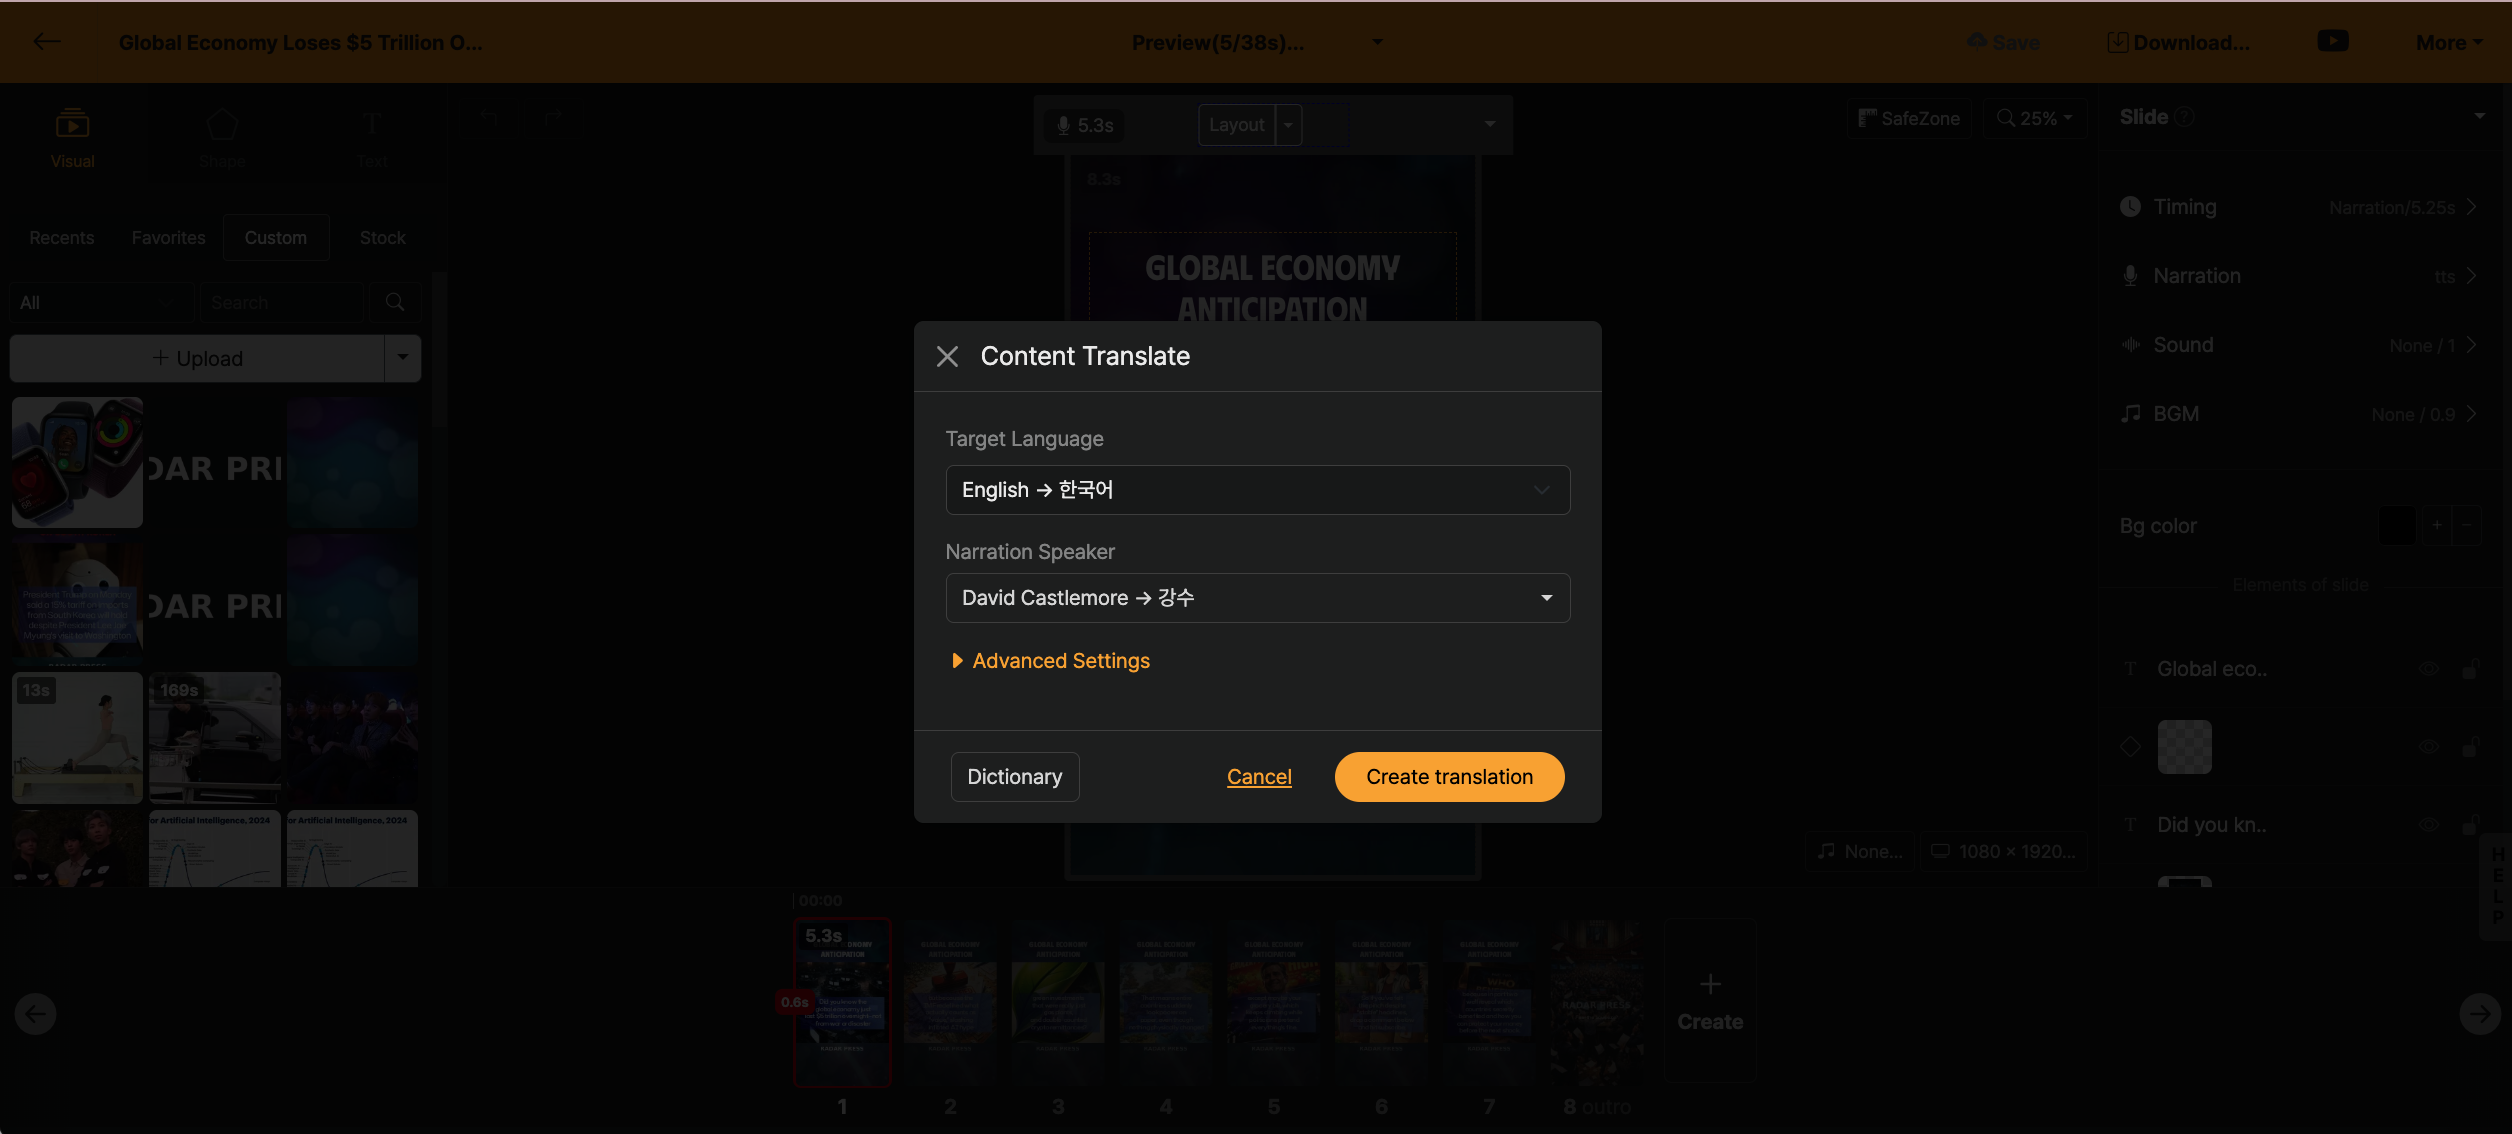
On this screen, you can see the current project's language and AI voice, and directly specify the language to translate into and the AI voice to use.
Even if you only set up to here, the content of the project you are working on will be translated as it is.
Translation detail settings
Through the "고급 설정" feature, you can set the project to be translated in more detail.
Change font
You can see a list of all fonts used in the project, and directly specify the replacement font for each font.
Area-specific settings
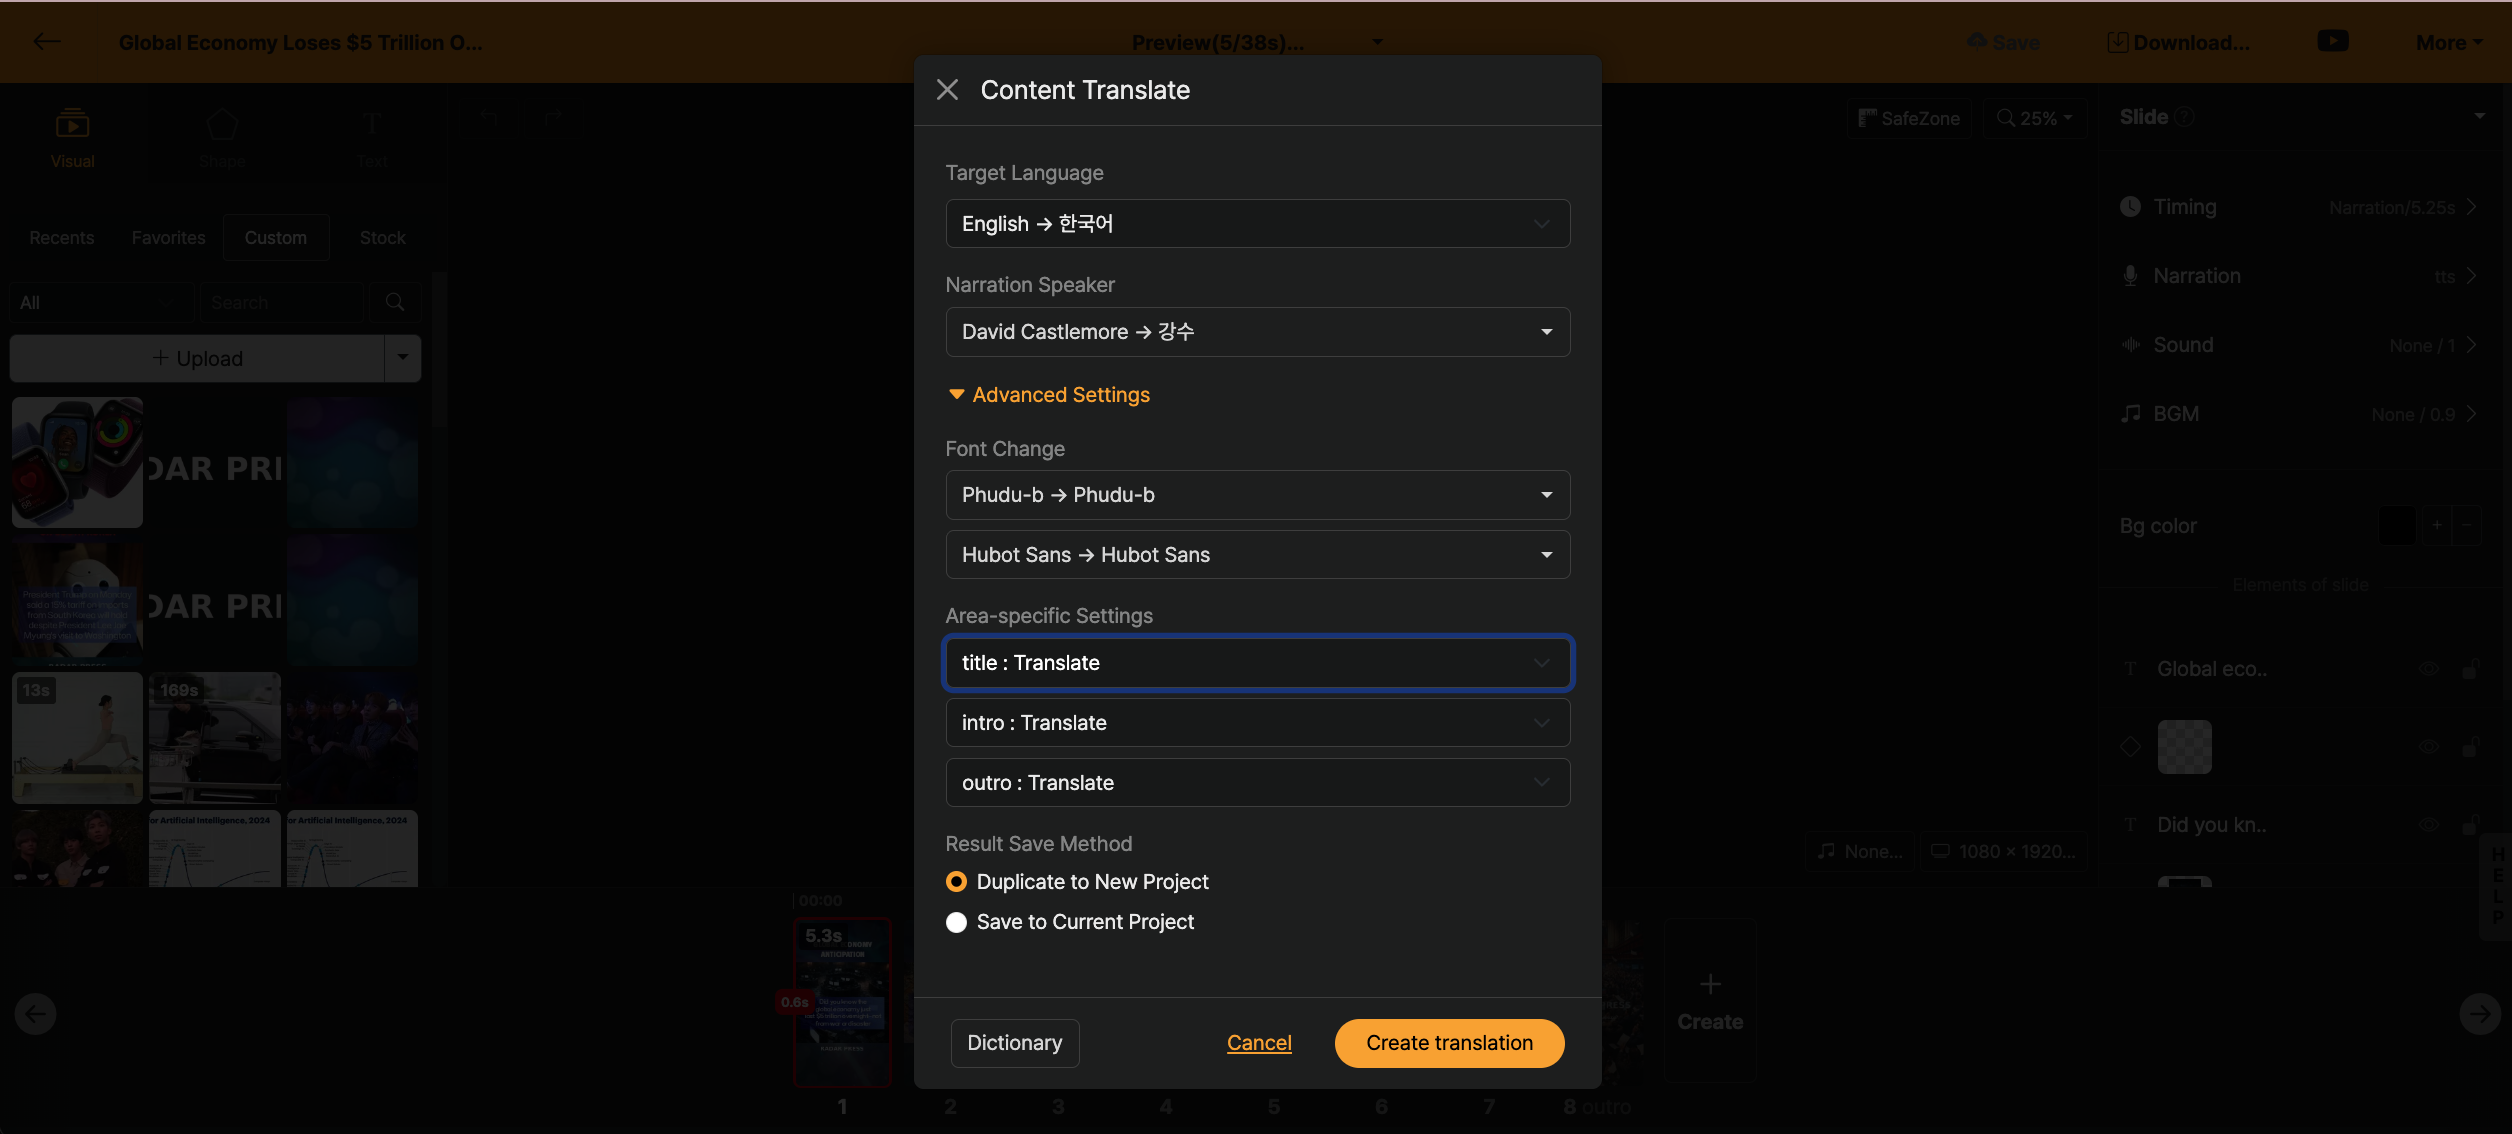
If it is a template created based on [나만의 템플릿], you can directly set whether to translate each slide. Also, you can replace each slide layout with a specific template.
For example, if you created a project in Korean and want to translate it into English but the design gets broken due to automatic translation, you can prepare a well-designed English template in advance and use the intro, outro of this template.
How to save the result
- Copy to a new project: Copy the translated content to a new project.
- Save to current project: Replace the current project with the translated content.